How to make a large page smaller in Word. Change page size, paper size, and page orientation in Publisher
Page size refers to the size of the area occupied by a publication. Paper or sheet size is the size of the paper used for printing.
Page orientation refers to portrait (vertical) or landscape (horizontal) layout of the publication. More information To change the page orientation, see the section.
In this article
Page size, paper size and orientation
Any publication layout you select in Publisher includes the page size and orientation commonly used for that publication type. You can change them and view the result in the group Page Options on the tab Page Layout. You can also set these settings and view the effect of the change, as well as the relationship between page size and paper size, on the Seal in Backstage view. More information about the tab Seal see the article Printing.
By adjusting the page and paper size and orientation, you can control the position of the page on the paper and ensure alignment when printing. You can also extend beyond the edge of the page by printing on paper that is larger than the publication size and trimming it to the finished size, or by printing multiple pages on one sheet of paper.
Page size, paper size, and orientation for individual pages
In a multi-page publication, you cannot change the page size, paper size, or orientation just for certain pages. This will require you to create a separate publication for each set of settings and then manually assemble the printed documents.
Changing the page size
This procedure allows you to set the publication size. For example, this method can be used to select the size of a printed publication if you want to print a poster measuring 55.88 x 86.36 cm - regardless of how it is printed on the printer: on one large sheet or on several overlapping sheets (fragments).
Note: You can create publications up to 6 x 6 m in size.
Selecting Page Size
Creating a Custom Page Size
Open the tab Page Layout.
In a group Page Options click Size and select Create new size pages. In the section Page Enter the desired width and height values.
Advice: Are you using Publisher 2007? In the task area Post formatting select Change page size. In the dialog box Page Options in the group Page Enter the required page width and height. You can also choose desired type publications, for example Posters, click Create a custom page size and then in the group Page specify the required page width and height. In the dialog box Custom Page Size You can specify a custom page size name, layout type, and desired margin sizes.
Changing the paper size
The printer you use determines the paper sizes you can print on. To check the range of paper sizes that the printer can print on, view the printing guide or view the paper sizes configured for the printer in the dialog box Printing settings .
Advice: Are you using Publisher 2007? You can find the paper sizes set for the printer in the dialog box Printing settings.
When printing your publication on sheets that match its page size, you must ensure that the page size and paper size match. If you want to print your publication on a different size of paper (for example, to run off the edges of the page or print multiple pages on one sheet), you only need to change the paper size.
On the menu File select Printing settings.
In the dialog box Printing settings in the group Paper Size.
Advice: Are you using Publisher 2007? On the menu File select Printing settings. In the dialog box Printing settings in the group Paper select the desired value from the list Size.
How many words fit on a piece of paper? It depends on the type of document, on the user who creates this document, not to mention who it is intended for...
The standard paper on which most documents are printed is A4 size. This is what Word considers standard page, the elements of which (fields, etc.) the user can change at his own discretion. But the user can choose a different page format. The program allows you to set any page size - from a small sticker to a huge “sheet”.
Setting the page size is done using the dialog box Page Options. Next, you'll learn how to change the paper size settings for the paper you'll be printing on.
- Select a team File>Options pages. A dialog box will appear Page Options.
- Make sure the tab is activated Paper size.
Your dialog box should look something like this: 14.1. If the window has a different view, click the tab shortcut Paper size.
- Click on the drop down list Paper size.
A list of common paper sizes will open.
- Select a new size from the list.
For example, B4 (25x35.4 cm).
Almost all printers can print on multiple paper sizes. However, the list also contains sizes that may not be suitable for your printing device; not to mention the fact that you will have to rack your brains about where to get paper of this size. Word will not be able to enlarge a sheet of A4 paper by a few centimeters!
- On the list Apply select To the whole document or Until the end of the document.
Selecting the Entire Document option means that the new size will be applied to the entire document, from start to finish. Selecting the Until the end of document option means that the new size will be set to current page(i.e. the one in which the cursor is located) and all subsequent pages of the document. If your document is divided into sections, you can select the To current section option, and then the new size will be set only for the pages of the current section. (Partitions are discussed in more detail in Chapter 15.)
- Click the button OK. Great!
Rice. 14.1. Page Setup dialog box with Paper Size tab
The new paper size has been set.
- Note that page settings are set using the File menu, not the Format menu. This common mistake novice users, although there is some truth in their logic. The question arises about the correctness of the computer logic...
- If you plan to print on custom-sized paper, be sure to load it into the printer. Some smart printers even tell you what paper you need. My printer, for example, always requires paper of one size or another. Looks a lot like my wife...
- Possibly on the list Paper size The paper size you are printing on will not be available. In this case, select another option from the list, and then enter the required size manually - in the fields Width And Height.
- Don't forget about the area Sample dialog box Page Options. It will show you what the resized sheet looks like.
- You can learn how to print envelopes in
There are at least five simple ways reduce the number of pages in the layout Word document, without affecting the font sizes.
Many text users Word editor It is often noted that last page Their beautifully designed document contains only one or two lines of text, which also increases the total number of pages. When printing the document it does not look in the best possible way. To eliminate this drawback, users press the well-known "Page Fitting" button, available when selecting the " Preview". However, often the result of this button does not satisfy the author of the document. The fact is that the "Fit Pages" command only reduces the size of all fonts used in the document, which is not always acceptable.
How else can you reduce the number of pages in your document without affecting the font sizes? There are at least five simple ways.
Method one
First, you need to look through your entire document and determine if there is an opportunity to delete it somewhere. extra words, spaces, empty lines. If the text contains pictures, you can try to reduce their size.
Method two
If nothing can be safely removed from the text, you can try hyphenating the text. By default, the editor does not use this mode and changes the distance between words if width alignment is used, or moves entire words to new line. To enable hyphenation mode, select the “Language” command from the “Tools” menu, and then the “Hyphenate” command. A dialog box will open as in the screenshot below.
Check the " Automatic placement transfers" and click OK.
Method three
Try changing the document margin sizes. To do this, go to the "File" menu and select the "Page Setup" command. A dialog box of the same name will open in which you can slightly reduce the left, right, bottom or top margins. As a rule, even a small reduction in the field sizes can give the desired result. You just need to carefully review the entire document again so that you don’t find any side effects in the form of merging headers and footers with the main text or something else.
Method four
A good effect can make a change line spacing or spacing between paragraphs. Most easy way Changing the intervals involves changing the corresponding parameters of the styles used. But if your document has a style chaos, then in the “Format” menu, select the “Paragraph” command. A dialog box will open in which, on the “Indents and Spacing” tab, you should change the necessary parameters.
Method five
This method still affects the size of the fonts, but not all, but only the headings. If your headings are designed in styles, even standard ones, proposed by the editor himself, then select all headings of the same type in your document and reduce their size by at least half a point. Visually, such a change is practically not noticeable, but the result can be quite good.
Method six (bonus)
Reduce the intercharacter spacing size. From the Format menu, select Font and select the Spacing tab. In the Spacing field, select the Condensed option and set the value to your liking. Again, best result Changing a specific style, rather than selective text in a paragraph, can give a difference.
Thus, you can choose from the proposed methods the one that suits you best and use it in your work. Just don’t forget to analyze the resulting result in order to detect undesirable consequences in time and correct them.
I consider myself experienced user, but I suddenly recognize some basic things and wonder how I didn’t notice this before. Just the other day I learned that if you hold ctrl and roll the wheel on the mouse on the desktop, the icons will change size. I knew that this is how you can change the scale in Excel and Word or the size of icons in a folder in Windows. But I had no idea about the desktop. Perhaps someone doesn’t know how to conveniently change the scale in MS Office?
Besides changing the font size, there are several ways to increase the zoom. If you need to print documents, set up a convenient display for reading or analysis, if you need to zoom in on the text you need to read. First things first.
I have seen cases where a person writes letters in capital letters(with pressed Caps Lock), only because he doesn’t see well, and all the recipients think that the person is swearing. In order not to look angry in letters, it is impossible would be better suited a scaling function that works in almost all applications from Google Crome to MS Office products.
Changing the scale is easy - go to desired window, for example, in Excel file, pinch Ctrl key and turn the wheel on the mouse.
The scale will change as you need.
Excel and Word have a special scale slider in the lower right corner.

If you click on the percentage (100% in the picture), a scale selection window will open.
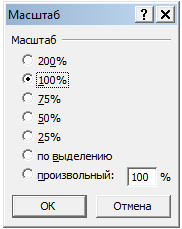
The same functions are available in the panel Excel tools, View tab. See the picture at the beginning of the article.
Scale selection
Excellent Excel function! You can quickly enlarge the desired table fragment to fit the screen size. Available again: View - Scale selected fragment. Below is a detailed gif of how to do this:

Print area scale and size
Quite often problems arise with printing when you need to put all the information on 1 sheet. This function is available in the Page Layout - Page Options - Scale to fit no more than:

If you need to place it on one sheet wide, just put 0 in the page height column and vice versa

Magnifier
An excellent feature for those who have difficulty seeing. She appeared in Windows versions 7 and above. The easiest way is to press the start button on your keyboard and type “magnifying glass” without quotes in the search.
With it you can zoom in and see even the smallest objects!
Figure scale in MS Office
Quite simple - grab the border of any design and move it to the desired size.
If you need to zoom in on the drawing, you can again Scale the selected fragment
Don't forget to use combination Ctrl+ scroll the mouse wheel wherever you need to zoom in/out on the screen. Really very convenient!
Share our article on your social networks:


