Mega cloud service. Cloud storage MEGA
Remember the times when 40 GB of storage space on your computer seemed like an unaffordable luxury? Now the count goes into hundreds of gigabytes, and often into terabytes, and we are so accustomed to this that we take up space on PC disks indiscriminately - with everything.
Meanwhile, savings and comfort have not yet been canceled, and the existence, prosperity and bright prospects of cloud storage prove their worth. Over the past few years, the services of such Internet services have been developing in giant strides, and several cloud data storages can be cited as an example:
1. Yandex.Disk - offers beginners 5 GB of free space for storing files different formats and extensions plus various bonuses. For example, if you have been using Yandex mail for 5 years, you will be given another 2 GB of Disk space.
2. Google Drive– free 15 GB of space.
3. Microsoft SkyDrive - 7 GB free instead of 25 GB previously offered.
4. – 2 GB plus expansion disk space for attracting referrals.
5. Apple iCloud – 5 free gigabytes of space.
6. – here you can borrow no more than 40 MB for each note for free, and use the traffic volume for writing/editing notes up to 60 MB per month.
7. Amazon Google Drive - 5 GB.
8. Cloud service Box - 5 GB.
9. SugarSync service - 5 GB.
10. Cloud storage Mega.co.nz – 50 GB of free disk space.
Cloud storage Mega.co.nz
All of the above services can work not only on desktop PCs, but on all mobile applications, which undoubtedly expands the scope of their application and increases their popularity. But the leader in the free gigabytes offered is still Mega.co.nz - 50 GB is no joke, you still need to manage to fill it with something, so I suggest we talk in more detail about this cloud service - Mega.co.nz. By the way, I actively use this service, since it is stable, anonymous, and its creators are well-known people.
The head of the company that offers the services of this storage facility is Kim Dotcom, founder of the Megaupload service, which closed two years ago at the behest of the Department of Justice and FBI of America. Perhaps you remember that story. Actually, their old exchanger was quite a convenient thing. But now Kim's new creation has become even cooler. Let's talk about it in more detail.
Now the Mega service provides not only the usual storage of data in the cloud using on a PC, but, as the developers previously promised, they have already included the ability to work from mobile devices - iPhone, iPad, devices on Win 8, mounting file system for Windows, etc. That is, it will be possible to send files directly to the cloud. For example, your photos from your smartphone will be stored in the gadget, but at the same time they will be transferred to Mega.сo.nz, so the possibility of unexpected loss or damage to files will be completely eliminated. All your data is encrypted during transmission, and no one except you can unpack it for reading.
Advantages and differences of Mega
1. The main feature and difference between the Mega.co.nz cloud service and similar resources in the proposed initial free volume Disk space – 50 GB. At Mega.co.nz you can upload files of any size, with any extension, in any format - there are no restrictions in this regard.
2. The abbreviation MEGA is the name of “MEGA Encrypted Global Access”.
3. The main features of Mega are the same as other resources - downloading, storing files on third party drive, and the ability to share files with your friends and colleagues by passing links or encrypted access. File encryption in the browser occurs using AES algorithm, that is, you are provided with protection from unauthorized access. File transfer links are also encrypted, and even service employees do not have access to your data. At least that's what they claim.

4. The service for exchanging and storing Mega files is multilingual, so you will not have language difficulties when working with it - just select the desired language in the control panel.
But to start using cloud storage, you need to go through a simple registration procedure.
Registering and getting started with Mega.co.nz
As can be seen from the registration link, logging into the site https://mega.co.nz/ occurs via a secure connection. Next on the main page you need to select Russian language for comfortable work– the menu is at the top right. Now you can register:

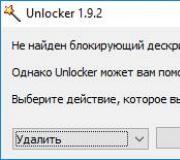
When registering, you need a real email address, the rest of the data can simply be taken from your head. After we fill out all the fields and click the “Create account” button, we will send you an email a letter will arrive with a link confirming our registration:

Click on this link in the letter and confirm your account on the service page - for this there is a form on the right top corner, that is, simply enter your email address and password. This is done once - then the service will use our browser cookies. When confirming registration, we will be asked to create our own individual key, which will determine our authentication. Creating a key is of a playful nature, and I even got carried away, missing the moment when the key had already been created.

The game looks like knocking out bricks with a ball, which make up the MEGA inscription. Once you reach 100% on the scale at the top of the screen, a key will be created:


And after clicking the “Finish” button, go to your page in the Mega.co.nz cloud service:

How to use the Mega.co.nz service
There is a very small difference in using the service when working on and Google Chrome, which I will talk about below. In the meantime, let’s talk about general points of control and use. On the right side of your page you see a control column and a display of the storage structure. At the top there is a menu for downloading, viewing and managing files. That is, in the drop-down menu for already downloaded files, you will see the opportunity to get a link to the file, the ability to copy it, edit it, etc.
Browser users Mozilla Firefox can install an add-on in their browser MEGA extension. The developers of this add-on promise that after installing it, you will notice a significant improvement in your file download speed. This result is ensured by batch uploading an unlimited number of files without limiting their size. Every link in the Mega.co.nz service is captured by your MEGA extension application and remains local (JavaScript scripts are not downloaded from servers). Reliable automatic updates the service is provided thanks to a cryptographic signature with an encrypted key.
Without installing this add-on, to work more efficiently with the Mega service, developers suggest using the Google Chrome browser. Since I’ve been using several browsers all my computer life, I installed the recommended extension in Firefox, but, to be honest, I didn’t notice any difference in the operation of the cloud service. The application can be installed both from the “Add-ons” of the browser and from the MEGA service (“Menu” – “Applications” – “Firefox Application”)

It is better to use the Google Chrome browser if you are going to upload entire folders of files to the cloud - Mozilla does not have this option, but Chrome can upload both files and folders:

This is what the storage control panel looks like in the Google Chrome browser, but in Mozilla Firefox there is simply no “Upload folder” button - there is only an “Upload file” button. Using the “Upload file” button, you can upload a file to the cloud from your personal computer. After you click on the “Upload folder” button in Google Chrome, an Explorer window will open, in which you select a folder to upload it to file storage, and that’s it – the download has started.
Now let's talk about how to get around this problem in Firefox. Let's say you want to download the entire folder - do not install for this new browser! Then you just need to create a folder of the same name in Mega (the “New Folder” item in the menu), and upload all the files into it (press Ctrl + A to select all at once) that are located in the same folder on the computer.
We continue to familiarize ourselves with the service. In the “My Account” item, you will not only see that you are using a free account, but also see your amount of cloud space used, and you can also change your profile settings or configure data transfer:

In the settings (“Menu” - “My Account”) you can do a lot. For example, change the number of parallel connections for downloading files, as well as the number of parallel connections when downloading files. You can also impose a limit on the download speed.

If you click on the menu button “Menu” - “My Account”, you can learn more about the rules for using the Mega.co.nz cloud service. I won’t tell you much about the Pro account, since I haven’t used it yet - the free 50 GB is enough. But after you click on the “Upgrade your status” button in your free account, you can choose any paid package of those offered to be able to store a larger volume of your data in the cloud - from 500 GB to 96 TB. Personally, I can’t imagine such a volume - 96 terabytes - but, nevertheless, if you think carefully, you can find a use. For example, for backing up website databases, etc.

Let's continue with working with files - you can simply create a new folder to upload some thematic files into it. To do this, click on the “New Folder” button and rename the folder as you need. In this new folder, you can also create other subfolders into which you can upload files. If you click on a folder (file) right click mouse, then in the pop-up context menu you can see the corresponding commands for your actions with the folder (file). As you can see, there are many possibilities, including the ability to receive a link to transfer to other users. The link will be encrypted.

If you have not limited the file download speed in your cloud settings, then the data download speed will be unlimited and will depend only on the speed of your PC’s Internet connection. Further work with folders/files occurs in exactly the same way as in regular computer– you can edit them, get links to them, move them, allow shared access to them, copy them, etc. The process of uploading and downloading files is displayed on the right at the bottom of the page on the service - click on the icon
How to share folders
You can set public access rights to the folders that you will store in the Mega co nz cloud storage. To do this, simply right-click on the folder, and in the context menu that pops up, click “Sharing”. Next you will see the “Sharing” window, in which you need to specify the email address of the user to whom you want to grant sharing rights. For this user, you can configure the rights - for example, set the rights to “Read only”, “Read and write”, “ Full access" After this, sharing rights can allow users with the permissions you set to edit files, or only view them, or only download them. There can be any number of such users.

After we indicate the email address for providing public access, a letter will be sent to his email with a link that is necessary to go to the service and gain access to the specified folder. The folders that are shared differ slightly in appearance from the rest of the cloud storage folders, and look like this:
How to get a link to Mega.co.nz
The Mega.co.nz service allows you to provide other users with links to download files that you host on the Mega cloud service. To get such a link, you need to right-click on the file and in the context menu that appears, click on the “Get link” menu item. In a new window that opens you will see your (encrypted or unencrypted) link to download the file. In general, all links to download files in the Mega.co.nz cloud service are issued in two types, and the type of link will depend on the degree of confidentiality of the security keys.
If the link itself is formed in unencrypted form, then the file is still transmitted encrypted, and only if the user follows this link, the file is decrypted and becomes available for downloading. That is, until someone downloads this file, it will be stored in encrypted form. If the link itself is encrypted, then only the user who received the link to the file along with the file will be able to download the file from this link. special code security (key). Without this security code, the recipient will not be able to download the file from the link.
In the image below you can see that if the “With file key” option is activated, then the encrypted code is embedded in the link itself, and it is available for download to all users. And vice versa - if you do not check this box, the target user will be able to download the file only if he enters the key you provided separately.

Also, the user to whom the link to the file was intended can save it in his cloud located on Mega.co.nz. To do this, after receiving the link, you need to click the “Import” button. With this option, the link will not be downloaded to your computer, but will simply be moved from one account to another. It is clear that to carry out such an operation it is necessary that the recipient also has his own disk space in the Mega.co.nz cloud, just like, for example, in . You can see all these possibilities in the figure below:

How to download a link with an individual key (second option)? Below in the image you see his solution. In the case of a separately transferred key, the recipient will be able to download the file if he receives from you both a link and a key to download the file from the cloud storage. You will receive the key itself by copying it when transferring the file (in the picture above there is the “Copy keys” item). You send all this data (both the shared link and the link with a separate key) to the user via regular email.

After clicking on the “Decrypt” link, in a new window the user will have to enter the security key received from you to download the file, or to save it in his own cloud storage. After the key is entered, the user must click the “Download” button and check the box “I agree to MEGA’s terms of service,” or simply import the file to their cloud.

After the file has been completely downloaded, the “Download Complete” window will open, and in it the user will be prompted to save the file manually in any convenient location on the computer.

And lastly, all the files that will be posted by you on the service cloud storage Mega.co.nz data will be encrypted - I already talked about this above. On the one hand, this is great, but on the other hand, you will not be able to visually view their contents, play or listen to audio and video files while they are in the cloud. That is, to use these files you will need to move them to your computer or mobile device. To completely delete all downloaded files, you need to move them to the trash, and then empty it too.
Hello.
Some users forced me to write this article with their whining. More and more cool materials began to appear on the site, which are available for download using the Mega cloud storage. As time has shown, many users are not able to download the course. The question immediately arises: “Why do you need a course if you can’t even do the simplest action, how to download the material?!” If earlier these comments caused a smile and laughter, now it has become a little annoying and those who write such comments resemble a primeval sponge, as in the preview for this article. In the future (in the very near future), voluminous cool materials are expected that will be available for downloading through Mega. If you have problems downloading- read this article, since this issue will not be raised again and no one will, for the sake of some users, break materials into hundreds of pieces and re-upload them to other repositories. Users who continue to whine will be sent to learn PC skills and will be temporarily isolated from society.
So, let's look at why Mega? It's very simple. For us, this is a convenient storage facility, where there are no restrictions on the volume of uploaded material, where the disk capacity is large, and where complaints are taken seriously. Materials for users are available for free, so either learn to download or don’t download at all. Let's assume that you have found the desired course and it is uploaded to Mega. First of all, make sure that the storage itself opens. If Mega is not available in your country (some providers block storage), use a proxy or VPN to bypass the block. Now the simplest thing left is to download the material. There are 2 most simple ways downloads:
1 way. This method is suitable for downloading small files. To download large files, use method 2. First way- This is to use downloading through a regular browser. As practice has shown, the Google Chrome browser works best with Mega. Therefore, we recommend using it. How to download via browser: First, the material is downloaded to the cache, then after it is completely downloaded, you can save it to any folder (if folder selection is not configured, the material is saved to the downloads folder).

Click the “Download in Browser” button and wait for the download to complete. You can't close the tab!

You can also use software from Mega - MegaSync and synchronize files, but we have not tried this method of downloading, although some users praise this particular method. Also, according to some users, for successful downloading, you need to import files to your cloud drive, but, in general, this is not necessary. After downloading large file via a browser, we recommend clearing the browser cache, for example, using the CCleaner utility.
Method 2. Download using the Mipony program. Mipony program can be downloaded from the official website. We recommend using this method, since the program is very convenient and has many advantages, for example, the software supports resuming files (like a torrent) and does not create temporary files, unlike downloading through a browser. Some antiviruses may swear at the program, but there is nothing wrong with that. The program does not steal anything and is not malicious. Paranoid people can use the program on a virtual machine. Install the program (everything is very simple) and launch it. First of all, open the “Options” tab and make sure that there is no speed limit there.
After the launch of the somewhat scandalous MEGA service, conversations about its security began to boil a little and died down. Today the service lives its own life and no one has even broken it. For some reason, the term “User Controlled Encryption” (UCE, or User Controlled Cryptography), which MEGA boasts, was missed from all the conversations. What I mean by "missed" is the fact that we haven't covered all the possibilities that a cryptography engine running in JavaScript on the client side gives us.
Of course, myself MEGA service this simply means that the encryption keys are not stored on the server, but all their cryptography is performed in the context of the browser. Moreover, after the launch of the service there was a lot of talk about the fact that it uses unstable cryptographic algorithms and that in general everything is bad and we will all die, and the FSB will read our files. This gave me the idea to expand the concept of “UCE” and really take control of cryptography, namely, replace or supplement some of the service’s security mechanisms.
In this article, I'll break down some of the magic that happens in two megabytes of MEGA JavaScript code and show how you can override some methods to stop worrying and love cryptography. As a result, we will receive a cloud file storage service with two-factor authentication and critical hardware encryption important information.
MEGA, UCE and all, all, all
So, let's start by looking at the technologies on which the client part of the service is built, how new users are registered, registered users are authenticated, passwords are changed, and files are uploaded/downloaded.JavaScript
As you may already know, the entire client side of the service is based on JavaScript, in the code home page SHA-256 checksums are specified for all scripts and pages that are loaded by the browser. The download itself occurs as follows: checksums are checked for all files, after which they are combined into one BLOB, which is given to the browser. The source code of the js files shows that they were written different people and sometimes there are funny gems, such as the consequences of copy-paste, meaningless conditions and simply strange variables.In the process of studying source code I also noticed that the site is being updated quite actively, the developers are correcting minor errors and optimizing the already written code, which is good news. The code itself is written very straightforwardly and without unnecessary prototyping: the site uses three hundred global variables and more than 8,000 functions. It was very easy to understand the site architecture and change its code.
Among third-party frameworks, MEGA uses jQuery (you can’t live without it now), Ext JS and SJCL. The latter implements a cryptographic core with AES encryption. SJCL also provides an interesting format for storing keys and other byte arrays: instead of simply storing bytes in a regular array, they are “compressed” into a format called a32. Its essence is that the contents of any byte array are packed into 32-bit numbers and written into an array of shorter length. That is, every 4 bytes of the array are converted into one banal int. The site code contains functions that perform all kinds of transformations on an improvised set (a32 array, string, base64 string).
Key information
Before moving on to the description of the registration and authentication processes, it is worth considering the information that is subject to encryption, namely:- Master key account , which is created randomly at the time of user registration and has a length of 128 bits. And in principle, the length of all keys used for symmetric encryption, is equal to 128 bits.
- RSA private key: Created at the time of registration based on mouse movements and keyboard input. In this article, I will not focus on asymmetric cryptography, since it is used for sharing downloaded files, and my task was to change the process of authentication and encryption of user data.
- Individual file keys and the files themselves, uploaded to the service. The keys are generated randomly when a file is loaded, the key itself is used to encrypt the file data, and a key created based on the file's individual key and its checksum is used to encrypt the attributes.
Closer to the code
Now I propose to analyze the registration and authentication processes, see how the master key is created and how it is encrypted.I tried to depict these processes on paper and in order to let you understand the essence of the madness, I even took this photo:

New user registration
The registration process itself is quite confusing; after the user fills out the questionnaire, a mighty bunch of functions are called, but we are interested in the api_createuser function:// creating a new user and his master key function api_createuser(ctx, invitecode, invitename, uh) ( var i; var ssc = Array(4); // session self challenge, will be used to verify password var req, res; if (!ctx.passwordkey) ( ctx.passwordkey = Array(4); for (i = 4; i--;) ctx.passwordkey[i] = rand(0x100000000); ) if (!u_k) api_create_u_k(); // generating a random master key u_k for (i = 4; i--;) ssc[i] = rand(0x100000000); // generating a random authentication sequence if (d) console.log("api_createuser - masterkey: " + u_k + " passwordkey: " + ctx.passwordkey); // encrypt the master key on the current password and send it to the server (field k) // the ts field is the concatenation of ssc with its encrypted value req = ( a: "up" , k: a32_to_base64(encrypt_key(new sjcl.cipher.aes(ctx.passwordkey), u_k)), ts: base64urlencode(a32_to_str(ssc) + a32_to_str(encrypt_key(new sjcl.cipher.aes(u_k), ssc))) ); if (invitecode) ( req.uh = uh; req.ic = invitecode; req.name = invitename; ) if (d) console.log("Storing key: " + req.k); api_req(, ctx); )
In this function we are interested in the following things:
- u_k is the master key itself, a global variable. An array of 4 32-bit numbers, which is created by the api_create_uk function
- ssc is simply a random array that is encrypted with the master key, concatenated with its public value, and sent to the server. Later it will be used to check the correctness of the master key during authentication
- sjcl - cryptographic library implementing AES
- rand() - local generator implementation pseudorandom numbers, based on RC4
- encrypt_key() is the cornerstone function of the service's symmetric cryptography. Accepts an sjcl object initialized with a key and an array that needs to be encrypted. The function code is given below and, hopefully, does not need explanation.
As a result, after registration the following is sent to the server:
- Master key encrypted with the key derived from the account password
- String like ssc||encrypt_AES-128(u_k, ssc)
User Login
Now you can smoothly move on to the authentication process. Briefly, it is done like this:- The user enters login/password
- If the first stage of authentication is passed, then the encrypted master key and the authentication sequence (ssc) created during registration are received from the server
- The master key is decrypted using the user-entered password
- The authentication sequence is decrypted on the master key and compared with its open value - thus checking the correctness of the master key and password.
// decrypt the master key after the user logs in function api_getsid2(res, ctx) ( var t, k; var r = false; if (typeof res == "object") ( // initialize sjcl-aes with the current account password var aes = new sjcl.cipher.aes(ctx.passwordkey); // if we received a master key in the server response... if (typeof res.k == "string") ( k = base64_to_a32(res.k); if (k.length == 4) ( // ... then decrypt it k = decrypt_key(aes, k); // and re-initialize sjcl-aes using the master key aes = new sjcl.cipher.aes( k); // if we received ssc from the registration process if (typeof res.tsid == "string") ( t = base64urldecode(res.tsid); // encrypt the first half of the string and compare it with the value from the server // if they matched - it means that all logins and passwords match and you can let the user in if (a32_to_str(encrypt_key(aes, str_to_a32(t.substr(0, 16)))) == t.substr(-16)) r = ) // The private key of the RSA pair is analyzed below, we are not interested in this yet else if (typeof res.csid == "string") ( var t = mpi2b(base64urldecode(res.csid)); var privk = a32_to_str(decrypt_key(aes, base64_to_a32(res.privk))); var rsa_privk = Array(4); // decompose private key for (var i = 0; i< 4; i++) {
var l = ((privk.charCodeAt(0) * 256 + privk.charCodeAt(1) + 7) >> 3) + 2; rsa_privk[i] = mpi2b(privk.substr(0, l)); if (typeof rsa_privk[i] == "number") break; privk = privk.substr(l); ) // check format if (i == 4 && privk.length< 16) {
// TODO: check remaining padding for added early wrong password detection likelihood
r = ;
}
}
}
}
}
ctx.result(ctx, r);
}
As a bonus to registration/authentication, you can take a look at the password change process.
// change the user password function changepw(currentpw, newpw, ctx) ( var pw_aes = new sjcl.cipher.aes(prepare_key_pw(newpw)); api_req([( a: "up", currk: a32_to_base64(encrypt_key(new sjcl. cipher.aes(prepare_key_pw(currentpw)), u_k)), k: a32_to_base64(encrypt_key(pw_aes, u_k)), uh: stringhash(u_attr["email"].toLowerCase(), pw_aes) )], ctx);
The code for this function is self-explanatory: we encrypt the master key with two keys obtained from the old and new passwords, and then send these values to the server. If the current password is correct, it is replaced with a new one. Here I wanted to draw more attention to the prepare_key_pw function, which was implicitly present in all previous operations. Its task is to convert the string password into an a32 array, and then perform the key derivation operation as follows:
// convert user-supplied password array function prepare_key(a) ( var i, j, r; var aes = ; var pkey = ; for (j = 0; j< a.length; j += 4) {
key = ;
for (i = 0; i < 4; i++)
if (i + j < a.length)
key[i] = a;
aes.push(new sjcl.cipher.aes(key));
}
for (r = 65536; r--;)
for (j = 0; j < aes.length; j++)
pkey = aes[j].encrypt(pkey);
return pkey;
}
This feature has caused a lot of criticism because it is based on a home-grown algorithm. While writing this article, the creators of the service managed to change its code a little, but I didn’t notice any significant changes. Its essence is that the transmitted password is encrypted 65536 times using a constant key in order to obtain a key indistinguishable from a random one. Why the creators of the service did not use existing algorithms (for example, PBKDF2) remains a mystery.
Uploading and encrypting files
Briefly, this whole process can be represented like this:
I warn you, delving into this picture for a long time is dangerous for the brain, so below I will tell you how it all happens.
As I already said, when loading, each file creates its own random array key of 6 32-bit numbers. The first four elements of this array are used to encrypt the contents of the file, and the last two are used as the initial values of the counter that is used to calculate the checksum of the file. This array is stored in the global variable ul_key. Its contents are entered into the JSON-serialized string ul_KeyNonce .
The decryption itself occurs with using the Web Worker (if the browser supports this technology) or simply inside the main page code. When a file is ready to be sent, a new key filekey based on ul_key and file checksum. This key is then encrypted with the master key and sent to the server along with the file attributes. The initupload3 and api_completeupload2 functions are responsible for all these actions. The filekey is created in the ul_chunkcomplete function, below I will give a part of it.
// start uploading a file: creating its individual key and initializing the encryption mechanism function initupload3() ( // ... cut =) // creating a random individual key for the file // ul_key is used in page code, // ul_keyNonce is passed to the Web Worker and is used there // to encrypt the file and calculate its checksum ul_key = Array(6); for (i = 6; i--;) ul_key[i] = rand(0x100000000); ul_keyNonce = JSON.stringify(ul_key); ul_macs = ; // ... next is processing the download queue, it is of no interest... // initializing sjcl-aes for a file based on ul_key ul_aes = new sjcl.cipher.aes(); // ... // starting the file upload process: // reading it from disk, encrypting and sending onUploadStart(ul_queue_num); ul_dispatch_chain(); ) // creating a key to encrypt file attributes function ul_chunkcomplete(slot,pos,response) ( // ... var t = ; // ul_macs - an array with the file checksum obtained inside the worker for (p in ul_macs) t .push(p); // filling and sorting a temporary array, if anyone knows why, please explain t.sort(function(a,b) ( return parseInt(a)-parseInt(b) )); = 0;< t.length; i++) t[i] = ul_macs]; // внутри condenseMacs производится зашифрование // и "уплотнение" контрольной суммы файла в массив из 4х элементов var mac = condenseMacs(t,ul_key); ul_settimeout(-1); // на основе контрольной суммы и ключа файла создается ключ для шифрования атрибутов // он же в зашифрованном виде позже будет отправлен на сервер var filekey = ; // ... } // завершение загрузки файла: зашифрование атрибутов и ключа файла и отправка их на сервер function api_completeupload2(ctx, ut) { var p; if (ctx.path && ctx.path != ctx.n && (p = ctx.path.indexOf("/")) >0) ( var pc = ctx.path.substr(0, p); ctx.path = ctx.path.substr(p + 1); fm_requestfolderid(ut, pc, ctx); ) else ( // encrypt the file name to key derived from ul_key and checksum // ctx.k == filekey a = ( n: ctx.n ); if (d) console.log(ctx.k); var ea = enc_attr(a, ctx.k) ; if (d) console.log(ea); // transfer of attributes and the file key encrypted on the master key var req = ( a: "p", t: ut, n: [( h: ctx.t, t: 0, a: ab_to_base64(ea), // attributes k: a32_to_base64(encrypt_key(u_k_aes, ctx.k)), // == AES_encrypt(u_k, filekey) fa: ctx.fa )] ); // a target has been supplied: encrypt to all relevant shares var sn = fm_getsharenodes(ut); if (sn.length) ( req.cr = crypto_makecr(, sn, false); req.cr = ctx.t; ) ) api_req(, ctx.ctx);
Downloading and decrypting files
Obviously, these processes should simply be the reverse of encrypting the file. The only thing that may be of interest is obtaining the value of the ul_key key from the encrypted filekey value that came from the server.At the time of downloading the file, the browser context already contains an object that stores the decrypted keys of the files. Therefore, it first makes sense to consider the process that occurs immediately after user authentication, namely, downloading the file manager. After the user has been allowed into the service, he naturally wants to gain access to his files (assuming that he already had them there). To do this, we need to first decrypt the file keys, and then their attributes. This matter is dealt with by another pack of functions, of which we are interested in loadfm_callback and process_f_f .
Briefly, the process of obtaining file attributes can be described by the following algorithm:
- Wait for the file manager to load (loadfm_callback), where you can get JSON with a description of all downloaded files
- Create an array farray in which to put an array with information about files
- Run (recursively) the process_f_f function for each file
- For each file that has a key, decrypt that key and attributes (crypto_processkey function) and save them back into an array with file information
- After that, save the decrypted values to the FileStore variable (end of recursion in process_f_f)
// callback for loading the file manager function loadfm_callback(json, res) ( // ... // processing JSON with information about files json = json; if (d) console.log(json); if (d) console.log (json); if (json.u) process_u(json.u, false); if (json.ok) process_ok(json.ok); if (json.s) ( for (i in json.s) ( if ( u_sharekeys.h]) ( sharingData.push(( id: json.s[i].h + "_" + json.s[i].u, userid: json.s[i].u, folderid: json. s[i].h, rights: json.s[i].r, date: json.s[i].ts )); sharednodes.h] = true; ) ) ) // ... nothing special further. .. // entering information about the files into another global array farray = new Object farray.f = json.f // starting its processing, the callback was declared above // in this function and simply modifies the layout process_f(fi, false , callback); fi++; ) // recursive function in which file keys and attributes are decrypted // called from process_f function process_f_f(fid) ( // recursion end condition - we have processed all files in the farray array if (!farray.f.i ]) ( if (farray.ap) FileStore.suspendEvents(); // writing data to FileStore FileStore.loadData(farray.mdata, true); if (farray.ap) FileStore.resumeEvents(); if (d) console.log("call reqmissingkeys:"); crypto_reqmissingkeys(); if (farray.callback) farray.callback.fn(farray.callback); return false; ) var f = farray.f.i]; f.attrs = f.a; if (f.sk) u_sharekeys = crypto_process_sharekey(f.h, f.sk); // if the file matches the type and has a key, then process it if ((f.t !== 2) && (f.t !== 3) && (f.t !== 4) && (f.k)) ( crypto_processkey(u_handle, u_k_aes , f); // description of this function below u_nodekeys = f.key; if ((typeof f.name !== "undefined") && (f.p == InboxID)) InboxCount++) else ( if (f.a) ( if ( !missingkeys) ( missingkeys = true; new missingkeys = true; ) ) f.k = ""; f.name = "" ) if (f.t == 2) RootID = f.h; else if (f.t == 3) InboxID = f.h; else if (f.t == 4) TrashbinID = f.h; else if ((f.t< 2) || (f.t == 5)) {
// тут идет обработка расшаренных файлов
} else {
// подготовка массива для записи в FileStore
farray.mdata.push({
id: f.h.replace(/[^a-z^A-Z^0-9^_^-]/g, ""),
name: f.name,
size: f.s,
type: filetype(f.name, f.t),
icon: fileicon(f.name, icontype),
parentid: f.p,
folder: f.t,
owner: f.u,
date: f.ts,
attrs: f.attrs,
key: f.key,
r: f.r,
su: f.su,
fa: f.fa,
});
if (f.p == TrashbinID) trashbinfull = true;
if (((f.t) && (farray.ap)) || (f.p == InboxID)) refreshtree = true;
}
farray.i++;
// проверка таймаута (видимо, чтобы загрузка файл-менеджера не выглядела слишком долгой)
timeoutcount++;
if (!(timeoutcount & 63)) {
// если у нас больше 63 файлов - дальше грузим их асинхронно
setTimeout("process_f_f(" + fid + ")", 1);
timeoutcount2++;
}
// иначе - запускаем обработку следующего файла
else process_f_f(fid);
}
// обработка ключа файла и его атрибутов
function crypto_processkey(me, master_aes, file) {
var id, key, k, n;
if (!file.k) {
if (!keycache) return;
file.k = keycache;
}
id = me;
// do I own the file? (user key is guaranteed to be first in .k)
// ключ записан в виде "
After this, we can get the value of the original key ul_key from the browser context like this: dl_keyNonce = JSON.stringify();
This conversion happens in the startdownload function. If we take into account that the value dl_key == filekey from the ul_chunkcomplete function and perform simple modulo addition operations, we will notice that the dl_keyNonce variable will store the ul_key value generated when loading the file. An illustration of this can be seen in the lower left corner of the board in the photo at the beginning of the section on uploading files.
"Overloading" of cryptographic operations
Despite the fact that the principles described above for protecting files and keys are very secure, some may not like the fact that we still depend on the implementation of the algorithms that the service provides. In this case, we can develop our own browser extension, which will override some of the service’s functions, implementing additional encryption in them. Namely, I decided to implement the protection key information(master key and file keys) using hardware encryption on a non-retrievable key according to the GOST 28147-89 algorithm. A bonus to this will also be the inclusion of two-factor authentication on the service.So, let's consider this use-case:
- The user registers on the service
- Then it installs the extension
- With its help, hardware encryption of the master key is performed using a key that cannot be extracted from the token.
- The master key encrypted in this way is uploaded to the server
- Two-factor authentication on the service (without a correctly decrypted master key, the api_getsid2 function will fail)
- Without a token, you will also not be able to change your current account password.

I would like to note that here I have used very tricky method. In this case, it is important for us that an attacker cannot decrypt the file, even if he intercepts the file key received from the server and knows the user’s master key. Therefore, here you can play on the features of the service’s architecture and use the key value ul_keyNonce (aka dl_keyNonce) obtained by encrypting the value of the ul_key (or dl_key) key to encrypt files.
Since these articles were written, our product has added the ability to use hardware encryption using the GOST 28147-89 algorithm. The beta version of the plugin with hardware encryption functionality according to the GOST 28147-89 algorithm can be downloaded. This version of the plugin has not yet been fully tested, so I warn you that it may contain errors, please report them in a personal message.
In the plugin interface, symmetric encryption is implemented by the encrypt function, which has the following syntax:
encrypt(deviceId, keyLabel, data, resultCallback, errorCallback) → (string)
The function takes as input:
- Device ID, number
- Label of the encryption key, number (if there is no such key, it will be generated)
- Encrypted data, string (string containing a byte array of the form "aa:bb:cc:dd")
- Callback functions for successful and unsuccessful completion of an encryption operation
Special attention should be paid to the key label, since it determines on which key the data will be decrypted. The label is an arbitrary string and mainly serves to conveniently identify the key. In this case, I use two key pairs: one to encrypt the master key, the second to encrypt individual file keys. The key on which the master key is encrypted has a label equal to the user’s password (now I came up with the idea of using a hash from the e-mail||password string, I will fix this in the near future). To encrypt the keys of downloaded files, a key with a label equal to the string representation of the master key is used (here it is also worth using the hash of the master key).
Direct development
I would like to immediately make a note about my source code: it is, in fact, in an alpha version, although it implements the functionality described above. I didn’t check how compatible my modification turned out to be with the other functions of the service, so I posted all the sources on github and will be glad for any help in finalizing this system. Therefore, I will not clutter up the article further with huge listings, but will only describe the general scheme of how the extension works.The finished extension can be downloaded. It was developed using the Crossrider service, which provides extensions for three browsers (Chrome, Firefox and IE), but it is better to check its operation in Chrome or Firefox, and in the first it works much more stable.
The extension code is quite simple: it checks whether we are on the service page and if so, it simply loads additional scripts. These scripts modify the page code, adding a couple of dialogs, and override the following service functions:
- changepw: responsible for changing the password
- api_getsid2: one of the login callbacks
- api_completeupload2: callback to complete file upload
- loadfm_callback: file manager load callback
- processpacket: another callback, in which the attributes of the just downloaded file are decrypted
- parsepage: responsible for drawing additional dialogs
- dologin: extends authentication capabilities
- initupload3: responsible for creating the file encryption key
- startdownload: reverse parse the file key and initialize the download
- To get started, it’s a good idea to get Rutoken EDS (or Rutoken Web) and install a browser plugin
- Install extension
- Log in to the service with the extension disabled
- Enable extension in browser
- Go to account page
- Click on the “Bind token” button
- Enter the current password and perform this operation
Demonstration of work
First, let's connect our creation to the site. To do this:
Then you can log out of the service and try to log in again using two-factor authentication: 
Authentication occurs according to the following scheme:
- Checking the login-password pair on the server
- If the login and password are correct, then an encrypted master key comes from the server
- The plugin requests a PIN code for the token
- If the PIN is entered correctly, then the master key is decrypted on the key from the token
Instead of a conclusion
Here I feel like writing “to be continued...”, since I did not cover the details of creating the extension and the interestingness of screwing it on asynchronous functions encryption into a service that in most cases uses synchronous calls. In conclusion of this article, I would like to once again turn to the idea of implementing client-side cryptography.Approach to implementing additional cryptographic functions on the client side can be applied to any web service, which does not care what is stored on its server: be it file storage, mail or a simple chat. For example, you can implement secure mail based on any mail service using message encryption in CMS format and key exchange mechanisms using the VKO GOST R 34.10-2001 algorithm.
Thank you for your attention, I look forward to your questions and comments.javascript Add tags
I'm sure everything active internet users have heard about the story of the closure of the popular file hosting service Megaupload and the misadventures of its creator. And they certainly know about Kim Dotcom’s new project called Mega. Let us remind you that this service is the reincarnation of Kim’s previous creation, but on a completely different platform.
When creating it, all the shortcomings and errors of Megaupload were taken into account and the emphasis was placed primarily on the stability of the file hosting service. And not only to network loads, but also to attacks by copyright holders. To achieve this, great attention is paid to the confidentiality and security of your data. All files you upload are encrypted with a special algorithm, so the service administration has no idea about the contents of your accounts and, accordingly, cannot be held responsible for it. For the same purpose, Mega servers are located in different countries, so if there are problems with the laws in one country, this will not lead to the collapse of the entire service and your data will remain intact.
Today we want to introduce you closer to the work of this service and offer you a small screenshot tour of its functions.

To get started you need to register. To do this, you need to provide your name, email address and password. The service is perfectly Russified and perfectly designed.

After registration is complete, you will be sent a login link to the email address you provided. By clicking on the link, you will have to wait a couple of minutes until special secret keys are generated for you, with which the data will be encrypted.

We get into our cloud storage. Everything here is clear and simple: the folder tree is on the left, the file display area is in the center, and the toolbar is on top. Files can be downloaded by clicking the button New upload or simple drag and drop in the service window. Downloads are exceptionally fast.

Files can be organized into folders. Moving files between folders is done by dragging or using context menu(see below). The level of nesting of directories is not limited.


A link to download the file is generated in the pop-up window that appears.
Notice the options at the top of this window. If enabled only File link, then your recipient will not be able to download the file without entering special password, which you can send to him separately by email. This way, you can post download links in public places, such as a blog or forum, but only allow certain people to download.
If additionally marked File key, then anyone can download the file using the created link. Checkboxes Name And File size add the appropriate file characteristics.

The folder context menu is slightly different. There is a point here Sharing. With it you can invite sharing your employees, friends or family. Invitations are sent by email and access may vary. Read only - only viewing, Read & Write— viewing and uploading your files to a folder, Full access— viewing, downloading and deleting files.

In the section Account you can view the fullness of your storage, buy additional space, change data transfer settings and some other options.
Some personal impressions
File sharing service Mega makes a great impression. Excellent operating speed, clear and pleasant interface, 50 gigabytes of disk space, no restrictions on traffic and the size of downloaded files, plus complete freeness and privacy of your data. It's just some kind of holiday!
The capabilities of the Mega service can be used for a variety of purposes. First of all, this is distribution various types information that will greatly please pirates of all continents. However, the possibility of limited access using passwords can also be useful for the legal sale of their creations, for example by musicians. Sharing folders makes Mega an interesting tool for organizing remote work. And of course it’s banal backup important information for you.
The only thing Mega is missing at this stage is desktop and mobile client for different operating systems. Considering the young age of the service, one can have hope that the developers simply haven’t had time yet and such a client will appear soon. After this, I don't see any obstacles to Mega becoming the new standard for cloud file storage.
For regular user Nowadays, on the Internet, it is not particularly difficult to find and use a file-sharing cloud service for free - there are quite a lot of them. As they say, for every taste and color.
The new file sharing service MEGA will be no exception. What, you haven’t heard of MEGA yet? MEGA is a new online new service file storage, created by famous businessman Tim Dotcom. His previous service - Megaupload.com - closed due to severe pressure from anti-piracy lobbyists. But Tim was released, and he took up his old ways and created a new file storage service for users. Even cooler and even more interesting. And although the project is still damp, it clearly has a future, since the former file hosting service Megaupload.com there were a lot of fans.
Given his bitter experience, Tim Dotcom came to the conclusion that all files that are stored and uploaded to the service must be encrypted. This will increase the security of users using cloud storage and prevent “interception” personal information. In this video, Kim shares her opinion on information encryption and more.
Let's return to the MEGA file hosting service.
It is not difficult to verify that the service is protected by an encrypted connection. If you look at the address bar of your browser (in this case, the Google Chrome browser), it indicates that the connection is established using the secure https:// protocol. The letter s means secure(safe).

Previously, this feature was only used payment systems and sites where you need to enter payment information. Now even search engines, such as Google, use it.
I hope you are already interested. So let's register on MEGA and find out what and how it works there.
I registered in the first days after the service opened. At that time it was still very buggy, but despite this, I managed to download a certain number of files.
It is worth noting the fact that the service supports several languages (including Russian). This is a definite plus of the project.
![]()
In order to register you need to go to the MEGA website and find the button " Registration". Create a new account - indicate your name (you can come up with any nickname), your e-mail and password.
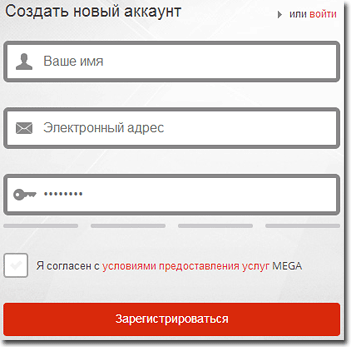
Check the "" checkbox and click the "Register" button. On postal e-mail an email should arrive shortly after registration. You need to find a link in the body of the letter and follow it. This will serve as confirmation of registration. That's all, actually. Registration is completed.
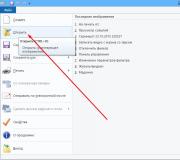
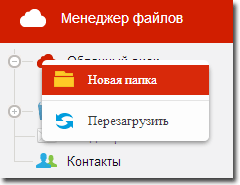
Log in to your account by specifying your e-mail and password. Now let's create a new folder. We will do this in order not to get confused, because in the future there may be a lot of files. Find the red cloud icon in the file manager and right-click. A drop-down menu should appear. That's it.
Let's name the new folder " Books" We'll put the e-books we liked there :).

Click the create button. We observe that a new “Books” folder has appeared in the file manager.
In addition to the fact that we can create a folder, we can delete an existing one. This is also easy to do. We need to indicate the folder that we no longer need, and by right-clicking on it, select the item " from the drop-down menu Delete"Everything is intuitive.

In general, the interface is very similar to an operating system. Here you can also create a folder, rename it, move it or copy it. The same can be done with regular files. Try it yourself and you'll figure it out quickly.
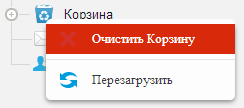
There is also special folder – « Basket" Yes, yes, this is the same basket in which they accumulate deleted files and folders. Just like in the operating system. And this is very cool, since you can delete a file by mistake and bitterly regret it. The files are immediately deleted into the Recycle Bin and can be restored if desired. This is done with a simple move or copy command.

Apparently, the trash can only be emptied forcibly through the item “ Empty Trash" That is, deleted files are stored until you delete them completely and irrevocably.
Well, okay, let's digress. Let's try to upload some file to the “Books” folder we created. For testing. Click on the “Books” folder in the “panel” File Manager" Next, click on the “Upload file” button located in the top menu.
![]()
A file selection window appears, select it and click “Open”.
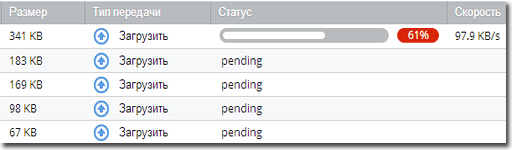
At the bottom of the page you can see the process of downloading the file.
If the status says " pending…", this means that the file is queued and waiting to be downloaded. This happens if several files or a folder with files are downloaded. Don't close your browser window. As soon as the download queue reaches a file with a pending status, the download process will begin, which can be observed.
In addition to downloading separate files It is possible to download entire folders with files. To do this, click the “Upload folder” button and in the “Browse Folder” window, select the desired one, click OK. After confirming your selection, the download will begin.
It is worth warning here that downloading entire folders with many files can take many hours. The loading time depends both on the load on the MEGA service itself and on bandwidth Internet connections.
Now let's talk about how you can get a link to a file and transfer it to someone else. This is a file sharing service.
If you look at the list of files, you will see that next to the name of each file there is this icon. When you click on it, a window appears to receive a link to the file (“ Links»).

It's not so simple with links. As already mentioned, all files are encrypted and transmitted securely over the network. In the window for receiving a link to a file, there are several checkboxes (windows where you can remove or check boxes). Depending on which checkboxes we check, the link we will receive will depend.
If you check it, only a link to the file will appear in the window. But you can't download the file from this link. You need a key to the file. It will be displayed if you check the file key checkbox.
File key. This is a certain combination of characters that gives access to the file when downloading. The recipient of the file will need to enter it in a special field on the download page.
File name. Check the box if you want the file name to be included in the link. The same applies to the checkbox " File size" You may or may not indicate it. Here as you please :)
Let's see what happens if you specify only "" and "" + " in the link parameters File key" Options " File name" And " File size» we will not indicate, since they do not particularly affect anything, but are purely informative.

Next we will open new tab browser and copy the text of the received link into the address bar. You can use a hotkey combination CTRL+V. This combination is responsible for pasting text copied to the clipboard. Let's follow the link and see the download page. The page is very nicely designed. In the central area of the page we will see this message.

Oops! Here they ask us something decryption key. Only knowing the key to the file can you download it. This is the key we are offered to receive in the window for receiving links.

So, let's get it and paste it into the field that says " Enter decryption key" Don’t forget to check the box next to the words “ I agree to MEGA's terms of service».

Press the button " Download" and wait for the file to download.
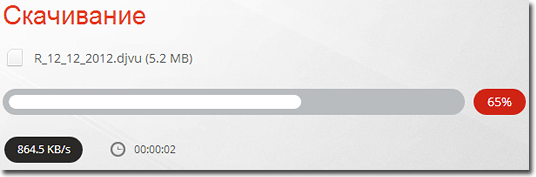
As you can see, the file download speed is 864.5 kbps. , which is quite a lot.
But what should those who don’t like playing spies do? In this case, when receiving a link to the file, check the checkboxes “” + “ File key"and copy it.
That's it, now the link can be inserted into the text email, ICQ messages and send to whoever you want to transfer the file to. On the file download page, you don’t need to enter any keys; you just need to agree to the terms of service and click on the “ Download».

Now that we have successfully figured out the service interface, let's take a look at the settings. Go to the “Account” tab and get to the settings and options page.
The free account type on MEGA allows you to use 50 GB of cloud storage space.
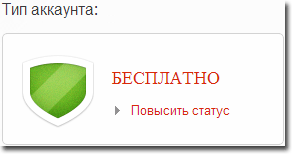
If you want more, pay money. But, for personal purposes, these 50 GB are quite enough. The paid account type also has its advantages. Firstly, it is an increased download speed. Secondly, the increased amount of space on the service is 500 GB ( Pro Ⅰ), 2 TB ( Pro Ⅱ), 4 TB ( ProⅢ).
The percentage is shown here on the page. occupied space in storage.

You can also set transmission parameters: limit the transmission speed, set the number of parallel connections. Here you can enable/disable the skip function identical files when downloading, as well as using the secure SSL protocol. Disabling the secure data transfer protocol increases the speed of downloading files, since in this case redundant code is not used.


On the same page you can view your balance (if you are using a paid account type) and session history.