How to create vector images. How to Convert Bitmap to Vector Image in Photoshop
How to make a vector image in Photoshop is often asked. As you know, Photoshop is a program for processing raster graphics and is not designed to work with a vector. With vector graphics special graphic editors work. But if you really need, and time to study new program No, with the help of some manipulations, you can convert the image into a vector.
What is a raster and vector image and how do they differ
A raster image is also a grid of pixels (dots). We are all familiar digital photo is just a raster image. A vector image does not consist of pixels, but of geometric primitives: straight lines, rectangles, and other shapes.
If you reduce and then significantly increase bitmap, its quality will be irreparably damaged. Since each pixel is a dot of a certain color, and all together these dots make up a picture. When the image is reduced, extra pixels are discarded, so it cannot be restored to its original appearance.
Scaling a vector image allows you to resize without losing quality. This is possible due to mathematical recalculations of the dimensions of the geometric shapes that make up the image.
A bitmap image allows you to reliably convey visual information, the vector has no such advantage. Images vector graphics can be useful for visualizing logos and contour drawings. You will not get photographic beauty from them. Or it will be very complex images, consisting of huge amount primitives that actually replace pixels.
A simple example of how to convert a raster to a vector
So, the vector consists of geometric shapes. Photoshop has tools for creating paths. contour and is geometric figure. To make a vector image in Photoshop, you need to create an outline of the image. The tools of the group will help us with this. Select: Rectangular Marquee Tool, Elliptical Select Tool,** Magic Wand Tool , **Quick Selection Tool and "Pen" / Pen tool.
To make the vector neat, you should choose the bitmap as much as possible. good quality, otherwise drawing the contours will need to be done manually.
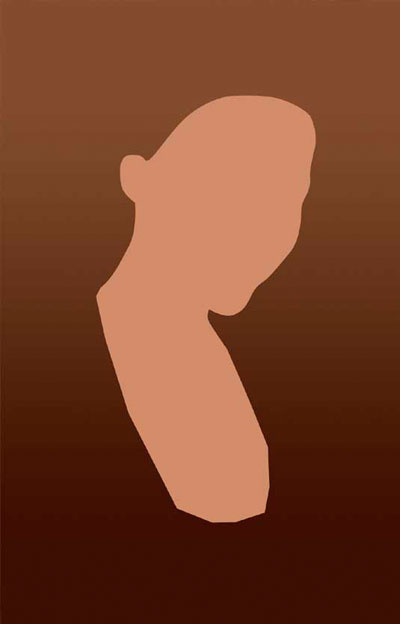
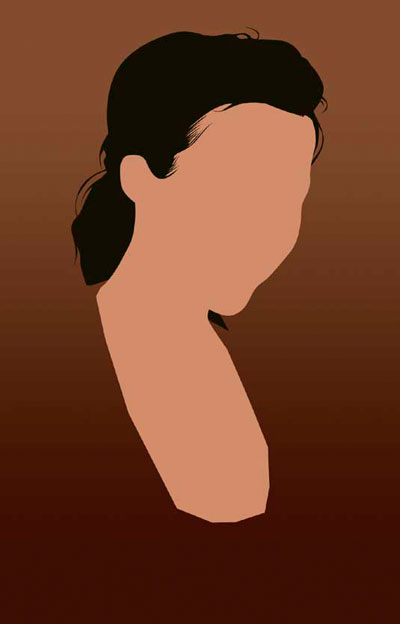
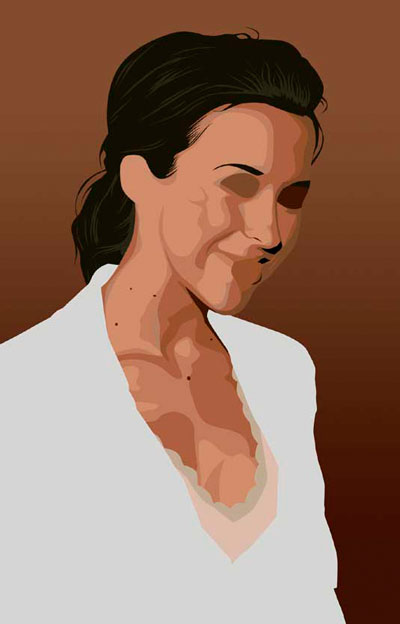
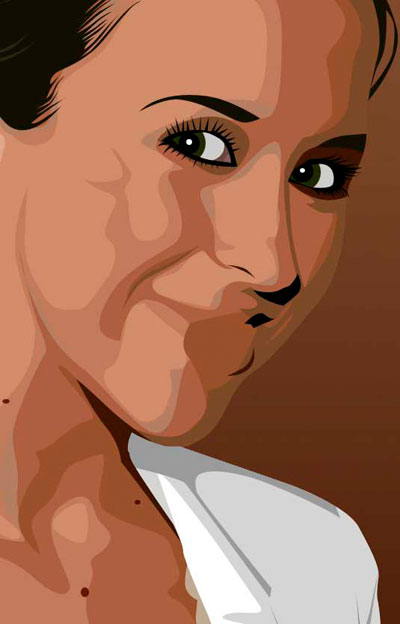
Open the bitmap image in Photoshop (the most common bitmap format is JPG). Very easy to process logos, contour drawings, sketches. To get a vector sketch of a portrait, you can first convert the portrait to a sketch using "Filter Galleries", or use ready-made pop art. How to work with "Filter Gallery" and quickly create pop art from photos, we talked about in previous articles. For this example, we will take a ready-made pop art portrait. Intentionally, we prepared it from a photo not of the better resolution. Therefore, the vector version will show us a noticeable difference.
To work with contours, you need to call the tab "Contours" / Path to the layers palette. To do this, go to the menu "Window" / Window and check the box "Contours" / Path. The bookmark will appear on the layers palette.
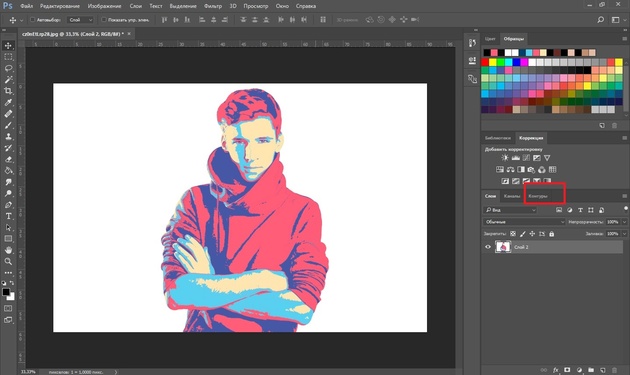
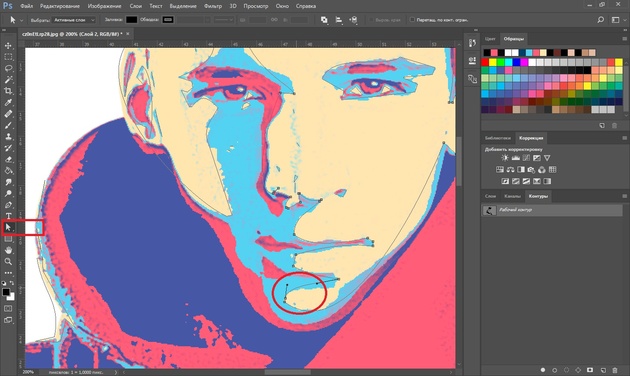
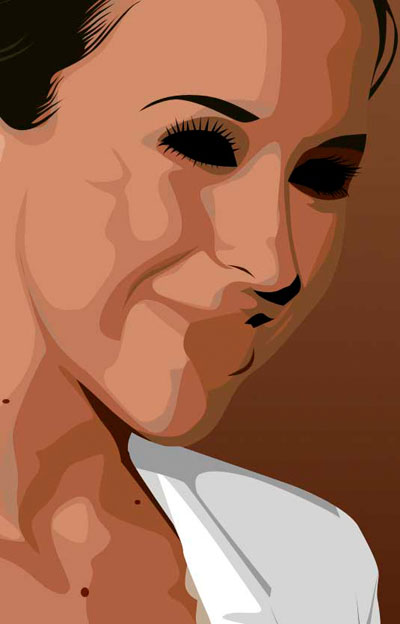
The image has 4 colors (the background is not counted). We take the tool "Magic Wand"/Magic Wand Tool and select the first color. To select all areas scattered by islands across the image, hold Shift.
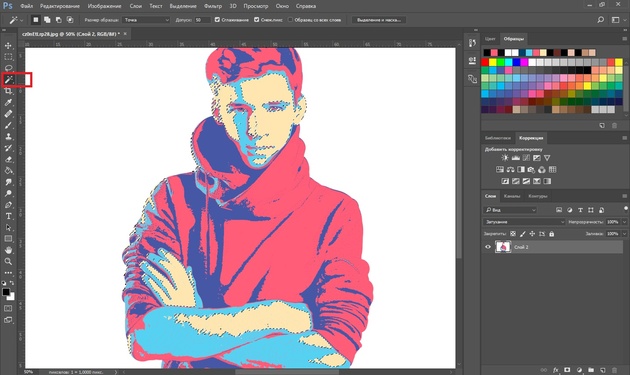
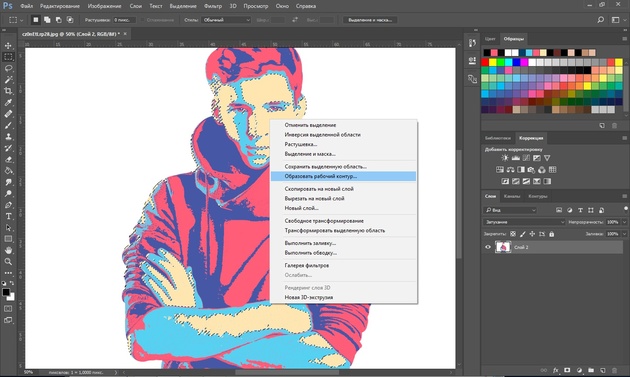
With the first color selected, select the tool "Lasso" / Lasso or Rectangular Marquee Tool and, without removing the selection, click the right mouse button. AT context menu choose Make Work Path.
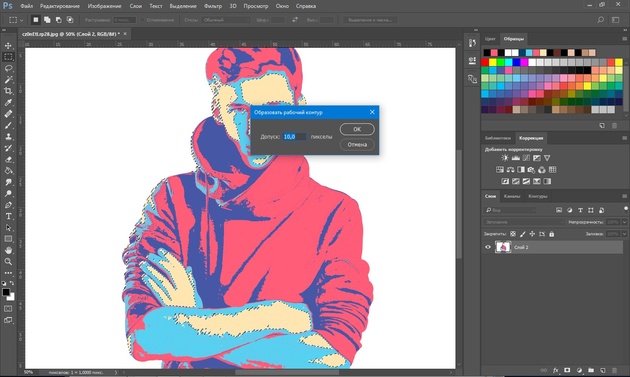
In the dialog box, specify the maximum smoothing "Tolerance" / Tolerance(from 1 to 10; the lower the number, the better the contours will repeat). We press Ok.
Bookmark "Circuit" the first loop will appear. On the image, it will be noticeable in the form of curves with dots. They can be aligned and adjusted with a tool Node Selection/Direct Selection Tool. With this tool, select a point and either adjust the curve by moving the antenna of the point, or move the arc itself.
Bookmark "Circuit" change the name of the circuit. To do this, click on it double click and change the name in the dialog box.

We do all the described steps with the rest of the colors. As a result, we get four contours for each color.
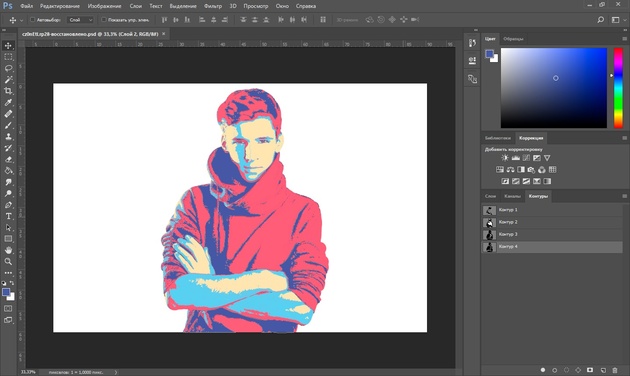
Having received the contours, it remains to create a vector. Go to bookmark "Layers" / Layer on the layers palette, create new layer Shift+Ctrl+N. We set the main color to the one in which we will color the first contour.
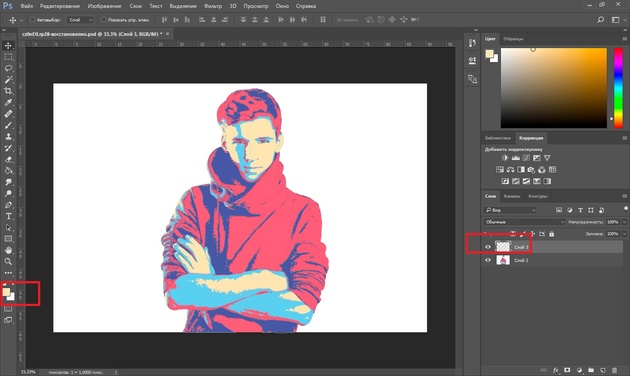
Back to bookmark "Circuit", we become on the first contour. In the main menu under "Layers" / Layers choose "New Fill Color" / New Fill Layer - "Color"/Solid Color. In the window that opens, click Ok.

Now going to the bookmark "Layers" / Layers, you will see the first vector layer on the new layer.
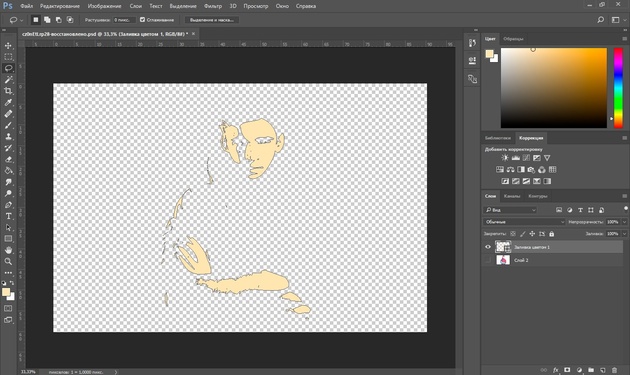
Let's do these steps for each circuit.

So we got four figures that made up the portrait. Now you can save to a file with vector extension SVG (delete the layer with the original image). Click Alt+Shift+Ctrl+W(export as). Select an extension in the dialog box SVG file, press "Export All" / Export All.

In the next dialog box, as usual, specify the file name and path.
That's all. The method is quite simple.
If you find yourself working with vector art often, this article might inspire you to learn new things. graphic editors. In any case, you have learned another useful method. We wish you great work.
Learn more about Photoshop at Fotoshkola.net courses
Photoshop has an intuitively familiar window interface, broken down into several work items: the main menu, the Tools panel, the Control panel, the document window, palettes. All interface elements except the main menu can be placed on the screen in positions convenient for you simply by dragging them. To do this, move the cursor over the panel header, press and hold the right mouse button and move the opened panel to a convenient part of the screen. You can also add or remove additional palettes by calling them from the "Window" / Window item of the main menu.
In that Photoshop lesson we will turn an ordinary photo of a girl into vector drawing.
This is enough difficult lesson which will take you a lot of time, but it's worth it! Thanks to this lesson, you will understand how to draw vector images of people.
We are not using any filter here, only the Pen tool. If you don't know how to use the Pen Tool, see .
Find the photos you want to turn into vector art.
Duplicate it and go to the menu Image> Adjustments> Posterize (Image - Correction - Posterize) and select the desired number of levels there. The more levels, the more detailed your vector image will be.
![]()
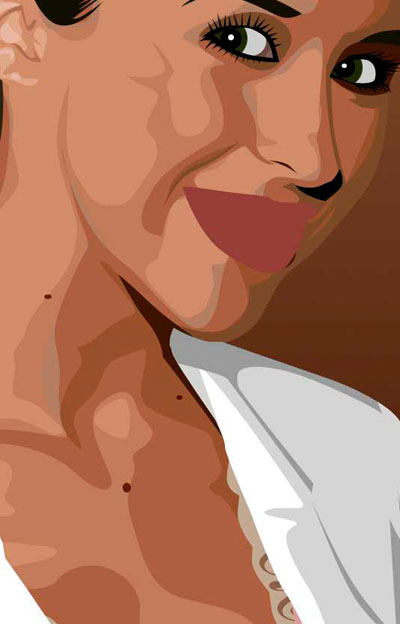
Highlight the girl's face and neck (exposed areas of the skin) with Use the eyedropper tool to select the color of the skin from the photo. Fill the selection with this color.
Outline the hair again, fill it with black and place this layer below the face layer.

Since we have lost some areas of hair on the temples and on the forehead, we need to finish them. Do this on a new layer above the face layer.
Circle the edges of the clothing. Remember that every detail must be solid. We will draw shadows later...

And now, based on your posterized base and the original image, decide on a new level that you will paint, and with its color.

NEVER TAKE COLOR FROM THE POSTERIZED LAYER! THE COLORS ON IT ARE INCORRECT, YOU NEED IT ONLY TO DRAW THE LEVEL.
Continue painting the tones on the skin. Layers with shadows should be superimposed on each other according to the following principle: light layers - at the bottom, dark ones - at the top.
When you are done with the skin, merge all these layers.

Since we have two layers with hair, make a new layer on the very top and draw light strands on it.
If the hair in your photo is dark, then it will be easy to do, and if it is light, then you will have to more accurately draw the shades obtained during posterization.
Do the same with clothes.
If you look at the original photo, you will notice that the necklace is missing from the picture. It's okay, so be it.
If the person in the photo is a little overweight or has some detail that you don't like, then just remove it!

Edit all remaining details...

Now work on the eyes. First, on a new layer, draw the shape of the eye. Then create another layer and draw eyelashes. Then merge both layers together.
Draw a white tint over the black eye shape. smaller size. And inside the white one there are several circles, from which the pupil will turn out.
We draw lips. First draw the shape and fill it with the main color.
Draw shadows and highlights on the lips, as well as in the mouth (if necessary).
Here, as you can see, a substrate for the teeth is drawn - this is the basis of the gums and the shadow of the teeth.

And in the end, draw the teeth themselves and highlights on them.
Remember that all shadows and highlights must be grouped with the main color.
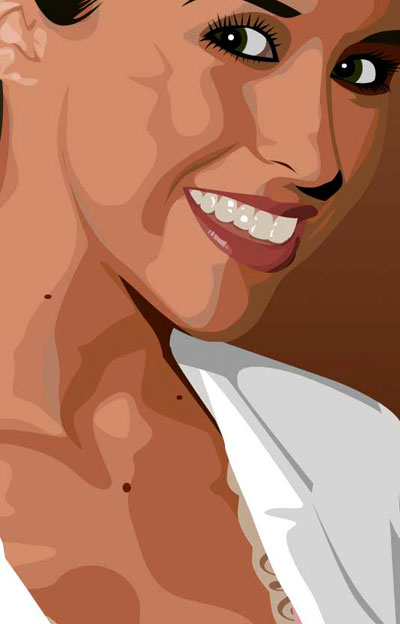
And after several hours of working on this photo, now look at the result! We sincerely hope that you yourself like what you have drawn.

Let's say we have some kind of bitmap and we want to get it in vector form(or in curves). What do we need to do for this? First of all, you need Adobe program Illustrator.
The version doesn't matter.
Procedure
Opening our bitmap in Adobe Illustrator. To do this, you can click on the picture. right click mouse and select from the drop-down menu Open with... > Adobe Illustrator or launch illustrator and drag the picture onto the workspace.
original image
On the toolbar, select the tool " Selection» (black arrow) and click this arrow on our image. In this case, the picture should stand out. To test this, you can try moving it around a bit by holding left button mouse when the cursor is over the picture (drag-and-drop principle).
Above the workspace we find the button " Quick trace” and click on the arrow next to it. It shows all the options available for this action. We need an item Trace Options...". When we click on it, a window with parameters opens.
On the right side of the options window, select " View". This will help you get more good result and understand what each of the parameters is responsible for.
1) do it in a scientific way, that is, you will need to read in the tooltips which of the parameters affects what and set the necessary values;
2) experiment with the parameters yourself, using the so-called "scientific poke method".
I prefer the second way: firstly, the Russian translation of a word does not always fully convey the meaning inherent in the original, and secondly, it is often faster and easier to remember this way. You change the setting. See what it affects (visually). Combine multiple options. And so on until a more or less acceptable result is achieved.

The resulting vector image.
When the picture is already similar to the truth, in the tracing parameters window, click " tracing” and in the menu above the workspace, the button “ disassemble". Thus, we get the original image, but already in curves.
If you are not satisfied with the result, you can refine it. To do this, use the tool Selection» it is necessary to select all the created curves (press the left mouse button and, holding it, circle the entire picture). Go to menu item An object» > « Transformation» > « Scaling” and resize the image so that it is large enough for easy editing. Then select the tool direct selection» (white arrow). With this white arrow, click in turn on each node and align the splines as necessary: when a vertex is selected, whiskers appear nearby, by dragging which you can change the curvature of the spline.

Result in grid mode
Also, a better result can be obtained if you initially take a large image of good quality. So, if you don't want to spend time hacking spline knots in the future, use high-quality images as raw material for tracing!
Vector drawings are increasingly used in various printing tools to create beautiful drawings from wood, plastic, metal, paper and other materials. Today, we will figure out how to make a vector drawing with your own hands using Photoshop. Having spent quite a bit of time, we will get a high-quality vector drawing, and we will be able to use it in the future without any problems.
How to convert a drawing to vector?
First of all, it should be noted that converting the figure into vector format only drawings that are depicted on a white background are allowed. If the background is not white, then first you need to remove all unnecessary and clear the background.
1. Using the selection tools, select only the element that we want to turn into a vector drawing, and copy it to a new layer called "shape". Then we create another layer and completely fill it with white, this layer can be called "background". Now, move the "background" layer under the "shape" layer and merge them. The resulting image is called "Base". Copy the "Base" layer twice and name them "Base_1" and "Base_2". Turn off their visibility.


2. Let's start our operations on converting the picture into vector format. First of all, apply for the "Base" layer, the "Isohelium" correction, in order to get the picture in black and white format. Not always at the first correction we get the picture we need, so we can make several copies of the layers and make corrections with different values until we get what we need.
So we got the most normal effect.

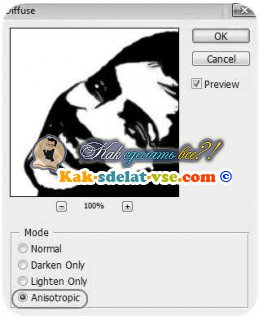
3. Next, we apply a Diffusion filter to the resulting image to remove the jagged edges. The path to enable the filter: “Filter – Stylization – Diffusion” (Filter-Stylize-Difuse). In the window that opens, select "Anisotropic".
4. The next step is to smooth the edges so that they become sharper, for this we press “Image – Correction – Levels” (Image-Adjustment-Levels). AT open window move the left and right sliders closer to the center. In order to see the result of the correction, it is best to enlarge the drawing up to 300% before opening the levels.

5. Repeat steps 3 and 4 in the same order.

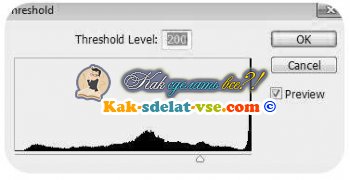
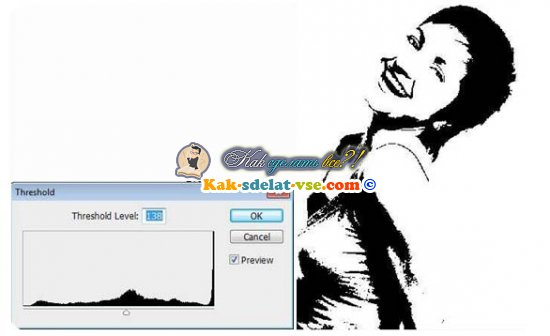
6. Turn off the visibility of our main layer and turn on the "Base_1" layer. Perform the action "Image - Correction - Isohelia" (Image-Adjustment-Threshold). The parameter is set at level 138.
7. We perform the operations indicated in paragraphs 3.4 and 5 with this layer.

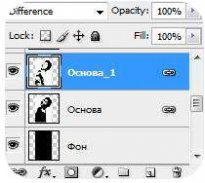
8. Create a new layer and fill it with black. We call it "background". Set it below the "Base" layer. In the "Base_1" layer, change the mode to "Difference" (Difference).
Here's what we get:

9. The result is a little scary picture, but we'll fix it now. Make the Base layer active and add a layer mask. After that, with the help of an eraser, we can remove unnecessary areas on the face and body of the girl.

10. So we got the drawing, now it needs to be converted to vector. We use " magic wand”, select the entire black area of the picture, and press the right mouse button on the image, in the menu that opens, select “Create work path”. Set the value to 1.0.


