How to use Apple Diagnostics. Do-it-yourself MacBook repair: troubleshooting guide
Yesterday we help diagnose hardware problems on Macs manufactured prior to June 2013. But if your device is younger, ANT will no longer start on it: instead, the computer will use the Apple Diagnostics program.
In fact, both programs are not much different from each other. Unless Hardware Test has a simpler and older interface, while Apple Diagnostics has everything done in a new “flat” stylish design. In addition, the latter is adapted to the latest Apple computers and diagnoses and diagnoses problems with the internal hardware components of the computer, such as the motherboard, memory and wireless devices.
If you think your Mac is having hardware problems, there is a handy way to check it out.
To get started, turn off your computer and turn it on while holding down the D key until the Apple Diagnostics boot screen appears.

After that, select a language - this will make it easier to work with the program.

The basic test takes two to three minutes. If no problems are found, you will see a corresponding message. But if there are problems, the system will not only find them, but also describe in detail what could be the matter, and for some problems it will offer solutions before contacting the service center.

Under each error, you will find its unique code - if the problem is serious, it is better not to self-medicate. For warranty computers, you need to contact, tell her the error code, after which the specialists will tell you what to do next. Do not despair if your Mac is no longer under warranty - as a rule, they know all the error codes and will be able to immediately tell you how much the repair might cost.

To exit Apple Diagnostics, shut down your computer. If you want to immediately contact the company's support, click "Get started".
One of the easiest ways to find out if your Mac is having hardware problems is to run Apple Hardware Functional Test or Apple Diagnostics. Yes, most Apple users do not encounter any malfunctions, but problems sometimes arise: drive damage, memory failure, unstable graphics or motherboard. There are many different types of hardware defects.
The good news is that Apple Hardware Functional Test allows you to easily determine if there is a hardware failure. Keep in mind that Apple Hardware Functional Test can only be run on devices manufactured prior to June 2013. Newer models will load Apple Diagnostics.
The programs are somewhat different, but the functionality is the same. Hardware testing is the same on all Apple computers, be it an iMac, MacBook, MacBook Pro, MacBook Air, Mac mini or Mac Pro, the version of the operating system also doesn't matter.
How to diagnose Mac hardware:
Step 1: Connect your Mac to a power source.
Step 2: Disconnect all external devices except display, keyboard and mouse.
Step 3: Shut down your Mac and press the power button again to turn on your computer.
Step 4: Press and hold the "D" key on the keyboard until the gray boot screen * appears.
Continue holding "D" until you see a progress bar instead of the normal loading screen.
- If your Mac boots up in Apple Hardware Functional Test mode, an icon appears on the screen.

- If your Mac is downloading Apple Diagnostics, you will see a progress bar or language selection screen.

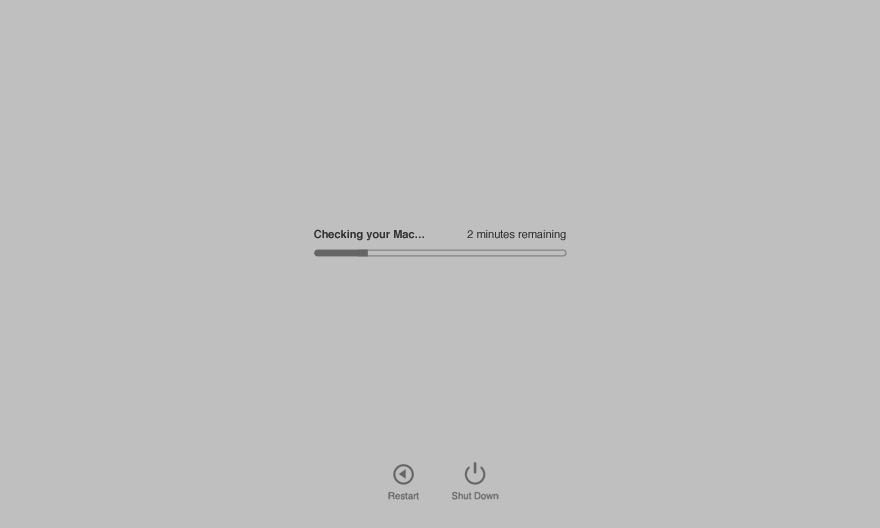
Step 5: For “Functional Hardware Test”, check the box next to “Perform Extended Test” and click “Test”. For Apple Diagnostics, wait for the Mac check to complete.
The diagnostic tool will notify you of any faults found.
- If any error is found, then your Mac has a hardware problem.
- If no errors are found, the computer hardware is working and there is most likely a software problem. In this case, you should back up your data and reinstall Mac OS X.
* If you have problems downloading Apple Diagnostics, press Option + D to download the test over the Internet.
If a malfunction is found during the test, the error code and other details shown on the monitor should be noted. This will help you when contacting technical support. For Mac computers with Apple Diagnostics, there is one at support.apple.com.
The example below shows that the Apple Hardware Functional Test detected a problem with the SATA interface and returned the error code: “4HDD / 11/40000000: SATA (0,0)”. This means that the hard drive is defective.

If you are having problems with your Mac and are still under warranty, you should contact an Apple Authorized Representative. Some errors can be eliminated by yourself by replacing the RAM or hard drive, but if the case is under warranty, you should not worry, since an Apple certified service center is obliged to perform a free computer repair.
If the warranty has expired, you can try to fix the problem yourself, but this method is only suitable for tech-savvy users.
It is very easy to distinguish between hardware and software faults. The damaged hardware problem cannot be fixed by reinstalling the operating system, while the software problem will most likely go away. It is also worth keeping in mind that some software itself does not work correctly and such problems appear only when using a specific application.
There are some unusual technical problems, you can use Apple Diagnostics to find out the causes and even fix them.
Apple Diagnostics will run several tests to identify problems not with the system, but with the device itself. It could be a broken port, a broken battery, display problems, and so on.
This program is essentially a reincarnation of the Apple Hardware Test program. Apple diagnostics are for newer Macs, and 2013 and older models use the Apple Hardware Test. The old program displays more information and the Diagnostics is more concise. However, both programs work in the same way and are great for identifying and solving problems with Mac parts.
Opening Apple Diagnostics on Mac is very simple - you just need to press a keyboard shortcut at startup. More on this in more detail.
How to open DiagnosticsApple onMac
There may be many different messages about different problems. If you are unsure of what to do, you can contact Apple Support or a specialist.
Please note that Apple Diagnostics can not detect all problems, and in this case, all that remains is to immediately seek help from a specialist. Such problems include cases when the computer periodically does not start or, on the contrary, turns off by itself. Also, the program will not detect physical damage to the device, including damage from contact with liquids.
Apple Diagnostics is not perfect, but it is a good place to start when solving any technical problem with your Mac, iMac, MacBook, MacBook Pro, and other models.
Launch DiagnosticsAppleacross Internet
You can also run Apple Diagnostics over the Internet by holding down the Option + D keys during startup. The process will take longer, and there are no more differences from the previous method.
What to do with Diagnostic CodesApple?
If the program detects a problem, it will give you a code and a short description. For more information, check the code on the Apple Reference Codes site. There you will learn more details about your problem.
How else to solve technical problems
Apple Diagnostics is very useful, but it doesn't solve all problems. You can try the following.
As you know, Apple pays a lot of attention to the organization of maintenance and repair of its devices ... while they are under warranty. If the warranty period for your MacBook has expired, then its repair can result in a serious amount. You may be charged a few hundred dollars for some trivial problem.
Therefore, let's deal with those problems that we can fix ourselves. Here I have collected all the important information on how to repair a MacBook with your own hands. It also comes in handy for Mac desktop users.
Before you start: backing up
If your MacBook started to work with problems and you are going to deal with them, then before proceeding to action, create a backup copy of all important information.
I hope you already know how to use Time Machine. Use this utility to create a copy of your Mac to an external drive or online storage. Ok, let's start troubleshooting MacBook problems and fixing them.
1. Download updates and check for viruses
In the first step, make sure that the latest software versions are installed on your computer. Download the latest updates for your operating system, applications, component firmware ... absolutely everything. Launch the App Store and go to the Updates section. If an update is ready for some software product, install it. 
If you installed some programs not through the App Store, then run each of them separately and check if they are ready to update.
After updating the programs, run an anti-virus scan (after updating the anti-virus) to make sure that there are no viruses and other malware that could be the source of problems with your computer. You can also use a program to find and remove adware, such as Adware Mdic. Just don't use MacKeeper for this.
Many users still live in the dark and believe that viruses do not threaten Macs. But the situation has changed a long time ago, and unwanted programs displaying ads can easily get into your system.
After updating and checking for viruses, restart your computer. It is possible that it will work without problems.
2. MacBook diagnostics
If the problem persists on your Mac, then you need to find out the source. First, you need to decide on the category of the problem: software or hardware. To test the hardware, you need to run Apple Diagnostics (or Apple Hardware Test, depending on the age of your computer). To do this, we will use the following algorithm:
- Shut down your MacBook and disconnect all peripherals (except the network adapter, mouse, keyboard, and Ethernet connector) from the MacBook.
- Hold the D key until the Apple Diagnostics download begins.
- Select a language and press the Enter button.
- If your Mac was released earlier than 2013, then select “Perform extended testing” and click “Test”.
 The procedure for diagnosing the hardware filling of the computer will begin. This may take a long time - be patient. At the end of the diagnosis, a table with information about the found problems with the hardware will appear on the screen. Write it all down somewhere and restart your computer.
The built-in Disk Utility of OS X can detect a number of file system problems, especially those related to permissions.
If these diagnostic tools do not find anything, then you will have to use an alternative method. Explore "Troubleshooting Mac OS X" - in this document, Apple has put together helpful tips to help you find the source of your computer problems. Having found it, you may yourself understand the further strategy of MacBook repair or you will have to look for relevant information on thematic forums.
If you still don't know how to get full functionality back to your Mac, read on.
3. Problematic programs
Let's start with what is easier. As a rule, problems with software are solved cheaper and faster.
Correcting access rights
Incorrect access rights often create problems that are difficult to explain. Fixing them in many cases allows you to quickly solve seemingly incredibly complex problems. Launch Disk Utility (Applications -> Others) and click the Check Permissions button.
 The utility will almost certainly find several objects, the permissions to which it will advise you to fix. After it completes its work, click the "Fix access rights" button. If the list of fixes is long enough, this procedure will take several minutes. You can relax and have a cup of coffee for now.
Resetting PRAM and SMC
The random access memory where system parameters are written (PRAM) and the System Management Controller (SMC) are responsible for many important things in your Mac. To reset PRAM, do the following:
- Turn off your computer.
- Press the computer power button.
- Press the Command, Option, P, and R buttons at the same time until the gray screen appears.
- Hold these buttons until you hear the computer boot sound again.
- Now release the buttons.
Resetting the SMC depends on the type of computer you are using. On a MacBook with a removable battery:
- Turn off your computer.
- Unplug the AC adapter.
- Remove the battery.
- Press and hold the power button for five seconds.
- Insert the battery back.
- Turn on your computer.
On a MacBook with a non-removable battery:
- Turn off your computer.
- Connect the AC adapter.
- On the built-in keyboard, press the Shift, Control, and Option buttons on the left and the power button at the same time.
- Release Shift, Control and Option at the same time.
- Turn on your computer.
On a Mac Pro, iMac with an Intel processor, Mac Mini with an Intel processor, or Xserve on Intel:
- Turn off your computer.
- Unplug the power cord.
- Wait fifteen seconds.
- Plug in the power cord.
- Turn on your computer.
Removing problematic programs
If you still haven't gotten your MacBook to work properly, and you suspect a particular program is causing problems, then try uninstalling it and see if the computer works better after that. If this is the case, try installing this program again. Sometimes this is all there is to do to repair your MacBook. If you still have problems, then try a few more things.
Reinstall OS X
We are moving on to decisive action. Sometimes the operating system has a serious problem that can only be fixed by reinstalling it. That's why you backed up your Mac at the beginning of this article.
If you have OS X Yosemite installed (you've already upgraded your Mac), then proceed as follows:
- Restart your MacBook.
- When you see a gray screen, press and hold Command + R.
- Options should appear, among which select "Install OS X" (Install OS X).
- Follow the instructions on the screen.
- The operating system will reinstall. See if the problem is gone.

4. Hardware problems
If your MacBook has a hardware problem and you want to fix it yourself, then you will have to use online resources filled with useful information. The Apple Diagnostics or Apple Hardware Test information should be a starting point (assuming the utility is running and the computer display is running, of course). Sometimes, diagnosing hardware problems can be very difficult and requires professional skills and tools.
Collecting information
Before you start repairing your MacBook hardware, you should be well prepared and collect the necessary information. There are quite a few resources on the Internet about Mac repair. I recommend starting with iFixIt, Instructables, and YouTube. Before disassembling your MacBook case, read or view the instructions carefully and make sure you have everything you need.
MacBook Repair Tools
Unfortunately, to repair Apple laptops, you will need tools that are not included in the traditional home kit. In the iFixIt online store and in local hardware markets, you can find almost everything you need: ingenious screwdrivers, soldering tools and special kits. 
You can also search Amazon and eBay for the repair fixtures you need. In the latter case, the prices may pleasantly surprise you (only the delivery will most likely cost a pretty penny). Used tools are unlikely to lose their functionality after repairing one or two computers.
Where to get spare parts
On eBay, you can find not only tools, but also replacement parts for MacBooks, from motherboards to displays. You can also buy a faulty Mac at a low cost, in which we will find many working parts to repair. iFixIt also sells Mac parts.
Before buying, check a hundred times that this is exactly the part you need. Protect yourself from incompatibility issues. If you are not sure about the exact name of this part, on your MacBook go to the Apple Menu (in the upper left corner of the screen) -> About this Mac -> System Report and find a description of the required component there (of course, if the computer turns on) ...
Get down to business!
If you know what to do, have prepared the tools and the necessary parts, then it's time to start repairing your MacBook. Reread the required instructions. Protect yourself from possible electric shock and proceed.
Be patient. Repairing a modern computer is a very delicate task, there are many small and fragile parts, and some of them can be irreparably damaged by static electricity. Be extremely careful when working with the battery and microcircuits.
Or maybe a service center?
Fixing a MacBook takes time, patience, and sometimes a lot of money - but it comes with a return to computer performance and increased self-esteem.
I recommend taking on major repairs only if you like digging into the stuffing of electronic devices. After solving serious hardware problems with Macs a few times, you will be transferred to the group of favorites. 
But most of us should outsource our Mac major repairs to a trained professional. You can try to take the relevant courses yourself. But they are unlikely to seem simple to you. Therefore, most users entrust the repair of their MacBook to a professional. Yes, you will give more money, but you will receive qualified help.
In what situation are you ready to fix your computer yourself? And when would you prefer to entrust its repair to a qualified person? Share your opinion in the comments.
Before going to the service center with their Mac, any user can independently check their computer for problems. Perhaps, knowing what the problem is, the user will be able to carry out simple repairs on his own.
Since Apple's instructions are of little use in this case - they are sent exclusively to the service center, I have compiled my own guide to solving problems with Mac.
- If the computer was released after June 2013, then the checker is called "Apple Diagnostics"
- If the computer was released before June 2013, the test program is called "Apple Hardware Functional Test"
Regardless of the name, the utilities work almost identically.
How do I run Apple Diagnostics?
Step 1. Disconnect all devices except the mouse, keyboard, network cable, and monitor.
Step 2. Turn off your computer.
Step 3. Turn on the computer and press the D button. Hold it until a special screen appears with a choice of language.
Step 4. Choose Russian and the check will start automatically. It does not last very long - 2-3 minutes.
If you do not start the usual diagnostics, then at boot press Option + D and the diagnostics will start using the Internet. For example, I had to do so, because I changed hard disks in MacBook a long time ago and, naturally, I no longer have a recovery partition. This picture can hang for 5 minutes. If it freezes, then restart your computer.
This is how the diagnostics look like on the MacBook Pro 2011. At the beginning, we find and select the line "Select Russian as the main language":

After that we press "Test":

Apple error codes on MacBook
| Error code | Problem | What to do? |
|---|---|---|
| ADP000 | No problems found | If the problem still exists, then search the Internet for a solution. |
| CNW001 CNW003 CNW004 CNW005 CNW006 |
There may be a problem with the Wi-Fi module. | |
| CNW007 CNW008 |
No Wi-Fi networks found. There are no available Wi-Fi networks, or the Wi-Fi module is defective. | Try a Wi-Fi network at this location on another device. If it works, then you have a problem with the Wi-Fi module. |
| NDC001 NDC003 NDC004 NDC005 NDC006 |
There may be a problem with the camera. | |
| NDD001 | There may be a problem with the USB module. | Disconnect all USB devices and run the test again. Then connect the working device one by one to the Wi-Fi modules and start the test. |
| NDK001 NDK003 NDK004 |
There might be a problem with the keyboard. | |
| NDL001 | There may be a problem with the Bluetooth module. | Try connecting several different devices in the system and check if there really is any problem with Bluetooth. |
| NDR001 NDR003 NDR004 |
There might be a problem with the trackpad. | |
| NDT001 NDT002 NDT003 NDT004 NDT005 NDT006 |
There might be a problem with the Thunderbolt module. | Disconnect Thunderbolt devices. Run the scan again. |
| NNN001 | Serial number not found. | |
| PFM001 PFM002 PFM003 PFM004 PFM005 PFM006 PFM007 |
There may be a problem with the System Management Controller (SMC). | |
| PFR001 | There may be a problem with the computer's firmware. | |
| PPF001 PPF003 PPF004 |
There may be a problem with the fan. | You can theoretically disassemble the laptop, remove the fan and clean it. I do this every six months. |
| PPM001 | There may be a problem with the memory module. | The laptop can be disassembled. Get out the memory modules, if possible, swap the brackets. |
| PPM002 PPM003 PPM004 PPM005 PPM006 PPM007 PPM008 PPM009 PPM010 PPM011 PPM012 PPM013 PPM014 PPM015 |
There may be a problem with the built-in memory. | |
| PPP001 PPP002 PPP003 |
There might be a problem with the power adapter. | Unplug the AC adapter from the wall outlet and from the computer. Reconnect and test. |
| PPP007 | The power adapter has not been tested. | Reconnect the power adapter to a guaranteed working outlet. Run the scan again. |
| PPR001 | There might be a problem with the processor. | Sadness if the error is repeated ... Here it is definitely better to refer to the service. |
| PPT001 | No battery detected. | |
| PPT002 PPT003 |
The battery will need to be replaced soon. It is serviceable, but its capacity has decreased. | On some Mac models, the battery can be completely replaced by yourself. |
| PPT004 | It is required to re-run the diagnostics via the Internet (described at the beginning of the article). Apple uses the most up-to-date battery diagnostics over the Internet. If the problem is confirmed and the battery does not work for you, then think about replacing it. | |
| PPT005 | The battery is installed incorrectly. Shut down and shut down your computer. Your computer needs service. | Disconnect and reconnect the battery. |
| PPT006 | The battery needs service. The battery is defective, although this may not affect performance or capacity. Until the test is completed, you can continue to use the battery without damaging your computer. | I would still replace the battery if the capacity drops to zero, because without it, Mac OS will automatically slow down the computer's performance. Reaches up to noticeable brakes. |
| PPT007 | The battery needs to be replaced. The battery is in good working order, but its capacity has decreased significantly. Until you replace the battery, you can continue to use it without damaging your computer. | The above advice is given! |
| VDC001 VDC003 VDC004 VDC005 VDC006 VDC007 |
There may be a problem with the SD card reader. | |
| VDH002 VDH004 |
There might be a problem with the storage device. | Check hard drives for errors with special utilities. |
| VDH005 | Unable to start OS X recovery. | OS X can even be installed from a USB stick. Look for instructions - it's easy. |
| VFD001 VFD002 VFD003 VFD004 VFD005 VFD007 |
There might be a problem with the display. | |
| VFD006 | There might be a problem with the GPU. | |
| VFF001 | There might be a problem with the audio hardware component. |
What else do you need to know?
The test does not always display errors. Here I have some problems with the SD slot, but the test did not reveal any errors. Extended testing may be required.