Windows 10 disk space management. How to create a local disk
Disk Management is a built-in Windows utility, which allows you to manage your computer's storage devices without using third party software. Of course, the functionality is not very diverse, but the basic tasks of managing drives can be completed.
The article is relevant for everyone Windows versions starting with Seven.
Opening the management console
To get to the management utility, just run command interpreter(press Win + R simultaneously) and enter the command diskmgmt.msc. This method works on all operating systems above Windows 7.
There is another way - open the Control Panel, go to the Administrative Tools folder and launch Computer Management. On the right side of the window that opens, select necessary component.
In addition, in new Windows operating systems, you can right-click on the start button and launch the utility. 
Interface and available operations
The utility's interface is quite simple and intuitive. Upper part contains information about physical storage devices, and the bottom one provides breakdown data. 
At the bottom, opposite the name of the drive, there is a ruler divided by multi-colored rectangles. They show the partition of the drive into logical partitions. The size and name are indicated here. The colors are deciphered at the very bottom of the window.
All actions are performed by pressing right click mouse on the disk. The top and bottom are identical, so it doesn't matter where you call up the control menu. 
However, some options are accessed from the action menu at the top.
Let's look at the main features of Disk Management.
- The first two items Open and Explorer will simply open the disk itself.
- Changing the letter causes the volume label to change. Those. you can delete or change the drive letter to an arbitrary one, but not used in the system.
- Formatting will erase all information.
- Extending the volume will allow you to change the size. And not only increase, but also decrease. However, this will delete all information on the logical drive.
- Compression makes it possible to compress all information located on the selected volume.
- Delete – will simply delete the volume, leaving unallocated space.
Converting drives
We will not consider the above operations in detail, but will touch on the conversion from GPT to MBR and to reverse side. WITH Windows release 10 this operation has become very relevant. 
It is worth noting that this procedure requires complete removal all information on the media, so you must first save the data from the device.
If the device is new and does not contain a structure, then we will be automatically prompted to convert it to MBR or GPT.
Storage with MBR structure detected by any computer and any OS Windows family. But modern PCs use GPT, because... mbr has some limitations:
- Logical volume size should not exceed 2 terabytes
- You can create no more than 4 main partitions on your device.
Because modern drives have much larger size, then these restrictions make the use of mbr not relevant.
By comparison, a disk with a GPT structure can contain up to 128 partitions and can be up to a billion terabytes in size.
The conversion process itself is quite simple. Select the device, right-click on it and select Convert to GPT (or MBR).
Basic and dynamic disk
Windows allows you to configure the drive as basic or dynamic. Computers usually use basic disks. But dynamic ones allow you to implement advanced OS capabilities, such as creating mirrored, striped or spanned volumes.
For conversion, a context menu is used, which can be called up by right-clicking on the disk. 
Volume types
Let's take a closer look:
- Basic – standard for partitions
- Composite – combines two disks. First, data is written to one device, after it is full, the recording moves to another disk.
- Striped – also uses multiple disks for recording, but data is written alternately to all devices on the volume. This provides maximum speed access.
- Mirror – recording occurs simultaneously on two devices. Thus, the failure of one of them will not affect the safety of the data. The access speed in this case may be lower.
For those who have worked with drives, this may remind you of RAID. This is true, only in this case there is no need to use RAID controller.
Creating a virtual disk
Another disk management feature worth mentioning is creating virtual disk. You could say it's a disk on a physical disk. In some ways it resembles a regular one ISO image.
It is often used to work with virtual machines. Such a device is stored in vhd format. 
Creating one is quite simple. Go to the Actions menu, where we select Create virtual disk. Select the location and volume and then confirm by pressing the OK button.
composs.ru
How to open Disk Management in Windows
Greetings! In the operating room Windows system There is a system window "Disk Management". In it you can see the current state of the disks, change the partition letter, and format it.
This window may be of particular interest when connecting a new/third-party media that does not have or presumably has an unsupported Windows file system, for example, the Linux family. To clarify this point, it’s worth looking into this system window.
You can also see in Disk Management reserved by the system or the PC manufacturer (if it is a laptop) technical sections that are not visible in the file itself Windows manager.
In Windows XP and Windows 7, the fastest way to open this window is as follows:
First of all, you need to open the Run window by pressing the Win + R key combination on your keyboard. As a result of this manipulation, it will be displayed.

In this window there will be a line for entering a command, in which you must enter diskmgmt.msc and press the OK key.
In essence, that's all. However, in Windows 8 and Windows 10, the Disk Management window can be opened even easier. To do this, you need to hover the mouse cursor over the Start menu, press the right mouse button and select the item of the same name in the context menu that appears.

As a result, the Disk Management system window will open, in which you can view necessary information and, if necessary, carry out additional actions.

As you can see, the procedure for opening this system window is very simple and does not take much time.
I hope that this manual will help you solve all your problems. If you have any questions, then mandatory state them in the comments.
What will the donations be used for? Details of other payment systems
Hello. It's no secret that things are not going well in the economy right now. in the best possible way, prices rise and incomes fall. And this site is also going through difficult times :-(
If you have the opportunity and desire to help develop the resource, then you can transfer any amount (even the most minimal) through the donation form, or to the following details:
Number bank card: 5331 5721 0220 5546
Yandex Money Wallet: 410015361853797 WebMoney wallet: R865066858877 PayPal: QIWI wallet: +79687316794 BitCoin: 1DZUZnSdcN6F4YKhf4BcArfQK8vQaRiA93
Those who provided assistance:
39 RUR Dennsd - 5 $ Maxim L. - 158 RUR Maria S. - 29 RUR Dmitry D. - 45 RUR The money will be used to pay for hosting, domain renewal, administration and development of the resource. Thank you.
Sincerely, administration of the site IT-Actual.ru
it-actual.ru
Disk Management in Windows 8

Control disk space- a useful function with which you can create new volumes or delete them, increase the volume and, conversely, reduce it. But not many people know that Windows 8 has a standard disk management utility, yet fewer users know how to use it. Let's look at what you can do with standard program Disk Management.
Launching Disk Management
There are several ways to access disk space management tools in Windows 8, as in most other versions of this OS. Let's look at each of them in more detail.
Method 1: Run Window
Use the Win + R keyboard shortcut to open the Run dialog box. Here you need to enter the command diskmgmt.msc and click “OK”.

Method 2: "Control Panel"
You can also open the Volume Management tool using the Control Panel.


Method 3: Menu “Win + X”
Use the Win + X key combination and select “Disk Management” from the menu that opens.

Utility features
Volume compression
Interesting! Before shrinking a partition, it is recommended to defragment it. Read below for information on how to do this:
Read more: How to defragment a disk in Windows 8
Windows 10 has quite flexible hardware for hard drives. Very important tools have appeared: volume compression and expansion. Without them, many felt like without hands. Disk Management in Windows 10 can do everything it does Diskpart team. This is why there is now no point (or at least very little) in using the command line.
The new tool is quite convenient and allows you to perform a whole series interesting operations. Snap sees unused disks, volumes that do not have letters. The only drawback is that you cannot change partition properties. For example, it is difficult to put into operation a hard drive that is write-protected by other utilities.
Where is
The first way to launch the snap-in is very simple:
The necessary tool can be easily called from the command line, the Run line (Win + R), or from bat file via the line diskmgmt.msc. The same is available in the Task Manager (via the File menu).

From Explorer
There are several places in Explorer where you can go to required section. First, the This PC location provides this option via the context menu (called by right-click):

Another way is to go to the This Computer location, where the option we need appears in the menu.

How to use
The screen shows not only the physically available hard drives and USB drives, but also the ports for them. This makes it a little difficult to understand, but in general you can figure it out.

On the screen you can see as many as 2 missing devices, which are still presented in general list. The tool allows you to quickly perform the following operations:
- Formatting.
- Delete.
- Creation.
- Resize.
We directly hint that Billy Gates is gradually surviving third party utilities. This time (with an update to ten) it dealt a powerful blow to antiviruses and storage management utilities. And not only for them. In the equipment in question most operations are available via right click on the section. So there is no point in studying the menu. In contrast, clicks prevent you from accidentally applying an operation to another partition.
Creating a section
Most of the population is frightened by novelty. And in vain. At one time, the authors, using two parallel-connected HDDs and combining them into a RAID array, were able to speed up PC loading up to 45 seconds (XP and Pentium). For such an old piece of hardware as the hardware was, this is an excellent result (before that, it barely performed the same task in 5 minutes). To create new volume, you need to allocate space for it. This can be an unallocated area of the hard drive, or a piece resulting from compression of an adjacent volume:

Let us illustrate both cases with an example.
Striped volume

Split Volume

Removing partitions
Right-click on the annoying disk and click Delete Volume... The operation will not take much time...
Shrink or expand a volume
If there is free space, the disk can be compressed. When you select this option, the wizard will evaluate the prospects and a window will appear with options such as:
- Overall size.
- Free space.
- Volume volume after compression.

Select required parameters and click Compress. The expand option is only available if there is an unallocated area on the hard drive. In the same way, the wizard will prompt you to set the values.
Formatting
There's no point in formatting local disk from Snap. Use File Explorer (Win + E) instead. Right-clicking on the volume and selecting the appropriate option will allow you to do everything in the best possible way.

Renaming and assigning a letter
If you need to mark disk D for quick recognition and entry visual differences, use the same Explorer. Right-click, go to Properties and perform the necessary operations.

Disk Management in Windows 10 offers more functionality compared to previous versions. Every user sooner or later faces the need to break hard drive into several sections for storage personal information and data. Therefore, many users are interested in the question of how to open disk management on Windows 10.
Disk storage management
Every gadget running the Windows 10 operating system has a primary storage device that contains system files OS, default location path for programs, data files.
If hardware allows, you can expand your storage capacity by performing backups. For these purposes, other memory devices are connected to the personal computer. They can be internal, external and virtual. To control all storage devices, you can use the disk management console and other tools.
Modern media are independent disk gadgets. They use fast and quiet flash memory. Such devices include, for example, solid state drives And portable usb disks. Another option is flash card storage (the most popular MicroSD format, most often used in smartphones and other devices). Devices that connect to Windows 10 via a USB port appear as storage devices.
In Windows 10, the hard drive is usually divided into volumes. Volume is the same as section. On regular disks more laptops, personal computers are used simple volumes. Using the controls, it is possible to make simple disks dynamic, as well as combine physical ones into composite ones. You can also merge into those disks that are striped or mirrored, and you can also combine into RAID-5 volumes.
Some of the features of the Windows 10 operating system hide drive letters ( good example- this is the explorer library). System, any additional external and internal disk uses NTFS to store file systems.
Small removable devices use FAT32 or ExFAT.
Disk Management is a built-in utility that is found in the Windows 10 system. It allows you to control storage devices without installing additional programs. Its functions are limited, however, the main problems associated with managing drives can be solved with its help. Some users prefer to replace this utility with the command line, but you can use both.
The "Storage" section gives detailed information about activities hard drives, and also allows you to clear it of unnecessary additions and temporary data. All this makes it possible to find out what exactly is stored on the hard drive. The operating system most often uses 2 partitions: drives C and D. However, if desired, their number can be increased. The storage helps to divide all available files and information into categories for convenient use.
Disk Management
Before you manage partitions hard drive, you need to open the utility. To do this, follow these steps:
- Press the Win+X key combination.
- A menu will appear from which you need to select the “Disk Management” line.
There is another way to open Disk Management:
- Press the key combination Win+R.
- A line will appear in which you need to write the command “Diskmgt. msc".
- From the task manager, select the "File" button.
- Click on “Disk Management”.
You can use the command line. To do this, you need to enter the phrase “DiskPart.exe”.
If opening the utility is accompanied by an error connecting to the service, you need to check whether the installed personal computer antivirus file Dmdskmgr.dll. If it is missing, you should install it in its original place. You can find it on the boot Windows disk 10 or using the system file check command, which is executed as follows:
- the Win+R key combination will call command line, in which you need to enter the letters cmd;
- The command “Sfc” is entered, then “Scannow”;
- to check the data, the program must specify the route to the location where the installation disk with the Windows 10 operating system is located;
- After this, scanning will begin.
The utility's interface is quite simple. The top section contains information about physical devices memory, and the bottom shows the breakdown data.

At the bottom opposite the name of the drive there is a ruler, which is divided by multi-colored rectangles. They reflect the breakdown of the storage device into logical partitions. The data contains the volume size and name. The explanation of each color can be found at the very bottom of the control utility window.
Each action is performed using the right mouse button. Both parts of the interface are the same, so it doesn't matter where you call the control menu from.
Certain functions are only available in the Action menu located at the top.
The main functionality of the utility is as follows:
- The “Open” and “Explorer” items open the disk itself.
- The volume label is changed by changing the letter. This means that it is possible to delete or convert a letter to any of those that are not used in the system.
- The formatting option erases all data and information.
- If you expand the volume, the size will change. It can change either positive or negative. All materials on the logical drive will be deleted.
- The Compression function compresses all information on the selected volume.
- The Delete option removes the volume and leaves unallocated space on the disk.
Creating a new volume on free space
Creation instructions:
- First, open the utility for interacting with disks. To do this, on the desktop or through the “Start” button, you need to right-click on the “My Computer” icon and select the “Manage” option.
- Then in the dialog box you need to click on the line “Disk Management”.
- IN open program sections that are available for editing are shown. To create a volume, click on the local disk icon.
- Click on the Shrink Volume option from the drop-down menu. The volume is compressed so that the disk appears free space. Further the system in automatic mode determines the amount of free space and calculates it.
- After some time, a window appears with the results obtained. Here you can only change the option “Size of compressed space (MB)”. This is quite enough for the editing procedure. You need to think about how much disk space to take to create a new one in MB. Next, click on the “Compress” button.
- The compression process starts.
- At the end of the action, the “Disk Management” window appears, but with a new “Free” partition. In the table it is marked with a green stripe. You need to right-click on it and select “Create simple volume” from the drop-down menu.
- After this, the “Create a Simple Volume Wizard” will open.
- There is no need to edit anything in the window with the “Resize” offer, because the size was specified when the disk was compressed, so you can just click “Next”.
- You are asked to select a letter for the name of the new disk, a volume label.
- An important point: there should be a checkmark next to the “Quick formatting” line.
- After reviewing all the selected parameters, you can click on the “Finish” button.
The procedure for creating a new volume on free space is completed.

Another way to create is the command line. To do this you need:
- Open the command line (must have administrator rights).
- Enter diskpart and press “Enter”.
- In the “Diskpart” line, enter “List disk”. The command displays a list of disks available on the personal computer. It helps you find the disk number with free space.
- Enter the command “Select disk” with the volume number and press “Enter”.
- Enter the command “Create partition primary”. A notification appears about successful creation the specified section.
- Enter the command “List volume” and press “Enter”.
- Format volume to file NTFS system. To do this, enter the command “Format fs=ntfs quick” and press “Enter”.
- Assign a drive letter: enter the “List volume” command indicating the volume number.
- The “Assign” command will automatically set the letter; if you enter the “Assign letter=f” command, you can select the letter yourself. To do this, you need to replace f in the command with the desired letter.
Creating partitions
You can divide disks into volumes when installing the operating system. Windows systems 10. Installation disk he himself, at the very beginning of the work, suggests performing an operation to format the hard drive.
If the user wants to perform this procedure when reinstalling windows, then he must remember that this process will delete all data that is on the hard drive.
To create new partitions when installing the operating system, you need to do the following:
- Enter key Windows activation 10 during installation.
- Click on the “Custom installation” option.
- Select the partition to install.
- To create 2 volumes from the HDD, click on the “Delete partition” line; it will be renamed “Unallocated disk space”.
- Select an empty space and click on the “Create” button.
- Set the size of the future local drive C. There will be unallocated space left that is needed similar method change to the second section.
- Once partition #2 is created, it needs to be formatted. There can be as many volumes as you like, everything will depend on the size of the hard drive memory.
- Select the volume that was created before and click on the “Next” icon.
At the end of the procedure the user receives broken hard disk with system and logical volumes.
In addition to the built-in ones, there are other utilities for interacting with partitions: Aomei Partition Assistant Free and Minitool Partition Wizard Free. All of them are in open access on the Internet.
Instructions for using the program
Aomei Partition Assistant is - free utility, which can be downloaded from the official website. To do this, perform the following steps:
- Launch the program.
- Select a disk that does not belong to the system.
- Right-click on it and select the line “Resize partition”.
- Set the size of the new partition.
- Click on the system local drive C and select the line “Resize partition”. A notification will appear indicating that you need to create a recovery image of Windows 10 or a backup copy of it using other means.
- Save changes made, to do this, click “Apply” in the upper left corner.
- A warning will appear about several reboots, during which the procedure for merging drive C with free space will occur. Here you need to click “Go”.
- The program will work in PreOs mode. The system will reboot.
- When you boot for the first time, the operating system will start the mode AOMEI Partition Assistant PreOS Mode. This means that the process of completing the task has begun.

Logical volumes are easy to use. When reinstalling the system, information from the logical partition is not deleted. Disk management in operating system Windows 10 is not a complicated procedure, but it does require certain skills.
Often it is not enough to work with a hard drive standard tools offered by the system. And therefore we have to resort to more effective solutions that allow us to obtain detailed information about the HDD and its partitions. The solutions discussed in this article will allow you to familiarize yourself with the operations applied to the drive and its volumes.
Thanks to its tools, AOMEI Partition Assistant is one of the best programs in its own way. Wide functionality will allow you to efficient setup volumes of hard disk. In addition, the program makes it possible to check a specific section for errors. One of interesting features– this is transferring the OS with all installed software to another hard drive or SSD.

Writing an image file to a USB device is also supported. The interface is endowed with a pleasant graphical shell. Despite the large number useful functions, the program is available for free use, which makes it even more in demand. At the same time, it is possible to download the Russian version.
MiniTool Partition Wizard
This software has powerful functionality that allows you to merge, split, copy partitions, and a number of other functions. MiniTool Partition Wizard is completely free and available for non-commercial use only. The program provides the ability to change the disk label, and when creating a partition, the cluster size.
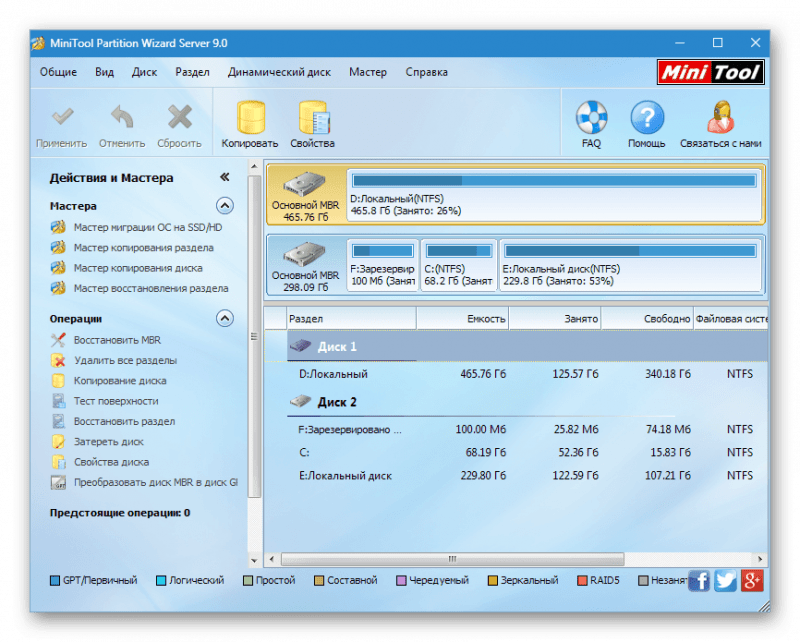
The surface test operation allows you to detect bad sectors on the HDD. The ability to convert is limited to only two formats: FAT and NTFS. All tools for working with disk volumes are located very in a convenient way, so even inexperienced user won't get confused.
EaseUS Partition Master
A program that opens up many possibilities when working with a hard drive. Among the main ones: disk cloning and importing the OS from HDD to SSD or vice versa. Partition Master allows you to copy an entire partition - this function is suitable if you need to create a backup copy of one partition to another.

At the program user-friendly interface, in which all operations are in the left block - this allows you to quickly find the desired function. Peculiarity EaseUS Partition Master is that with its help you can hide a specific volume by deleting a letter on it. Creating a bootable OS is another interesting and useful tool.
Eassos PartitionGuru
Convenience of working with Eassos PartitionGuru is achieved primarily due to its simple design. All instruments are located on top panel. Distinctive feature is the ability to build a virtual RAID array. To do this, the user just needs to connect drives to the PC, from which the program itself will construct a RAID.

The existing sector editor allows you to search for the required sectors, and the right block of the panel displays hexadecimal values. Unfortunately, the software is supplied in an English trial version.
Macrorit Disk Partition Expert
A pleasant interface displays functionality, which is divided into sections. The program allows you to scan your PC for bad sectors, and you can configure the disk space to be checked. Conversion available NTFS formats and FAT.

Macrorit Disk Partition Expert is free to use, but only in the English version. The software is suitable for people who need to conduct quick setup hard drive, but for more efficient work It is recommended to use analogues.
WonderShare Disk Manager
Program for implementation various operations With hard drive, allowing high-quality data recovery. Compared to other similar software, Macrorit Disk Partition Expert allows you to deeply scan partitions for lost information.

You can trim and merge hard disk volumes without losing files stored on it. Other tools will allow you to hide the partition if necessary or convert the file system.
Acronis Disk Director
Acronis Disk Director is one of the most powerful programs with a set of functions and operations for management sections of hard disk and more. Thanks to the capabilities of this software from Acronis, users can recover lost or deleted data. Among other things, it is possible to defragment the volume and also check it for file system errors.

The use of mirror technology allows you to save backup copy section selected by the user. Acronis Disk Director suggests using a disk editor, which makes it possible to find a lost cluster, taking into account the fact that the execution environment for this operation displays hexadecimal values. The program can be safely used to carry out the most efficient work with the HDD.
Partition Magic
A program that allows you to perform basic operations with a hard drive. The interface is very similar to standard application Windows Explorer. At the same time, among the instruments located in graphical shell, easy to find what you need. The advantageous feature of Partition Magic is that it allows you to select multiple active partitions, each of which has its own separate OS.

You can also use file system conversion services, two of which are supported: NTFS and FAT. You can resize the volume and merge partitions without losing data.
Paragon Partition Manager
Paragon Partition Manager pleases users with an interesting set of functions and purposes for their use. One of them is connecting a virtual disk image. Among them, image files are supported, VMware and other virtual machines.

A noteworthy feature is that it allows you to convert HFS+ file system formats to NTFS and vice versa. Other operations are basic for partitions: trimming and expanding. Large quantity The settings provided by the program will allow you to customize all the functionality to your liking.
Reviewed software solutions have unique potential, each in its own way. The powerful tools of the developed software make it possible to save disk space and extend performance of hard disk. A function HDD checks error detection allows you to prevent critical errors in the operation of the drive.
In this video we will look at the use standard utility for managing your computer's disk space in the Windows 10 operating system.
Disk Management panel
Right-click on the Start button and select “Disk Management” from the menu that appears. In the new window we see two areas. At the top – a list is displayed logical devices, sorted by volume title. Here you can find information about the status of the disk, its capacity and free space.
When to wait for full Windows boot It’s already unbearable and I want to speed up the process, it’s time to puzzle myself with the question of where unnecessary applications are disabled.
The bottom pane displays the physical drives. So for one physical hard disk, several logical devices can be created, which are displayed in upper area. And if physical disks If several are connected, then in the lower area it is easy to determine which volume belongs to which drive.
Changing disk sizes
To resize logical drive, right-click on it and select “Shrink Volume”. The compressed space can later be added to another logical volume of the same physical drive or another partition can be created. Please note the volume compression limits information.
Enter the number of megabytes you want to use in the future and click the "Compress" button. The size you entered will now appear as unallocated and will be highlighted in black. This area can be added to another volume by selecting from context menu"Extend volume" item. True standard Windows tool expand system disk S: It won’t work.
Creating Volumes
Any unallocated space on the disk can be made available by simply creating new area logical drive. Select “Create a simple volume” from the context menu. The Volume Creation Wizard will open, click “Next”, select the size and assign a letter to the new disk.
In the Format Partition window, use the default values and enter a volume label name for the new disk. “Done” and you have a new volume for future use.
If Windows 10 not only automatically downloads and installs updates, but also automatically reboots, it’s time to tame the operating system.
Changing the volume letter
If you want to change the letter existing volume, just right-click on the partition and select “Change drive letter or drive path.” And do it simple steps according to the purpose of the new letter.
Formatting a partition
To format a disk partition, right-click on it and select “Format”. In this case, you can change the name of the section, it file system and cluster size. When formatting a drive, keep in mind that all data on the drive will be erased, so make sure you save everything you need on another drive.
Deleting a partition
To delete a partition, select “Delete Volume” from the context menu. When deleted, all files will also be lost, and all occupied space will be marked as unallocated. This area can later be expanded to another existing volume.
For more information on working with a hard drive, see our videos “” and “”.


