Vista Wi-Fi connection. Wi-Fi setup for Windows Vista - Powered by Kayako system
Go to the "Start" menu - "Control Panel".
Click on the left "Switch to classic view", select "Control Center
networks and sharing.


We find in the list "Wireless Network Connection", right-click on it
mouse and select "Properties" from the drop-down menu.

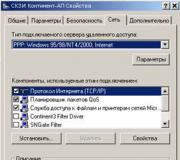
Open Internet Protocol Version 4 (TCP/IPv4) in Properties and click Properties.

We get all parameters automatically. After entering the settings, click the "OK" button.
In the "Wireless Network Connection - Properties" window, also click "OK". So
Thus, we will return to the "Manage Network Connections" folder. By label
"Wireless Network Connection" right-click and select
"Connection / Disconnection".

You will see the "Connect to the network" window. In the list of found wireless networks
find and highlight your network. In the example, we created AT. Then we press the button
"Connect".

In the next window, you need to enter the wireless network access key. Enter the password and
press the "Connect" button.

If the connection is successful, the following window will appear.

Click the "Close" button.
This completes the wireless network setup!
How can I set up Wi-Fi in Vista?
Master's response:
All laptops have special adapters that allow them to work with wireless “Wi-Fi” networks. In order to properly configure the parameters of such a connection, it is necessary to take into account a number of nuances. These subtleties are due to the fact that the operating parameters of wireless devices are very diverse.
Before connecting to a new wireless network, reset all settings of the “Wi-Fi” adapter. If you are running the “Windows Vista” operating system, left-click on the network icon in the tray. Go to "Network and Sharing Center". Select the "Change adapter settings" option. Find the “Wi-Fi” adapter icon and select its properties.
Find the Internet Protocol TCP / IPv4 and activate the item "Obtain an IP address automatically" and the item "Obtain DNS server address automatically". Save the received settings and return to the network and sharing center. Go to the start menu.
Select the "Connection" option and the "Set up a network connection" option. Go to the menu "Connecting to a wireless network manually" and fill in the table suggested by the program. Be sure to include a network name. It must match the name specified in the access point settings. Determine for yourself the type of radio signal and security system. Enter a password.
Select the network you just created and right-click on its name. In the "Properties" item, find the "Connection" tab. Perform the necessary activation of the desired parameter: "Connect automatically if the network is within range." Another necessary condition that must be activated is "Connect even if the network does not broadcast on its own behalf." In the future, this will ensure the efficient and uninterrupted operation of your laptop on the network.
Select the "Security" tab. Check again the parameters you have already set. Once again, make sure that you are using the correct encryption type “TKIP“ or “AES“. If all indicators are normal, click on OK. Go to the list with available wireless networks and select "Connection". Establishing a connection with the selected access point has been successfully established.
Sergey Pakhomov
When you start working with the new Windows Vista operating system, the problem of setting up network connections arises. The difficulty lies in the fact that, having got used to the interface of the Windows XP operating system, it is impossible to quickly switch to the new interface offered by Windows Vista. In general, the first impression of the Network and Sharing Center (that's what the network connection settings dialog box is called in Windows Vista) is by no means unambiguous. It seems that, wanting to simplify everything as much as possible, the developers left the entire configuration process at the mercy of the corresponding Network Connections Setup Wizard. But it looks like they overdid it, and as a result, things only got more complicated. Gone is the transparency and simplicity that was inherent in Windows XP, and instead we got a lot of dialog boxes that are easy to get confused. But Windows Vista provides tools that improve the security and reliability of network connections, which, of course, is its undoubted advantage.
In this article, we will take a closer look at all the nuances of creating network connections using the Russian version of Windows Vista Ultimate (32 bit) (build 6.0.6000) as an example.
In the Microsoft Windows Vista operating system, all network connection settings are made in the window. To access it, click on the desktop icon. Net right-click and in the context menu that opens, select Properties(Fig. 1).
Rice. 1. Accessing the Network and Sharing Center window
This will open a window Network and Sharing Center(Fig. 2), in the right part of which the status and properties of the computer's connection to the Internet and local network are displayed, and in the left part - the taskbar with links to other dialog boxes related to settings, management, viewing and diagnostics of network connections.

Rice. 2. Network and Sharing Center window
First, let's consider connecting a computer running Windows Vista to a local network using a wired interface, that is, connecting via an Ethernet network.
Until the necessary settings have been made on the network controller of the computer to connect it to the local network, in Network Sharing Center computer connection status will be displayed as No connection or as a connection to Unidentified network.
To include a computer in the local network, first of all, you need to find out whether it uses a DHCP server or whether each computer on the network is assigned a static IP address. However, the second option is quite rare - as a rule, it is used at home, when two or three computers are connected to the network. But even if the home network is built on the basis of a router with Internet access, the router itself is often used as a DHCP server, which necessarily has a built-in DHCP server. In the case of corporate networks with dozens or more computers, the standard solution is to use a DHCP server.
A DHCP server allows all computers on a local network to automatically obtain IP addresses from a predefined range of IP addresses. Actually, in this case, no specific settings are required on the network controller. With default settings, the network controller will attempt to obtain all network addresses (own IP address, default gateway IP address, DNS server IP address) automatically.
In order to configure the computer's network controller to automatically obtain IP addresses, or to set IP addresses manually, you must in the window Network and Sharing Center click the link on the taskbar Network connection management. In the opened window Network connections(Fig. 3) select the network interface we need (if there are several) and, by right-clicking on it, select the item in the context menu Properties.

Rice. 3. Network connections window
This will open the network connection properties dialog box ( LAN connection-properties) (Fig. 4), which practically does not differ from a similar window in the Windows XP operating system.

Rice. 4. Network Connection Properties Dialog Box
Going to the point, click on the button Properties, after which the well-known (for those who have experience in setting up network connections in Windows XP) TCP / IPv4 protocol properties window should open. It sets the IP addresses of the network controller, default gateway, and DNS server.
If a DHCP server is used in the local network, then in the properties window of the TCP / IPv4 protocol, check the box Obtain an IP address automatically and paragraph Obtain DNS Server Address Automatically. (Fig. 5). These Network Controller settings are used by default.

Rice. 5. TCP/IPv4 protocol setting
If you need to connect to a local network that does not use a DHCP server, you must manually assign an IP address to the computer and set the subnet mask. Naturally, the assigned IP address must be from the same subnet as all other addresses of computers on this local network. Also, if your local network has a router with Internet access, you must also specify the IP address of the default gateway (the IP address of the router with Internet access) in order to access the Network.
After the network interface of the computer has been configured, it will be connected to the local network and in the window Network and Sharing Center the connection status will be displayed with the name of the network to which the PC is connected. For example, if the computer is connected to a network domain, then the name of the network domain will be displayed as the network name (Fig. 6).

Rice. 6. Network Sharing Center window
and sharing with status display
network domain connections
After connecting the computer to the local network in the window Network and Sharing Center it will be possible to make additional settings for the network connection.
To do this, select the link on the taskbar Setting next to the local network name. In the opened window Network location setup(Fig. 7) you can specify the name of the created network connection (for example, HOME LAN), select the icon for this connection and the type of network location ( public or Private). As for the home network, it is better to set the location type Private, as this will allow your computer to discover other computers and devices on the local network and make it possible for them to discover your computer. For a public network (for example, if we are talking about a wireless hotspot), it is better to use the placement type public. In this case, the discovery of computers on the network will be limited, as well as the use of the network by some programs.

Rice. 7. Set network parameters
After the network settings are configured, in the window Network and Sharing Center you can view the full network map by clicking on the link View full map. It should be noted that the correct network structure is displayed only in the simplest cases, and if the local network is more or less complex, then it is not necessary to expect its correct display. For example, in our case, a home LAN was used, consisting of three computers and two wireless routers operating in the distributed wireless network (WDS) mode and, accordingly, connected to each other via a wireless interface. A laptop and a computer were connected wirelessly to one router, and another computer was connected to the other via a wired interface. A diagram of such a network is shown in fig. eight.

Rice. 8. View full LAN map
As you can see, the Network and Sharing Center does not correctly display the network diagram. First, the wireless router appears as a wireless access point and its associated switch, not as a single device. The second wireless router generally appears as a switch, and the wireless connection between the two routers is defined as a wired connection between two switches. Therefore, you should not trust the displayed network diagram. At the same time, we note that the created network map allows you to quickly view the IP and MAC addresses of all computers and network devices that are part of the local network. To do this, just move the mouse pointer to the icon depicting a computer or network device, and the tooltip will display the IP and MAC addresses of the network adapter (network device).
In addition to the ability to set the type of location of the local network ( Private or public), in the Network and Sharing Center window, you can fine-tune all the settings for accessing the computer to the network, as well as the settings for accessing the computer from the local network. Thus, it is possible to control (turn on and off) the following access parameters:
- network discovery;
- file sharing;
- sharing public folders;
- use of shared printers;
- shared access with password protection;
- sharing media files.
Access option Network discovery determines whether this computer will be visible to other network computers and devices, and whether, in turn, this computer will be visible to other network computers.
Parameter File Sharing determines whether files and printers that are shared on the computer will be available to other network users.
Parameter Sharing public folders determines whether network users can access files located on the shared folder. However, you can enable shared folder sharing so that network users can open, modify, and create files in shared folders on this computer, or only open them for reading.
Parameter Using Shared Printers determines whether the printers connected to this PC can be used by other network users.
When the option is enabled Sharing with password protection access to shared files and printers will be available only to those users for whom accounts and passwords have been created on this PC.
When the option is enabled Media Sharing network users will have access to music, pictures and videos stored on this PC, and the computer itself will search for shared files of this type on the network.
After the computer is included in the local network, the Network and Sharing Center allows you to quickly access the browser on the local network. To do this, it is enough on the taskbar in the window Network and Sharing Center select link View computers and devices. After that, a window will open Net(Fig. 9), which will display all computers on the local network and network devices. By clicking on any of these computers (devices), you can access it, if it is provided by the security policy.

Rice. 9. Viewing computers that are part of the local network
Note that the web browser can also be accessed by left-clicking on the icon Net on the desktop.
The next feature provided by the Network and Sharing Center is the ability to select the local network to which you want to connect. It is important when there are multiple wireless LANs.
To set up wireless connections, the Network and Sharing Center offers a special wireless setup wizard. To set up wireless connections on the taskbar in Network and Sharing Center link must be selected. After that, a window of the same name will open (Fig. 10), in which you can create a new profile (or edit an already created one) for connecting to a wireless network.

Rice. 10. Manage Wireless Networks window
To create a new wireless network connection profile, you must first either configure the wireless adapter to automatically obtain IP addresses, or manually enter all IP addresses.
To configure the wireless adapter, select in the window Wireless Network Management item on the taskbar Adapter properties. This will open the already familiar wireless network adapter settings window. Going to point Internet Protocol Version 4 (TCP/IPv4) and pressing the button Properties, we get to the standard window in which you can set the IP address of the wireless network adapter, subnet mask, IP address of the main gateway, as well as the IP addresses of the primary and secondary DNS servers.
If you are talking about a public wireless hotspot network, you need to configure the wireless network adapter to automatically obtain all IP addresses (these are the default settings). For a home network based on a wireless access point or wireless router, you may need to manually enter IP addresses.
After configuring the wireless network adapter, you can start creating a new wireless connection profile. To do this, in the window Wireless Network Management on the taskbar, select Add. After that, a dialog box will open (Fig. 11), offering three options for creating a wireless connection profile:
- add a network within the range of this computer;
- create a network profile manually;
- create a computer-to-computer network

Rice. 11. Options for creating a wireless connection profile
If your wireless access point or wireless router is active and your computer is in range of an unsecured wireless network, you might want to use the Add a network within range of this computer.If you select this option, a window will open with a list of all detected wireless networks (Fig. 12). By selecting an unsecured wireless network from this list, that is, a network that does not use authentication and data encryption protocols, and clicking on the button connect, you can connect to that wireless network. After successfully connecting to the selected wireless network, you will be prompted to save the settings of this network, that is, create a wireless connection profile for a specific network. If you plan to repeatedly connect to the selected wireless network, then it is advisable to save the connection profile, however, if you connect to the network once, you do not need to create its profile. If the option to save connection settings is selected, then in the window Wireless Network Management a new wireless network connection profile will be added.

Rice. 12. Window with a list of wireless networks,
within the range of which the computer is located
If you plan to create a connection profile for a secure wireless network, then in the dialog box Connecting to a wireless network manually you need to select a connection option Create a network profile manually. If you select this option, a dialog box will open in which you must specify the network name, security type, and encryption key. In addition, in the same window, you can specify options such as the ability to automatically connect to this network (Fig. 13).

Rice. 13. Profile setup
wireless connection when connected to a secure network
It should be noted that in the current implementation of Windows Vista, the wireless connection setup wizard does not work quite correctly when connected to a secure wireless network (what to do - there are still many "glitches" in Vista!). Therefore, do not be surprised that after creating a wireless network profile using the method described above, you will not be able to connect to it - the profile must first be edited. For example, if you connect to a secure network that uses WEP encryption, then when you set the security type to WEP and enter the security key in the generated profile, WEP encryption will be used, but without user authentication (security type - No authentication(open)). In addition, the specified network name will also serve as the SSID. Naturally, these settings may not allow you to connect to a secure network, and therefore the first step is to fix the "glitches".
In the window Wireless Network Management select the added profile and right-click on it. To change the network name (but not the SSID network), select the item in the context menu Rename(Fig. 14). This will allow you to enter a new network name other than the SSID network.

Rice. 14. Rename the wireless network
Then again right-click on the added profile and select the item in the context menu Properties. This will open a window Network security properties. On the tab Connection you can specify the method of connecting to the network, and on the tab Safety- security type (authentication method), encryption type and enter the encryption key (Fig. 15). It is on this tab that you can fix Microsoft errors. Specify the required security type (authentication method), encryption type, and re-enter the encryption key. Only after that the created profile will allow you to connect to a secure wireless network.

Rice. 15. Setting the authentication method
and type of encryption in the wireless network
Another useful feature provided by the Network and Sharing Center is the ability to launch the New Connection Wizard. To launch this wizard from the taskbar in the window Network and Sharing Center select link Setting up a connection or network. This will open a window of the same name (Fig. 16), which will offer several options for creating connections or network settings:
- Internet connection;
- setting up wireless routers and access points;
- connecting to a wireless network manually;
- setting up a wireless network "computer - computer";
- setting up a telephone connection;
- connection to the workplace.

Rice. 16. Set up a connection or network window
Option Internet connection allows you to configure a wireless, high-speed (using the PPPoE protocol) or telephone (using an analog modem or ISDN) connection to the Internet (Fig. 17).

Rice. 17. Dialog box Connect to the Internet
Choice of option Setting up wireless routers and access points launches the router (access point) configuration wizard. Naturally, to run this wizard, it is necessary that the computer is connected to a router (access point). The setup wizard offers two configuration methods: it allows you to either open the web interface of the router (access point) and then manually configure the device, or pre-create all secure wireless network settings (network profile) and save them to a flash drive with the possibility of later transferring to the router and other computers. True, for this, the router (access point) must support configuration from a flash drive.
Choice of option Connecting to a wireless network manually leads to the launch of the already familiar wireless network setup wizard.
Option Setting up a wireless network "computer-computer" allows you to configure a wireless network in Ad-Hoc mode, that is, in the mode of interaction of two computers with each other directly, without using an access point.
Option Setting up a telephone connection designed to set up an Internet connection using an analog modem. This option duplicates the wizard that is launched in the option Internet connection when choosing a telephone connection method.
Option Connecting to a workplace allows you to set up a VPN connection to the Internet.
24.03.2015
The wi-fi function is the most important element of laptops, which is very popular today. A laptop without wifi is like gas-prom without gas.
Usually, when buying a new laptop, the wifi function is turned off by default or you have to manually configure the wifi settings.
Configuration is carried out on different operating systems in their own way. There are also external settings that differ by laptop models (turned on using the keys).
In this article, I will tell you how to enable wifi on different laptops and how to make internal settings.
First of all, you need to configure the router and check if wifi is enabled on the router itself. You can enable disable wifi on the router in two ways:
1. There is a wifi button on the back of the router to turn it on and off.
2. Wifi is turned on and off in the internal settings of the router.
We perform an external inspection of the laptop, if you see an icon in the form of an antenna that is lit, this means that wi-fi is on, if it is not lit, then it is off.

If you see the "X" sign on the wi-fi sign at the bottom of the panel, it means that the network is turned off.

For almost all laptop models, there is a mechanical wifi switch or built-in software that turns wifi on and off. Laptop with mechanical wi-fi switches.

How to enable wifi on different laptop models
Notebook HP:

HP Connection Manager software.
To open the program, go to "Start" - "All Programs" - "HP Connection Manager". Open this program in front of the device, press the power button. We look at the picture

asus laptop:

For asus laptops, wi-fi is turned on using a mechanical switch (on or off button).
In this case, wi-fi control becomes convenient, but if the switch fails, there will be some problems.
Also, wi-fi is controlled using the Fn + F12 key combination on the keyboard, hold the Fn key and press F12
acer laptop:

But some models of acer laptops do not have a button on the case to turn wi-fi on and off. Therefore, the Fn + F12 keyboard is used to control the wi-fi connection. It is necessary to press Fn and without releasing press F12.
lenovo laptop:

To turn on wi-fi on lenovo laptops, use the Fn + F5 keys. Press the Fn key and without releasing press F5. After performing such actions on the laptop, the wi-fi indicator should light up
samsung laptop:

To connect a laptop to a wireless wi-fi network, you need to press the combination Fn + F9 on the keyboard. Hold Fn without releasing press F9. As in all cases, if the connection to the network is successful, the indicator on the laptop will light up.
Toshiba laptop:

To activate wi-fi on Toshiba laptops, use the Fn + F8 key combination. Again, hold down the Fn key while holding down press F8.
Internal wifi setup on laptop
These settings are dependent on the operating system, which is configured in its own way. Basically, all settings are related to wi-fi is in sleep mode. they need to be turned on manually in some cases. Consider the settings on each windows operating system. Before starting the settings, check the following parameter.
On the bottom panel on the desktop, look for the battery charge sign. Right-click on this sign and select "Windows Mobility Center".
The wireless network section that opens in the window is looking for, make sure that it is on.

How to enable wifi on a laptop with windows 7 operating system
Open Start, go to Control Panel, select Network and Internet. The window that opens, go to "Network and Sharing Center". Next, on the left side of the window, go to the "change adapter settings" section.

After we open the window with wireless networks. Right-click on "wireless network connection", select "enable",

if the network is on, leave everything as it is. If the data section is enabled, then the window that opens will contain available wifi points.
Select the desired network and click connect. If you specified a password when setting up wifi on the router, then when you connect to the network, your laptop will require that password from you, enter the password and press ok.
How to turn on wifi on windows vista laptop
In order to set up wifi on windows vista, you must follow the same steps as on windows 7.
We go to "start" and open the "control panel". On the left side, click "switch to classic view".
Now you need to select "Network and Sharing Center". On the left side of the window, click "manage network connections".
Now go to "manage network and connections" right-click on "wireless network connections" and click "connect".
After performing such actions, a list of wifi connections will open. Select the desired connection, click connect, if necessary, enter the password, click ok.
How to turn on wifi on windows xp laptop
In order for the laptop to be able to connect to a wifi network on the windows xp operating system, you must perform the following steps.
Click "start", open "control panel", go to "network connections". Right-click on the "wireless network connection" section.
Right-click on "connection" and select "view available wireless networks". A window will open in this window, click on "Change network preference order".
Next, click on "network and access point" click on the checkmark "automatically connect to the network." Now we go to the "view available wireless networks" section, select the network you need and click "connect". If everything is done correctly, a message will appear on the taskbar in the lower corner that a completely successful connection to wifi.
If, when applying the above settings, it was not possible to turn on wifi on the laptop, then you need to check the following parameters.
Installing wifi adapter driver on laptop
In order to check if the wifi adapter driver is working, you need to go to "start" "control panel" "system and security" and click "system". Next, go to the left side of the "Device Manager" window

Opened in the window, go to the network adapters section. If there is a yellow triangle with an exclamation mark as in the picture

This means that the driver is not working, to fix this situation, click on the non-working driver with the right mouse button, select "update driver".
In the window that opens, select "automatic updates", in the event that you have Internet access. Or go to the official website of the manufacturer of your laptop, in the drivers section, download the required driver.
In practice, there are cases when the wi-fi adapter is disabled. In this case, right-click on the adapter and click "enable".
There are also cases when the adapter is under the energy saving filter. To check if the adapter is under this filter, go to the "control panel" "security system" "system" "device manager" then right-click on the driver itself, click "properties" that opens in the window, go to "power management"

In this window, uncheck the box "Allow the computer to turn off this device to save power."
On this question, how to enable wifi on a laptop is resolved. I hope the information was useful to you. If you have questions write comments.
1) In the "Start" menu, select "Control Panel"

2) In the "Control Panel" in the "Network and Internet" section, select "View network status and tasks"
Note: If in the "Control Panel" go to the classic view, then you need to select the item "Network and Sharing Center"

The following window will open in front of you:


4) In the opened window you can:
a) View the properties of the wireless network adapter and configure it
b) Add a wireless network

a) Viewing the properties of the wireless adapter and configuring it
1) Click on the "Adapter Properties" button

2) Next, in the window that appears, select the "Internet Protocol Version 4 (TCP / IPv4)" item and click the "Properties" button, which is located just below the item you selected. As a result, the "Properties: Internet Protocol version 4 (TCP / IPv4)" window should open in front of you.


After entering all the settings, click "OK". Setup completed.
Note: If when you click the "OK" button, the message "This IP address is already in use" appears, then try to enter another number (from 4 to 64) instead of the last digit 3 in the IP address column and click "OK" again.
b) Adding a wireless network
1) Click on the "Add network" button


3) In the window that opens, available wireless networks that are within the coverage area of your computer will be displayed. Select your network - 1 and then click the "Connect" button - 2.


If the connection is successful, the following window will appear

In this window, by default, checkboxes are checked in the items "Save the settings of this network" and "Start this connection automatically", which will allow you to avoid the procedure of setting up and connecting to a wireless network every time you connect to the Internet.
As a result, the wireless network you connected will be displayed in the "Manage wireless networks" window.

In the "Network and Sharing Center" window, an entry will appear stating that the connection was made through the "Wireless Network Connection"

Check if the wireless adapter is enabled on your computer.
In some cases, the wireless adapter is disabled, as a result of which it becomes impossible to connect to the Internet via Wi-Fi. In order to check if your wireless adapter is enabled, right-click once on the "My Computer" icon on the desktop and select "Properties" in the context menu that appears. Next, "Hardware" --> "Device Manager". In the window, find the "Network adapters" group and click the "+" sign next to this group. In the list of network adapters that appears, find your wireless adapter

If it is turned off, it will look like this:

To enable a wireless adapter, right-click on its name in the list once and select "Enable" in the context menu that appears.