Download the utility for formatting a flash drive in fat32. Programs for formatting hard drives
In the modern world, flash drives for PCs are quite popular, and microSD memory cards for mobile devices. The popularity of the devices is due to their low price, the ability to store large amounts of data, and at the same time easily transfer all this data to other devices.
But these devices also have drawbacks - this is a formatting problem. Users of these storage devices are perplexed that the SD card is not formatted. At the same time, the following questions are often asked: The memory card is not formatted, what should I do? And the SD card is damaged Android how to fix it? Let's answer these questions, and also find out what to do if the memory card is not formatted.
Flash storage devices are an essential part of the modern world, so it is important to know how to properly operate and maintain these devices so as not to run into problems at the most inopportune moment.

If your SD card cannot be formatted, that is, you have problems formatting the flash drive and you cannot complete this action, then you need to either take the device to a service center or throw it away. But there are also other ways to “save a flash drive.” One of them is a way to format a flash drive through the console.

In the Windows system, there is one feature when deleting files - if the file itself is occupied by some processes, then it will not be possible to delete it. And through the console we can destroy everything without any problems. So, here's what we do in the console if the micro SD card is not formatted:
- We use the key combination Win + R
- The Run window appears. Enter the command there - diskmgmt.msc.
- Click “Ok” and the “Disk Management” window appears in front of us. We look for our flash drive, right-click on it and select “Format”.

If everything went well for you and without errors, then you’re doing great. If it doesn’t work, then don’t close the article - we have a couple more ways.

If your microSD memory card cannot be formatted, then the SNDFormatter utility will help you. The program is free and easy to download on the Internet, and we will tell you how to use this utility.
- Let's launch the program.
- In the “Drive” tab, select our flash drive.
- In the “Format Type” tab, select “Full” or “Erase”. “Format Size Adjustment” set to “On”.
- And click “Format”.
If the program did not work, then try this one - Apacer USB 3.0 Repair tool. The utility is similar to SDFormatter, but it is supplemented with the following functions:
- low-level formatting;
- disabling protection for flash drives.
You can download the program on the Internet.

- Open the standard Windows utility “Command Prompt” using the Win+X key combination, or look for it in the Start menu.
- In the new window we enter “diskpart”
- In the next window that opens, write “list disk”. The window will show us all available data recording disks on the computer, including our flash drive. We find our flash drive (usually it is at the very bottom of the list).
- We enter the data in the “select disk 1” window. Your flash drive may have a different name than “disk 1”.
- Next, clear the write protection attribute using the command – “attributes disk clear readonly”. To check disk attributes, use the command – “attributes disk”.
- We exit the utility using the “Exit” command, and again try to format the flash drive.
If the above methods did not help you, then the next one is for you.

Download the Flashnul program. The utility is designed for testing and in-depth work with removable drives on your computer. Therefore, use it carefully and try not to “click” anything unnecessary. Otherwise, you will damage your data and recording disks.
- We unpack/install the program on one of the main drives on our computer. For example, let’s take drive C. The path to the program will be – C:\flashnul.
- Launch the command line via Win+X or through the start menu and enter this command:
cd С:\\flashnul
- Next, we see a directory with a utility folder where we need to identify our flash drive. We write this command: flashnul –p
- In the list that opens, we look for the name of our flash drive (number or letter). Let's remember it. For example, you have a flash drive with the name N. In this case, we write a command to completely clear the data: flashnul N: –F
- We run a test for controller errors, and all data will be destroyed along with it: flashnul N: –l
- Upon completion of the test, we launch formatting through the management console. After the completed actions, there should be no errors.
Problems with the program
There are numerous problems that can occur with Flashnul. One of the important problems is the appearance of this type of error, in which flashnul itself cannot work with internal and external commands.
To solve the problem you need:
- Open a command line and go to the directory where our program is unpacked. Let's take drive C as an example.
- On the command line we write “ C:».
- Next, you need to go to the Flashnul utility directory. Enter in the line cd flashnul that's all.

Use the Usbflashinfo utility. After launching the program, click on the “get information about the flash drive” tab. Finding the lines VID, PID. Copy the values found in these lines into a search engine. Most likely, there are special formatting programs for this flash drive.
On the website flashboot.ru you will find an incredible variety of programs, utilities and useful information for flash drives and microSD memory cards from all popular manufacturers. Perhaps this is where you will find the program you need that will help your formatting problem.

We hope that the article helped you fully and now you know what to do if your SD card cannot be formatted or other problems arise with formatting other storage media. Now you can not only safely work with flash drives for yourself, but also help your friends and acquaintances, who will thank you more than once for your efforts.
Any of the applications we reviewed effectively deletes information completely and connects via USB to external devices, HDDs, SD memory cards, etc. The most popular ones are able to find bad sectors, resize volumes, and format flash drives for Unix systems. But each special program has its own audience, so we will select the best in several categories.
We really liked the tools Flash Memory Toolkit. Using the utility is a pleasure. Its context menu provides access to all necessary functions. The developers even screwed up the benchmarks, which already deserves respect! However, it is not without its drawbacks - the latest version of the program dates back to the times of Windows XP, which means that the utility’s operating algorithms are outdated. Its high cost is also a deterrent.
An alternative is the combination D-Soft Flash Doctor And MiniTool Partition Wizard Free. Both tools are free. You can download programs from the official website in the latest edition; updates are released regularly; functionally they complement each other.
Suitable for home use JetFlash Recovery Tool– proprietary utility for flash drives and hard drives Transcend. Its interface is intuitive and simplified as much as possible. But again, the only limitation is that only branded devices and a number of compatible chips are supported.
Has no such shortcomings USB Disk Storage Format Tool. It was developed by HP, but is compatible with any equipment. The program not only restores flash drives, but also erases all information from any HDD at a low level, which will be useful, for example, as part of the pre-sale preparation of a laptop.
It's a pity, but the HP application does not always find damaged devices. For this there is a “one-button” EzRecover. The algorithm of its operation is simple - we find the device, click on it, reset it programmatically and overwrite it with default settings.
Main features of the program Low Level Format Tool professionals will appreciate it. It most likely detects a damaged drive, meticulously formats and remaps sectors, but does not know how to do banal things - create partitions. The application will be able to add functionality MiniTool Partition Wizard or Acronis Disk Director.
I would also like to draw attention to SD Formatter– this specialized service software was developed for memory cards of cameras and smartphones. He himself will select the best recovery algorithm and carry it out efficiently. Fine tuning is present.
And if you are engaged not only in repairing flash drives, but also carry out testing, you cannot do without Flash Memory Toolkit. The utility is a little outdated, but its benchmarks and diagnostic methods are up to date.
HDD Low Level Format Tool is a convenient small program for formatting your hard drive, as well as any storage devices connected to your computer. It supports work with any interfaces, including USB, SATA, SCSI, IDE, Firewire. Works with devices from such manufacturers as Samsung, Fujitsu, Maxtor, Seagate, IBM, Toshiba, Quantum. It can also work with flash cards if the computer supports a card reader.
This utility destroys all data recorded on the media, including boot sectors with logical partitions. Using low-level programming, this program deletes data in such a way that it cannot be recovered later. Keep this in mind before you begin.
The program is provided on the Internet for free use. After downloading the program distribution and launching it, you will see the following window in front of you. 
Installing the program is extremely simple. So we won’t dwell on it.
After installation, you will be asked to read the license agreement, and will also be informed that you can use the program for free as much as you like, however, by paying only $3.30, you will be able to use the program with better speed and receive constant updates. We chose the free option. In the future, this window will appear every time the application is launched.
This hard drive formatting program has a very simple interface. After launch, this window will appear in front of you. 
The name and version of the program are indicated at the top, and it is also indicated that we are using the free option. On the right is an active link to the developers' website.
The main part of the window is occupied by a list of storage devices that are currently connected to your computer and available for use. Various information about the devices is indicated here, including the type of interface through which the connection was made, model, serial number and memory capacity.
To test the program, we, of course, will not use our hard drive. Therefore, we will conduct the experiment on a 4 GB flash drive. Having selected this device (it is the second one on our list), click the “Continue >>>” button
This is what we see next. 
The current date and time are indicated here, again the name and version of the program, and the device connected via USB 2.0 and its memory size are also indicated. Next, data about the device should be indicated, but in our case it is not available.
The next tab contains the event log and displays the formatting process. Here is the button to start and stop formatting. You can also check the box and select the quick option. 
On the third tab you can get S.M.A.R.T. information about the device.
Before starting formatting, the program asks if you really want to start this process.
After launch, the window displays the formatting process. 
The speed does not rise above 4.3 Mb/sec. This is the peculiarity of the free version. The paid version, obviously, has no speed limits. The process as a whole happens quite quickly, so there are no complaints here. Within about 10 minutes, the formatting of the flash drive was completed. Note also that when working with hard drives, the speed will definitely be higher.
Thus, this program will help not only format any disk drive, but also restore the operation of a flash drive or flash card if it is not detected by your computer.
Good day!
In some cases, you have to perform low-level formatting of a hard drive (for example, to “heal” bad sectors of the HDD, or to completely delete all information from the drive, for example, you are selling a computer and don’t want anyone to dig into your data).
Sometimes, such a procedure works “miracles” and helps bring a disk (or, for example, a flash drive, etc.) back to life. In this article I want to look at some issues that every user who has had to deal with a similar issue faces. So…
1) What utility is needed for low-level HDD formatting?
Despite the fact that there are quite a lot of utilities of this kind, including specialized utilities from the disk manufacturer, I recommend using one of the best of its kind - .
HDD LLF Low Level Format Tool
Main program window
This program easily and simply performs low-level formatting of HDD drives and Flash cards. What’s captivating is that even completely novice users can use it. The program is paid, but there is also a free version with limited functionality: maximum operating speed is 50 MB/s.
Note: For example, for one of my “experimental” hard drives of 500 GB, it took about 2 hours to carry out low-level formatting (this is in the free version of the program). Moreover, the speed sometimes dropped significantly less than 50 MB/s.
Main features:
- supports work with SATA, IDE, SCSI, USB, Firewire interfaces;
- Supports drives from: Hitachi, Seagate, Maxtor, Samsung, Western Digital, etc.
- supports formatting Flash cards when using a card reader.
When formatting, the data on the drive will be completely destroyed! The utility supports working with drives connected via USB and Firewire (i.e., you can format and bring back to life even ordinary USB flash drives).
Low-level formatting will delete the MBR and partition table (no program will help you recover data, be careful!).
2) When to perform low-level formatting, what will help
Most often, such formatting is carried out for the following reasons:
- The most common reason is to get rid of and treat the disk from bad blocks (bad and unreadable), which significantly impair the performance of the hard drive. Low-level formatting allows you to “instruct” the hard drive so that it can discard bad sectors (bad blocks), replacing their work with backup ones. This significantly improves the performance of the disk (SATA, IDE) and increases the life of such a device.
- When they want to get rid of viruses, malware that cannot be removed by other methods (such, unfortunately, do occur);
- When they sell a computer (laptop) and don’t want the new owner to rummage through their data;
- In some cases, this needs to be done when you “transfer” from a Linux system to Windows;
- When a flash drive (for example) is not visible in any other program, and you cannot write files to it (and indeed, format it using Windows);
- When a new drive is connected, etc.
3) An example of low-level formatting of a flash drive under Windows
A few important notes:
- The hard drive is formatted in the same way as the flash drive shown in the example.
- By the way, the flash drive is the most common one, made in China. Reason for formatting: it is no longer recognized and displayed on my computer. However, the HDD LLF Low Level Format Tool saw it and decided to try to save it.
- Low-level formatting can be done both under Windows and Dos. Many novice users make one mistake, its essence is simple: you cannot format the disk from which you booted! Those. if you have one hard drive and Windows is installed on it (like most) - then to start formatting this disk, you need to boot from another medium, for example from (or a computer and format it from it).
Now let's move on to the process itself. I will assume that you have already downloaded and installed the HDD LLF Low Level Format Tool utility.
1. When you launch the utility, you will see a window with a welcome message and the price of the program. The free version is distinguished by its speed, so if you do not have a very large disk and there are not very many of them, then the free version is quite enough for the work - just click the “Continue for free” button (continue for free).
First launch of HDD LLF Low Level Format Tool
2. Next you will see in the list all the drives connected and found by the utility. Please note that there will no longer be the usual “C:\” drives, etc. Here you need to focus on the device model and drive size.
For further formatting, select the desired device from the list and click the “Continue” button (as in the screenshot below).
Selecting a drive
3. Next, a window with information about the drives should appear in front of you. Here you can find out the S.M.A.R.T. readings, find out more detailed information about the device (Device details), and perform formatting - LOW-LEVE FORMAT tab. That's what we choose.
To start formatting, click the Format This Device button.
Note. If you check the box next to Perform quick wipe, “normal” formatting will be performed instead of low-level formatting.
Low-Level Format (format the device).
4. Then a standard warning will appear stating that all data will be deleted, check the drive again, perhaps the necessary data remains on it. If all backup copies of documents from it have been made, you can safely proceed...
5. The formatting process itself should begin. At this time, you cannot remove the flash drive (or disconnect the disk), write to it (or rather, try to write), and generally do not run any resource-intensive applications on the computer; it is better to leave it alone until the operation is completed. When it is completed, the green bar will reach the end and turn yellow. After this, you can close the utility.
By the way, the operation time depends on your version of the utility (paid / free), as well as on the state of the drive itself. If there are a lot of errors on the disk, sectors are not readable, then the formatting speed will be low and you will have to wait quite a long time...
Formatting process...
Formatting complete
By the way, the easiest way to do high-level formatting is to simply go to “my computer” and right-click on the desired disk (if it is visible, of course). In particular, my flash drive became visible after the “operation” was performed...
Next, all that remains is to select the file system ( for example NTFS, since it supports files larger than 4 GB), write the disk name ( volume label: Flash drive, see screenshot below) and start formatting.
After the operation has been completed, you can start using the drive as usual, so to speak, “from scratch”...
That's all for me, Good Luck :)
A memory card is a convenient way to store information that allows you to save up to 128 gigabytes of data. However, there are times when the drive needs to be formatted and standard tools cannot always cope with this. In this article we will look at a list of programs for formatting memory cards.

The first program on this list is SDFormatter. According to the developers themselves, the program, unlike Windows tools, provides maximum optimization of the SD card. Plus, there are some settings that allow you to slightly adjust the formatting to your liking.
RecoverRx

Transcend's RecoveRx utility is not too different from the previous one. The only thing I would like to have in the program is more fine-tuning. But there is data recovery if it is lost in the event of a memory card failure, which gives the program a small plus.
AutoFormat Tool
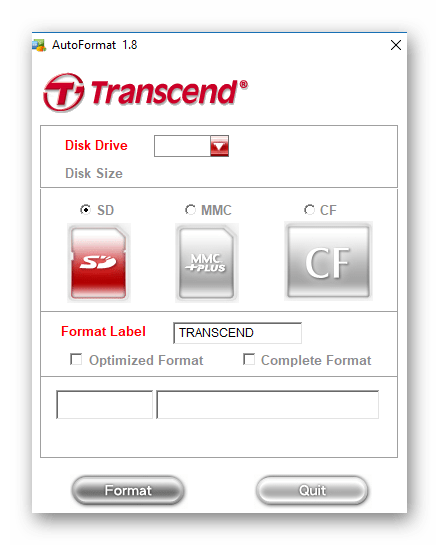
This utility has only one function, but it does it quite well. Yes, the process takes a little longer than usual, but it's worth it. And considering that it was developed by the famous company Transcend, this gives it a little more credibility, even despite the lack of other functionality.
HP USB Disk Storage Format Tool

Another quite popular tool for working with USB and MicroSD drives. The program also has formatting with a little customization. In addition, there is also additional functionality, for example, an error scanner on a flash drive. And in general, the program is great for formatting a flash drive that won’t open or freezes.
HDD Low Level Format Tool

This software is more suitable for HDD drives, as can be seen even from the name. However, the program can also cope with simple drives. The program has three formatting modes:
- Conditional low-level;
- Fast;
- Complete.
Each of them differs in the duration of the process and the quality of mashing.


