Login to your icloud personal account from your phone. Other ways to access iCloud
Switched from an iPhone to a smartphone with an operating system Android system? You are satisfied with everything, but almost immediately you realize that you have left important materials in mail for iPhone? Unfortunately, users quite often encounter similar problem and are interested in how to log into iCloud from Android and what is required for this.
iCloud on Android: is it possible?
Apple and Google software constantly conflicts, And official entrance There is no way to icloud via Android. Install this mail application via Google Play will not succeed, and it is impossible to find it on the Internet.
If you try to transfer iCloud via Bluetooth to your phone and install it that way, the system will definitely give an error. It’s the same with the online version: by entering your email address into a search engine, you end up on a gray non-working page with the text “This connection is not supported” or “Your browser is not suitable.”
But don't despair, there is still a way out. Apple services can be made to work on Android, and we’ll figure out how now.
To do this, you will need regular mail already installed on your Android device. Gmail is absolutely not suitable, but standard application called “Email” is an ideal option. Yahoo and Outlook are also allowed. Have you decided on mail? Great, now open it and start executing next steps strictly with instructions:
- Enter the first necessary data: full address icloud and username (text specified before the “@” sign);
- Necessarily click "Manual setting". If you try to log into iCloud using only your address and password, nothing will work;
- Next, enter the password. Please note that it is almost impossible to restore it on Android, so be careful!
- In the next column we write "mail.me.com". No commas, spaces or capital letters;
- We choose the type of protection, most often it is SSL, according to the certificate;
- We indicate the port 993 . Don't bother changing the numbers to suit your operating system. All data must be indicated only from the instructions;
- The last line, namely "IMAP Path" skip;
- Click “Next” and proceed to the necessary fine tuning SMTP server;
- In the “Address” field we duplicate the one already entered, only instead of « imap» we write « smtp»;
- We indicate the same protection, it is also allowed TSL;
- In place of the port we enter the numbers 587 .
- Ready. All necessary data has been entered. Click “OK”, and if an authentication notification appears, we agree.
Now it is possible to work with messages from iCloud on Android. But photos, videos, documents are still inaccessible because they are located in the Cloud. We will discuss how to solve this problem below.
Other mail login options
You can try other applications, Google Play provides a choice huge amount postal services. If the above method seemed too complicated and convoluted to you, you can simplify the task a little. For this we use postal service myMail. She only requires email address and password, nothing else network information not required. Unfortunately, this method does not always work.
How to access the iCloud cloud on Android
 Directly access the Cloud with Android phone it won't work. The only way out is to select a different method for each type of information. Let's look at an example of the most used materials.
Transferring contacts
To do this, you will also need access to a computer, since Google has a built-in service specifically designed for storing phone book. After synchronization, contacts from iCloud will be placed there. Let's start:
- Open the main page on your PC Google account, log in with your password and login;
- Click "Contacts", Then you can choose from import and export. Accordingly, import suits us. Click on "Other postal service";
- Enter your iCloud details. Made.
After a successful procedure, all the necessary numbers will appear on your Google account, from where you can freely use them on your Android device.
It is advisable that before this, contacts are stored directly on the phone, and not on the SD card.
Transferring data from the calendar
Your Apple calendar stored important data such as scheduled meetings, urgent events, birthdays of friends and colleagues, but after switching to Android, you lost access to it? Don't worry, the situation here is fixable, everything can be solved in a few clicks using special application Sync for iCloud.
This application is specially produced for smartphones running Android, so operating system will not conflict with her. The program does not have any special functionality, but it copes with its main task: transferring calendar data from iCloud. It also has useful advantages:
- Completely free, all options are provided to the user at no additional cost;
- It is possible to easily work with iCloud on Android. That is, you will not only get access to a previously registered calendar, but in real time you will be able to carry out the necessary operations with it;
- You can create multiple accounts on one device;
- Do you want to make the iCloud calendar the main one on your phone, because for some reason the built-in one doesn’t suit you? No problem, just turn on "Default" in the settings.
Transferring music
Here, too, the situation is quite simple, you just need to use famous application Google Play Music. This player program, surprisingly, works well with iOS devices. By installing it on your smartphone, you can easily access media files in the Cloud. Don’t forget also about special products from Amazon that allow you to connect several accounts. The perfect solution – Amazon Cloud Player.
Logging into iCloud (iCloud) from a computer can make it easier for the user to work with Apple services.
This action will help you set up receiving instant notifications about new messages and account transactions.
iCloud is a popular cloud storage service with email functionality from Apple.
Every user of an Apple device has a registered account in iCloud.
The profile stores backup copies of multimedia and office files, correspondence, application data.
The developers have created the ability to perform a web login to your account not only from a branded device, but also from any PC, regardless of the operating system used on it.
Let's take a closer look at how to perform authorization.
Authorization via browser
This method is the simplest and fastest.
Its essence lies in the fact that the user logs in to his account through the official website of the cloud storage.
No additional software installation is required for this method. Follow the instructions to log in to the system:
- Go to the main page of the official website of the iCloud platform via the link icloud.com;
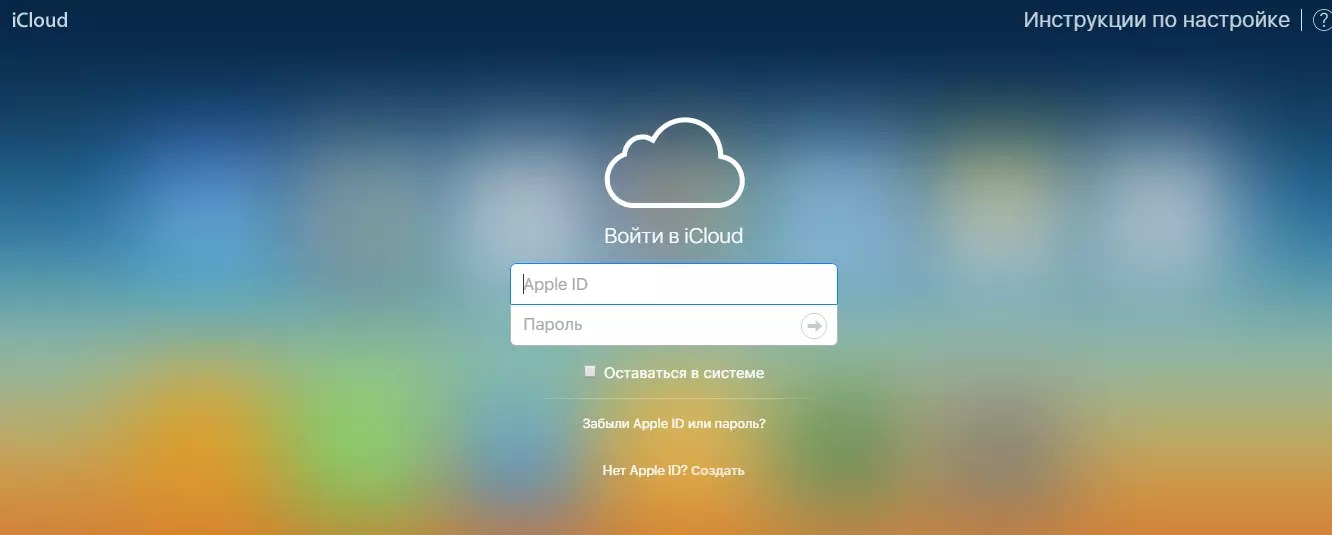
- enter your Apple ID and password to authenticate;
- If you do not have an account registered in the system, create one by clicking on the appropriate link. To get more detailed information To work with your profile, go to the “Setup Instructions” tab.
Menu icons may differ depending on what synchronization options you specified during registration.

Using this window, you can manage data synchronization, search for your phone, create reminders and notes that will be automatically saved to your smartphone.
It is also possible to edit saved documents directly in the browser.
In the “My Devices” tab, you can view the names of the last devices from which you logged into your account:

Versatility is the main advantage of this method. You can use your account from the browser of any computer, no matter what OS is installed on it.
Disadvantage this method is impossibility automatic download photos of them iCloud service to yours personal computer.
Authorization using official software
Installing specialized software allows you to fully use all the functions of the storage: access to email, full access to a cloud drive, instant file synchronization.
Official application for PC available for operating system users MacOS systems and Windows OS (version 7 and higher). To log into your account, follow the instructions:
- download the program executable from official page developer;

- After installation is complete, open the program and log in to your account. To do this, you need to enter your Apple ID and your password. Then click the “Login” button;

- After entering the data, you need to wait a few seconds for all files and personal settings to appear on your PC. After completing the authorization process, the iCloud folder with the contents of the cloud storage will appear in the Windows system explorer.
Now you can move files from your computer to the iCloud directory.
If there is an Internet connection, all transferred files will be automatically synchronized by the service.
You can also instantly move files from cloud drive on PC.

In the main window of the program, you can configure synchronization settings and find out data about the storage volume:

Rice. 6 – home page applications
And the cloudy one took a serious step forward Apple service. Cloud storage iCloud data turned into iCloud Drive , bringing users completely new opportunities for posting and managing files on the Internet. Let's look at these issues in more detail.
Basic settings
So for iCloud usage Drive must be installed iOS 8 on iPhone, iPad or iPod touch, and also OS X Yosemite on Mac. You can even access iCloud Drive from your browser and Windows Help, but more on that later - for now everything needs to be prepared. If compatible operating systems are installed, then pay attention to the status of the cloud service in the settings:
For iOS 8: Settings -> iCloud -> iCloud Drive- the function must be activated. Here, pay attention to the list of applications - they have access to iCloud Drive.
For OS X Yosemite: System Settings-> iCloud -> iCloud Drive- again, check for a checkmark indicating that the service is activated. When you click the Options button, you can view the apps that have access to iCloud Drive.

On this preparatory stage almost completed. One detail. If you refused to switch from iCloud to iCloud Drive after updating your operating system, then do not forget to do this now using the options indicated above. That's it now.
File types and available space
iCloud Drive largely follows the Apple tradition established back in OS X. There is no dump site by default various files, and each application has its own folders in which it stores working documents. However key difference iCloud Drive is different from regular iCloud in that now the user can create folders and absolutely any type of files in the cloud. In other words, Apple now provides us with a complete cloud storage for files.
Flights of fancy rest solely on free disk space. Initially only 5 GB available- There are no changes in this regard. Extensions are much cheaper than it was in the case of iCloud:

Please note that the price for cloud space also changed a little
In this simple way you can increase your cloud storage up to 1 TB. This will be enough for most users. At large volumes data on the Internet, it is worth thinking about specialized solutions. The bottom line is an exhaustive amount free space in the cloud and the absence of restrictions on file types is a fairy tale.
Access to iCloud Drive
1. The first way to access iCloud Drive is your Mac computer. Just open it Finder and go to the tab iCloud Drive. All! Absolutely all files and folders are available to change to your taste - nothing complicated.

If things don't work out with a Mac, but you have a personal computer running Windows control, then everything is also quite simple. You need to download and install "iCloud 4.0 for Windows". After that, a shortcut to iCloud Drive will appear right in the explorer on the left, in the “Favorites” menu. Everything works almost as elegantly and conveniently as on a Mac.

2. The second method is in some ways even simpler, but often not so convenient when long-term use. Let's imagine a situation where you are on someone else's computer or you need one-time access to iCloud Drive. Accordingly, configure cloud storage or install additional software there is no desire or possibility. will come to the rescue browser.

Documents 5 is kind of swiss knife for working with files on iOS. The application creates its own folder in the device memory, where the user can place any necessary files. Moreover, you can even get them by downloading from the Internet using the built-in browser. In addition, there is support for all known cloud services and the ability to connect various servers. Of course, you can access iCloud Drive.

Access to the cloud is possible at the level of launching the corresponding applications for each type of file, as well as the ability to add files to the storage from internal memory devices. However we're talking about about those files that are available to the Documents 5 application. In general, using the application you can listen to music, watch a video, edit a document or image - the main working points are available, and this will be quite enough for most users.

Unlike many new services and features that Apple launched this fall, iCloud Drive works stably and performs well. native functions. With the help of this material you now know everything you need to effectively use the cloud file storage for your own good and in many situations to refuse additional services, remaining within the unified Apple ecosystem.
iCloud – cloud storage, virtual place to save user information. Protected by login and password, gives access with various devices and gadgets.
This data storage location is one of Apple's projects. And in this article we will look at how to log into iCloud from a computer.
How to log into iCloud from a computer from the official website
Regardless of which browser will be used to enter the storage (Chrome, Firefox, Opera, etc.), you need to go to the official iCloud website.
By the way, even the operating system used does not matter. After all, some users believe that since iCloud belongs to the Apple company, they can log in from browsers assigned to it.
Practice shows the reality of logging in from any operating system.
So, after logging into the official website of the storage facility, a window will appear on the screen where you will need to enter your login and password.

After carrying out such manipulations, it will be possible to manage those positions that were previously saved under this login.
Usually this is email, contacts, pictures and photographs, notes and recordings, various reminders, etc.
If you want to use data located on at the moment on your phone, move the circle until it turns green, otherwise it will remain gray.
What is available in the storage when you log in from your computer
Along with the question of how to log into iCloud from a computer, interest also arises regarding the areas of its use.
That is, what information and data can be stored there, how confidentiality works with such possibilities.
It should be noted that initially you need to create a login and password that are as reliable as possible. That is:
- There must be letters in both Latin and Cyrillic alphabet.
- Large and small letters are good to use.
- Introduce numbers there, and, if the rules allow, signs.
- Also, these codes should not be based on personal data, especially known and accessible to many people.
You can put the positions you want in the cloud. There is no total copying here; everyone chooses for themselves what to save and what they do not want to remember or use.
So, the list includes the following provisions that you can control:
1 Contacts. This is access to a list of people with their data, phone numbers, addresses, by email and other data recorded in the iPhone. If necessary, you can transfer this list directly to the PC’s memory, and also save it in a format suitable for use on Android.
2 iCloud Mail, you can also log into it from your computer if you mark its saving in the iPhone settings. It should also be noted that you can log in and fully manage your mail data; even the interface is almost no different from the version on the iPhone.

3 Calendar. As strange as it may sound to some, many users use the calendar on their phone as a diary, that is, they reproduce the daily plan in the calendar. This is convenient when you have a lot to do, and reminder notifications help with this. That is why, in order to avoid various incidents, it is preferable to copy and synchronize this data, just so as not to disrupt the schedule of plans.
4 Photos. This is one of the most popular positions saved in the cloud, because after taking pictures or screenshots on your iPhone, you don’t need to resort to additional portable devices or programs, or nothing at all needs to be done. Just from any PC or gadget connected to the Internet, go to the official website, enter your cloud data and enjoy browsing.
5 Cloud Drive. This system involves saving the results of using any applications in the cloud, which brings the same convenience as using cloud photos.
6 Notes. This is very reminiscent of calendar saving, only here you can make entries in a different direction, not just planning and reminders. Saving note data is very common precisely because it is secure and always at hand.
7 Applications that are allowed in the settings. These are location finders for friends and acquaintances, phone search engines, phone settings and more.
Remember that you can turn off synchronization at any time and unwanted data will not end up in storage.
Hello to all blog readers! Today we will show you how to implement icloud login to your account. To begin with, iCloud is a place to store files and gives users a lot of options. Gadgets Apple the result is a good user toolkit.
iCloud is really worth attention, because it is an opportunity remote access, Creation backup copies for various unforeseen cases, convenient work with media files.
It would seem that everything is simple and easy, but no! It is not uncommon for users to have questions about the operation of the service. Often problems arise due to the fault of the device owners. Violation of security rules, unconfirmed email, incorrect launch applications - all this can be a reason for minor troubles.
Login to your account via icloud
If you imagine, what could be easier than logging into your account via icloud. But some have a difficult time during this period.
To log into iCloud you only need one ID. For example, this could be iTunes registration information.
To log in to the service:
1.Website

2. Application on PC

3.Phone or tablet
Entering or creating an ID allows you to immediately sign in to iCloud. 
To change storage synchronization you will need:

The message “Account not verified” appears
Tip #1
Close and reopen the settings panel to log in
Tip #2
View in mailbox folder "Spam". Maybe the email with the link was blocked by the email service 
Tip #3
Request a message for authorization. Click in Settings "Resend confirmation».
Changing settings and profile data

To activate editing, use the links: add, edit, more details.
Unblocking your account

Enter your current password or reset it and enter a new one.
Please note that several unsuccessful attempts will temporarily block the ability to restore the ID. Resumption becomes possible after 24 hours.
Deleting an iCloud profile
iOS device
- Go to settings.
- Next to the section "iCloud".
- Click to activate the function "Get out." When working with iOS 7, click on “Delete account.”
- Click on again "Exit" and then “Delete from...”
- Enter a password to log into the system.
If you don't have an iOS device
Option #1
- Using registration Apple data ID, sign in com/find.
- Go to the device panel.
- On your device screen, tap “Erase.”
- After clearing the data, activate the command “Remove from account”.
Option No. 2
If using the first method does not bring results, you will need to create a new password. Thus, the sale or loss of the device will mean that it will not be possible to delete stored content on iCloud.
I am attaching a video for you where you can see how to create an Apple account.
Conclusion:
After reading the review, I think you will be able to log into your icloud account. Write your results or questions in the comments. Also, don’t forget to like if you liked the article, and share it with your friends on social networks. Peace and goodness to you all!


