How to write an Android app using Android Studio. Add-ons for working with graphics
How to create a mobile application in Android Studio
Android Studio is an integrated development environment (IDE) based on IntelliJ IDEA, which Google calls the official IDE for Android applications.
This guide describes android app development:
- Navigate between files using File Explorer
- Installing the AndroidManifest.xml file
- Importing Files into a Project
- Advanced layout editor with dynamic preview feature
- Using Logcat and Android Monitor to debug applications
Getting Started in Android Studio
Launch Android Studio, in the window Android Studio Setup Wizard select Start a new Android Studio project(start a new project).
In the window Create New Project select application name(application name) as Fortune ball, enter the company domain; in field project location select the location where the application will be saved. Click Next.

There is a window in front of you Target Android Devices. Select Phone and Tablet. In field Minimum SDK indicate API 15. Click Next.

In the window Add an activity to Mobile select basic activity. Evaluate all the options, this window provides an overview of the available layouts.
Click Next.

In the window Customize the Activity, the screenshot of which is placed below, you can change activity name(activity name), Layout Name(layout name) Title(common name) and Menu Resource Name(name of resource menu). Leave the defaults and click Finish.

After a few seconds, the following window will appear:

The same window will pop up on your device or emulator. The emulator functions as a device, it will take some time to load.

It's already an application. He lacks a lot, but now you can move on to the next step.
Project and file structure
The window shows the project files.

In the dropdown menu (screenshot below) there are several filters for files. The main ones are Project and Android.
The Project filter will show all application modules - each project has at least one module. Other types of modules include modules from third-party libraries, or modules from other Android applications (such as Android Wear apps, Android TV apps). Each module has its own set of characteristics, including a gradle file, resources, and source files (java files).

Note. If the project is not open, click the Project tab on the left side of the panel, as shown in the screenshot. By default, an Android filter is installed that groups files by a certain type. At the top level, you will see the following folders:
- manifests
- Gradle Scripts

The following sections describe each of these folders in detail, starting with manifests.
Overview of AndroidManifest.xml
Every Android app has an AndroidManifest.xml file located in the manifests folder. This XML file tells your system about the requirements of the application. The presence of this file is mandatory, because it is he who allows the Android system to create an application.
Open the manifests folder and AndroidManifest.xml. Double click will open the file.

The manifest and application tags are needed for manifest and appear only once.
Each tag also defines a set of attributes, along with the name of the element. For example, some attributes in application might be:
android:icon, android:label and android:theme
Among other things, the manifest may appear:
- uses-permission: Requests a special permission that is given to the application in order to work correctly. For example, an application must ask the user for permission to access the network - in case you add the android.permission.INTERNET permission.
- activity: Reports an activity that is partly responsible for the visual UI and logic. Any activity that is provided in the application must be added to the manifest - the system will not notice the unmarked activity, and it will not be displayed in the application.
- service: Adds a service that you are going to use to implement long running operations or advanced API communications with other applications. An example in this case would be a network call through which an application receives data. Unlike activities, services do not have user interfaces.
- receiver: Thanks to the broadcast message receiver, the application receives signals about system messages or messages from other applications, even when other components of the application are not running. An example of such a situation is a battery with a low charge level and notification of this to the operating system.
The full list of tags can be found in the manifest file on the Android Developer site.
Manifest file settings
Add the following attribute to the activity:
android:screenOrientation=”portrait”. to limit the screen to portrait mode only. If this is not done, the screen, depending on the location of the device, will be either in landscape or portrait mode. After adding the attribute, the manifest file will look like in the screenshot.

Create and run the application. If you're testing on your device, flip it over, make sure the screen doesn't move to landscape if you've disabled it in the AndroidManifest.
Gradle Overview
Let's move on to Gradle. Gradle turns an Android project into an installable APK that can be installed on devices. The build.gradle file is present in Gradle scripts, at two levels: module and project.

Open the build.gradle file (Module:app). You will see the default gradle installation:
apply plugin: "com.android.application" android (compileSdkVersion 25buildToolsVersion "25.0.2"defaultConfig (applicationId "com.raywenderlich.fortuneball"minSdkVersion 15targetSdkVersion 25versionCode 1versionName "1.0"testInstrumentationRunner "android.support.test.runner.AndroidJUnitRunner")buildTypes (release (minifyEnabled falseproguardFiles getDefaultProguardFile("proguard-android.txt"), "proguard-rules.pro"))) dependencies (compile fileTree(dir: "libs", include: ["*.jar"])androidTestCompile(" com.android.support.test.espresso:espresso-core:2.2.2", (exclude group: "com.android.support", module: "support-annotations"))compile "com.android.support:appcompat- v7:25.1.0"compile "com.android.support:design:25.1.0"testCompile "junit:junit:4.12")
Let's analyze the main components:
- apply plugin: 'com.android.application' applies the Android plugin at the parent level and makes available the top-level tasks needed to build the application.
- Next to the android(…) section are settings options such as targetSdkVersion. The target SDK for your app must be at the latest API level. Another important component is minSDKVersion (defines the minimum SDK version that must be installed on the device in order for the application to run). For example, if the SDK version is 14, then the application will not be able to run on that device, because in this particular case, the minimum supported version is 15.
- The last component is dependencies(…). Note compile 'com.android.support:appcompat-v7:VERSION' and compile 'com.android.support:design:VERSION'. They provide support and compatibility features for new and old APIs.
In addition to the Android compatibility libraries, you can add third-party libraries to the dependencies(…) component. The animation library, for example, contains user interface effects. Find dependencies, then add the following two lines below:
dependencies ( ... compile "com.daimajia.easing:library: [email protected]"compile "com.daimajia.androidanimations:library: [email protected]"}
Here you can add third-party dependencies. Libraries are automatically downloaded and integrated into Android Studio. Click Sync Now to integrate these dependencies into your application.
Synchronization takes a few seconds. Gradle updates appear in the Messages tab of the bottom panel.

These are all the settings you will need in Gradle for now. Such manipulations will add animation in the application.
File import
In developing an Android application, integration with other resources is important: images, custom fonts, sounds, videos, etc. These resources are imported into Android Studio and placed in the appropriate folders, which allows the operating system to select the correct resources for the application. Our Fortune Ball application will need to import images into the drawable folders. These folders can contain images or special XML drawables (i.e. you can draw shapes with XML code and use them in your layouts).
In Android Studio go from Android to Project
Open the res folder (app > src > main). Right click on the res folder, select New > Android resource directory.

A window called New Resource Directory will appear.
From the Resource type drop-down list, select the drawable option. In the Available qualifiers list, select Density, then click the button that is highlighted in the screenshot.

In the next window, select XX-High Density from the Density list. Click OK.

Repeat everything to create the drawable-xhdpi, drawable-hdpi and drawable-mdpi folders. Select X-High, high (high) and medium (medium) density respectively from the Density list.
Each folder that has a density specifier (i.e. xxhdpi, xhdpi, hdpi) contains images that map to a particular density or resolution. For example, the drawable-xxhdpi folder contains a high density image, which means that an Android device with a high resolution screen will draw the image from this folder. The image will look good on all Android devices, regardless of screen quality. For more information about screen density, see the Android documentation.
Once you've created all the "drawable" folders, you can go back to the unpacked content in the folder and copy (cmd+C) the image from each folder and place (cmd+V) into the appropriate Android Studio folder.

After placing the files, you will see the Copy window. Select OK.

XML View and Dynamic Layout Previews
Creating a layout that users can interact with is an important part of the process. In Android Studio, this can be done in the layout editor. Open content_main.xml from res/layout. In the Design tab, you can transfer interface elements (buttons, text fields).

To the right of Design there is a Text tab that allows you to edit XML directly in the layout.

Before creating the appearance, some values need to be defined. Open strings.xml in the res/values tab and add the following:
strings.xml contains all the strings that appear in the application. Splitting these lines into separate files simplifies internationalization, as you only need a string file for each language that your application requires. Even if you don't intend to translate your application into other languages, using a string file is always recommended.
Open dimens.xml in res/values and add the following:
dimens.xml contains dimension values, layout spacing limits, text size, etc. It is recommended that you save this data in a file so that you can use it to create layouts later.
Go back to content_main.xml and replace the entire contents of the file with the following code:
This rather large code creates an application layout called FortuneBall. At the top level, you've added a RelativeLayout (relative layout defines the position of child components relative to the parent component). RelativeLayout can be stretched to fit the size of the parent component.
Relative markup adds two pieces of text, an image and a button. All these details will be visible in the order they were added. Their contents can be read in strings.xml (text) and in drawable (images).
When updating content_main.xml, note that the Preview window updates the UI:

Note: if the preview window is not visible, in the Text tab, click on the Preview button on the markup editor panel on the right.
Create and run.

And now you have created the layout of the application. But at this point, it's just a pretty image - clicking the button won't do anything.
Combining Activity and View
You can use java files located in app/src/main/java to establish logical links in an application.
Open MainActivity.java and add this data below the existing ones:
Import java.util.Random;import android.view.View;import android.widget.Button;import android.widget.ImageView;import android.widget.TextView; import com.daimajia.androidanimations.library.Techniques;import com.daimajia.androidanimations.library.YoYo;
The first five imports point to the relevant classes in your code: Random, View, Button, ImageView, and TextView. The next two imports indicate that you will be using two classes from libraries, incl. build.gradle for animations. In MainActivity.java, in the MainActivity class, add:
String fortuneList = ("Don't count on it","Ask again later","You may rely on it","Without a doubt","Outlook not so good","It"s decidedly so","Signs point to yes","Yes definitely","Yes","My sources say NO"); TextView mFortuneText;Button mGenerateFortuneButton;ImageView mFortuneBallImage;
In this short piece of code, you have set 4 variables for the activity. The first one is the strings that define the possible states, the other three are the UI elements that you have created in the layout/markup.
Now replace the contents of the onCreate() method with the following data:
// 1:super.onCreate(savedInstanceState);// 2:setContentView(R.layout.activity_main);Toolbar toolbar = (Toolbar) findViewById(R.id.toolbar);setSupportActionBar(toolbar);// 3:mFortuneText = (TextView) findViewById(R.id.fortuneText);mFortuneBallImage = (ImageView) findViewById(R.id.fortunateImage);mGenerateFortuneButton = ( button) findViewById(R.id.fortuneButton); // 4:mGenerateFortuneButton.setOnClickListener(new view.OnClickListener() (@Overridepublic void onClick( view view) (// 5:int index = new Random().nextInt(fortuneList.length);mFortuneText.setText(fortuneList);// 6:YoYo.with(Techniques.Swing).duration(500).playOn(mFortuneBallImage);)));
- Check that the activity is ready (superclass implementation).
- Specify that the layout for this activity is represented by the layout you created earlier, check the toolbar.
- Fill in the values of the three variables you created earlier in the views of the layout using the findViewById method. The id value is the same as in the XML layout.
- Add an OnClickListener on the button. This is a simple class that encapsulates (packs) the functionality that, in turn, is called by a button click.
- Pick a random choice from the fortuneList set for this application, and update the fortune text to show it.
- Use a third party library to add a dependency to the gradle file and thus add animation to the application.

It's almost ready. But you need to remove the floating button. Go to res/layout and open activity_main.xml.
This layout file contains a link to the content_main.xml that you edited earlier. It defines the content by default (toolbar and floating action button). However, in this particular application (Fortune Ball), the floating button is not needed. Therefore, remove the following block of code from the xml file:
Now there is no floating button in the lower right corner.

Ask a question (What's my fortune?) - press the button. Check the application.
Android Monitor
Android Studio contains a wide variety of tools. Open the Android Monitor tab at the bottom of the Android Studio window.
Here you will find many options for the developer.

- The camera and the play button on the left allow you to take screenshots and record videos.
- The magnifying glass opens up a number of additional options, such as app memory analysis.
- The Layout Inspector provides a visual interface that determines why an application's interface looks a certain way.
LogCat provides a detailed overview of system messages with the ability to drill down into specific application data, or even use the search bar to filter out messages if they don't contain specific characters.
Check that you have selected Show only selected application in the top right corner as shown in the screenshot above. Now only your app's messages will be visible.
In MainActivity.java, add the following to the list of imports:
Import android.util.Log;
At the end of onCreate() in MainActivity.java, add the following line:
Log.v("FORTUNE APP TAG","onCreateCalled");
Log.v calls two parameters - tag and message. In this case, the tag is defined as "FORTUNE APP TAG" and the message as "onCreateCalled".
Run the application to see the log message in the Logcat panel.

Filter the contents of LogCat, type onCreateCalled in the search box above the console:

Then delete the search text to see all log messages again.
Another useful feature is logcat, which is the ability to view error messages. Add a bug to your fully functional application to see how things work.
Go to MainActivity.java and change the following line in onCreate():
//mFortuneText = (TextView) findViewById(R.id.fortuneText);
Launch the application. Click the What's My Fortune? Does not work!

How would you fix the bug if you didn't know there was a bug? Logcat will help with this.
Go to the Logcat panel - it looks something like this:

There is a lot of red text here. In this case, the problem is on line 50 in the MainActivity.java file. LogCat turned this link into a blue hyperlink. If you click it, you can find out what the problem is.
By changing mFortuneText = (TextView) findViewById(R.id.fortuneText) you created a variable but didn't specify its value - hence the null pointer exception. Go back and change the code, run the application. This time everything works smoothly. Logcat is a useful tool for finding bugs.
Share this article:
related articles

Coming to everyone's mind - experienced designers, students or small business owners who have not written a line of code. If you have a great idea, how do you implement it if you don't understand the difference between Java and Javascript, or Photoshop and Illustrator?
How to make a mobile application - expert opinion
- Paul Ferro, President of 5 Nerds Software Development, a full-service design and development agency from branding and design to application development from scratch.
- Andres Max, founder of Ideaware, an agency specializing in product strategy, UX/UI design and front-end optimization. Prior to founding the studio, Max was the Lead UX Designer at Mashable.
- Daniel Hindi is Chief Technology Officer at BuildFire, a mobile app building platform used by over 50,000 companies. Even if you don't know how to create mobile apps, with BuildFire's WYSIWYG editor you can still make a professional app.
The responses from these entrepreneurs let us know that building a mobile app doesn't necessarily involve coding or getting your hands dirty at Adobe. With a great idea, a bit of business acumen, and a lot of effort, you could be at the helm of the next Uber. Let's take a look at their opinions.
1. Brainstorm
The first step on this long journey is told by Paul Ferro, who, in addition to starting his own business, helps other entrepreneurs turn their ideas into reality:
You have a great idea for a mobile app. This is the next viral game, or the utility that everyone will use, or the next step in the path of social expression. In any case, you know that it's great and you want to get your idea across to everyone. Where to begin?
First, it is very important to be specific about your idea. You can sketch out the basics of your app in your head, but have you thought through all the little details that separate a fantastic app from just a normal one? It is very important to sit down and take a few minutes to think about the whole experience of using the mobile application.
If it's a game or something like that, then you don't need to compose each level in your head, but you do need to understand how the levels differ. Are there in-app purchases? Multiplayer game? Connection with social networks? As you answer all these questions, you begin to mentally put all the pieces together and overcome all the problems and pitfalls. Or, if someone is building the application for you, they will want to know as much as possible before starting, and this will help the development process.
2. Present your idea to friends, family and colleagues for feedback
Everyone thinks their ideas are amazing, right? How can you understand that the concept of a mobile application that you came up with seems interesting to others as well? Turn your "inner circle" into a cordon sanitaire that tests ideas for viability:
Now that you have a working idea, it's time to test it out and see if it's really as good as you think. There are tons of good apps out there that do pretty much the same thing, but for one reason or another, some rise to the top and become loved, while others don't. Your app doesn't have to be #1 in the store to be popular or profitable. But he needs at least some visibility.
Bring your idea to the maximum number of people to get their opinion about it. Here's an expert tip: When you present your idea to others (friends or family), tell them that you know someone with the idea and want to invest in it. Then explain the idea itself. Your listeners will be much more honest knowing that the idea is not yours and that you could lose your money by investing in a not so good app. Ask - will they use it? If they do, why? If not, why not?
Ask them to point out shortcomings. Ask if they have seen anything similar? This approach can be much more productive for discussing an idea than just finding out that you have many friends and relatives who do not want to offend you.
If you have done all this several times, and your idea has not met with a strong rebuff, then it's time to start! Here you have a choice. You can make it yourself or hire someone.
3. Even if you can't make a mobile app, you can make a great prototype

Andres Max reiterates the importance of testing an idea and goes further: “I have always encouraged entrepreneurs to do market research. Dig deep to gauge the demand for your idea, what worked in the past and what didn’t, then make adjustments as needed.” For example, you might think you have an amazing idea for a photography app and only then find out that it's already made and on sale. This does not mean that you should stop working on the idea - it is just information for you to help you understand what you can do better.
One of the best ways to compare is, of course, to make a prototype. Max says, “After you've perfected the idea, create and test a prototype. Gather all the valuable information on its basis.” A prototype can be just a sketch of your design, or you can create a fully functional prototype in a tool like Proto.io. It does not require programming or design skills.
4. Decide whether you will hire a studio or a developer - or learn how to develop yourself.
The next step, says Ferro, is to figure out who will turn your prototype into a real application. You may not believe it, but you can very well create an application yourself (even if you have no experience). Provided, of course, that it is simple enough:
“Learning how to build apps can be challenging, especially if you're inexperienced. But it is possible. Especially if your idea is about the uniqueness of functions - and not the technology itself. Take, for example, Flappy Bird. The application itself is extremely simple. But the idea was unique and exciting. Now look at the Apple Passbook. The idea is relatively simple, but the technologies that allow you to keep your data secure, contact merchants, tie your fingerprint, etc. are relatively complex.
If you need cutting-edge technology in your app that uses the device in a way that no one else has used it before, then building the app yourself can be difficult. It can take years to figure out how to use all the features of a mobile device. If you understand that you can build the application yourself - great! But even if you don't have development skills, there's room for advancement pretty quickly."
5. Make Sure You're Using the Right Tools to Build Mobile Apps

But how to gain this very speed? You can either go through (there are plenty of resources for that) or use tools that are available even to beginners to create your mobile app. One such tool is BuildFire, explains Daniel Hindi:
“What if you have a killer idea but don't know how to build mobile apps? This is exactly the problem we wanted to solve in our BuildFire platform. We have over 80,000 apps, from small companies to large corporations, all made with little or no programming knowledge. While this is great for simple applications, the lack of programming skills usually limits you to the feature set that the platform offers. BuildFire solves this problem and we will soon open up an API for developers to add to existing BuildFire applications.
We see more and more startups and small companies connecting to our core platform with an extremely low entry threshold. Once the app has proven its worth, they ask third-party developers to create the missing pieces of the puzzle, saving a lot of time and money.”
6. Make sure you're hiring the right people
Whether you're hiring people to finish a project you started on a platform like BuildFire or building an app from scratch, it's important to find the right developer, says Ferro:
“Now, if you decide to hire someone to develop your application, things will be a little easier compared to if you were learning to code on your own. But here, of course, the question of cost arises. Hiring an office has a number of advantages compared to self-development. They have experience, they already know all the pitfalls of development, they will make an optimized and fast application, its design will not be terrible - I think there is no need to explain in detail the benefits of turning to professionals.
But you need to make sure you are hiring the right professionals. First of all, this means finding a company that will listen to your story and fully understand it before they even start writing code. A lot of people want to jump right into development and start billing you, but that's not the way to go. Talk to several companies to find the one that suits you. You should feel comfortable working with them, communicating and overcoming problems with them. And trust me, there will be problems!
Once you find the right company, everything will work out. They will immerse themselves in your idea and unravel the loops, fill in the gaps, offer features and functions, providing a high level of service. The best apps come when a great idea meets a great team that breathes life into it.”
Time to act
Ferro ends by reminding entrepreneurs that building an app is one thing, but getting users to download it is quite another:
So, you have made and released the application. Don't stop there. Promote it. Talk about him. Share it on social networks - everywhere! You need to talk about it. There are many ways to promote your app and you should try them all. Blogs are always looking for new apps to talk about. Contact them. If your application is a utility, find out where it can be most useful and tell people about it. Whatever you do, you should always share your application as much as possible.
And how are you doing? Have you made your dream app? Tell us about it!
This tutorial will teach you the basics of how to write an Android app using the Android Studio development environment. Android devices are becoming more and more common, the demand for new applications is only increasing all the time. Android Studio is a free, easy-to-use development environment.
For this tutorial, it's best if you have at least a smattering of Java as it's the language used by Android. There won't be too much code in the tutorial since I'm assuming that you are somewhat familiar with Java or are ready to find something you don't already know. Creating an application will take 30-60 minutes, depending on how quickly you download and install all the necessary programs. After following this tutorial on creating your first Android app, you might find yourself a fun new hobby or even start a career as a promising mobile app developer.
Step 1: Install Android Studio


- JDK needs to be installed ( Java Development Kit) and JRE (Java Runtime Environment). You can download from this link. Choose the version for your OS there, accept the license agreement, download and install.
- Now go here http://developer.android.com/sdk/index.html and download (be careful, you will have to download about 3 gigabytes).
- We start the installation and follow the instructions.
Stage 2: Create a new project


- Open Android Studio.
- On the menu " Quick start”, select “ Start a new Android Studio project».
- In the window " Create New Project” (the window that opened), name your project “ hello world».
- Company name optional.*
- Click " Next».
- Make sure the checkbox is only on " Phone and Tablet».
- If you're planning to test your first app on your phone, then make sure the correct version of Android is selected (no older than the one on the phone).
- Click " Next».
- Select " Blank Activity».
- Click " Next».
- Leave all other fields as they are.
- Click " Finish».
*Typical company name for android projects is "example.name.here.com".
Step 3: Editing the greeting


- Go to the tab activity_main.xml, most likely it is already active.
- Make sure the tab is active at the bottom of the screen design(most likely it is).
- Drag the phrase " hello, World! » from the top left corner of the phone to the center of the screen.
- The folder tree is located on the left side of the screen. Open the folder called " values».
- In this folder, double click on the file " strings.xml».
- In this file, find the line containing the text " hello world!" and add to this text " Welcometomyapp! ».
- Return to the " activity_main.xml».
- Make sure your text is centered on your phone screen and contains the text " helloworld! Welcometomyapp! ».
Step 4: Adding a Button

- On the tab " activity_main.xml» select the tab below « design».
- In the column to the left of the window where the phone is located, find the folder called " Widgets". There are various buttons.
- Take the button button” and drag it to the phone screen. It should be centered on the screen directly below your text.
- Make sure the button is still selected (blue box around it).
- In the lower right corner there is a window with the properties of the selected object. Scroll down and find the line called " text».
- Change the text " New Button" on the " Next Page».
Step 5: Create a Second Activity

- At the top of the project's filesystem tree, right-click on the folder called " app».
- Select New > Activity > Blank Activity.
- In the window that appears, in the top line, enter " SecondActivity».
- Click " Finish».
- Go to the " activity_second.xml' and make sure the ' design».
- Move the text from the top left corner of the phone to the center of the screen as we did in the previous steps.
- Make sure that the text block is still selected (blue frame) and in the lower right corner of the object properties, find the line " id" and enter there " text2 ».
- In the upper left corner (in the project tree), double-click on " strings.xml».
- Under the line
hello world! Welcome to my app! add the following line
Welcome to the second page! - Return to the " activity_second.xml».
- Select the text block again.
- In the lower right corner in the properties of the object, find the line " text" and enter there «@ string/second_page».
- Make sure the text box now says " Welcometothesecondpage! ” and the blog is placed in the center of the screen.
Step 6: Write an action for the button


Stage 7: Testing the application

- In the toolbar at the top of the Android Studio window, click on the green play symbol.
- In the window " Choosedevice» select « Launchemulator» and select a device.
- Click on the button " OK».
- When the emulator starts (this may take a long time), the application will automatically open on the virtual device.
- Make sure all text is displayed correctly and clicking on the button takes you to the next page.
Attention: If you receive the message " HAX kernel module is not installed!', there are two possibilities. The fact is that this virtualization is supported only by modern Intel processors and you only need to enable it in the BIOS. If you have a processor that does not support this feature, you will have to test the application on a real phone or use a third-party emulator instead of the built-in one.
How to get .apk file in Android Studio
In my opinion, this issue is well covered in this article, so I will not repeat myself. The easiest for the first lesson seemed to me Manual way.
When you receive the file, you can copy it to your phone and install the app.
Stage 8: Result

Congratulations! You have just finished writing your first Android app with some basic functionality. The finished application should have a user welcome page and a button that will take the user to the second page.
You've had a glimpse into Android app development and may have aroused in yourself the desire to learn everything you need to further develop in this direction.
09.04.17 3287Mobile software development can be an interesting and rewarding activity. In this article, we will tell how to create an android application.
android studio
To write an application, you will need to download and install Android Studio. The package includes a software development kit with all the Android libraries and codes needed to develop the application. As well as an Android emulator that allows you to first test the application on your PC without installing it on a real mobile device.
But first you need to download and install the Java Development Kit ( JDK) from Oracle. Find the section " Java SE Development Kit 7u79 and download the version for your PC. It is important to download the correct version ( 32-bit or 64-bit), otherwise Android Studio will not be able to find the Java Runtime Environment ( JRE).
Note: Oracle will not be posting any updates to Java SE 7 on its public sites and it is expected that users will move to Java 8 en masse. But at the moment Android Studio requires Java 7 . This may change in the future.
After you have installed the JDK , you need to install Android Studio . During installation, you must specify how much memory to reserve for the Android emulator. It runs Android as a virtual machine, like a smartphone with an Intel processor. It's faster than ARM processor emulation on PC. But to run this virtual machine, the emulator must allocate some memory. But before you create an Android application yourself, keep in mind that the combination of Android Studio, Java and an emulator will be quite resource intensive and your computer may slow down.
Google says you need at least 2 GB of RAM and 4 GB is recommended. But my main PC has 8 GB and it still slows down sometimes:
The first time you launch Android Studio, it will perform an initial initialization that includes downloading and installing the latest version of the Android SDK. This may take several minutes.
When everything is downloaded and installed, you will see a menu that will allow you to create a new one, open an existing one, or import a project, etc.
Create a new project
Click " Start a new Android Studio project" and enter the name of your application in the field " application name". In field " Company Domain» enter the official domain of your company. If you are an independent developer or hobbyist, enter your own domain. If you're just experimenting with Android and don't intend to publish your apps on Google Play anytime soon, just leave the domain example, just change " user» to your name (no spaces):

In the next dialog, make sure you have the option " Phone and Tablet", and for " Minimum SDK» installed - API 15: Android 4.0.3. For options " wear" And " TV» checkboxes should not be checked.
In the dialog box " Add an activity to Mobile» leave the default value « Blank Activity" and press " Next". In the dialog box " Customize the Activity» leave all values and click « Finish»:

Integrated Development Environment ( IDE) is running. This may take several minutes especially if you have created a project for the first time). If you see the error message " Rendering Problems: Rendering failed with known bugs", click the link" rebuild”, which is displayed next to the error message.
By default, the IDE's workspace is divided into three main parts ( not including toolbars, etc.). On the top left is the project tree. To the right of it is the code editor, and below them are the messages.
Before you create an Android app from scratch, you can already compile and run the auto-generated app, but that's not very interesting. Instead, we'll add a few little things to get you familiar with Android app development.
Project Tree
The project tree contains all the files and resources needed to create an Android application. If you're familiar with writing simple programs in Java, C, Python, etc., you might think that everything would be contained in just one or two files. But Android app development is a bit more complicated:

In node " app The » project tree contains several nodes (for example, folders ) that you can expand. The top level nodes are “ manifests”, “java" And " res". The latter is short for " resources”.
IN " manifests” file is located “ AndroidManifest.xml”, every app should contain it. This is an XML file with information about the application, including its name. An element often added to this file is a list of permissions required by the application. For this simple application, you don't need to change anything here.
In section " java» contains the Java code of the application. It will be in a subdirectory named com.example.user.myfirstapp . This is the company domain name you entered earlier, only in reverse, plus the application name. This folder contains the MainActivity.java file. This is the entry point to the application and the only Java file we need.
We continue to create a simple application for Android. In section " res» There are several folders for graphics, menus, and user interface elements. We are interested " layout" And " values". In folder " layout' there is a file called ' activity_main.xml". This is an XML file that describes the user interface. You can edit it in two ways. The first is direct editing of the XML code, the second is the use of the built-in user interface designer:

In folder " values' contains several XML files. At the moment the most important thing for us is strings.xml . Instead of specifying string values in Java code, it is customary to put them in the file " strings.xml' and we can refer to them via identifiers. The advantage is that if a row is used multiple times, it can only be changed once and the changes will take effect in all places. It also makes it easier to support multiple languages in an application.
To create an Android application yourself, you will need to modify the MainActivity.java , activity_main.xml and strings.xml files.
Application writing
For our example, we'll add a button labeled " Tap Me!", change the default greeting " hello world!" on the " Tap me if you dare!". And also change it so that it is in the center. And add the code so that when the button is clicked, the text " toast»!
Let's start by changing the greeting text and its alignment. First, find in the project tree the file " activity_main.xml” and double click on it. Remember, that " activity_main.xml' is a file that contains the user interface definition. There are two tabs at the bottom of the code window: design" And " Text". Go to the " design».
Now click on the text " hello world!”, which is shown in the smartphone screen preview window. If it is too small, use the zoom button ( magnifier with plus sign).
In the properties window, located to the right of the phone image, scroll down the screen until you find the inscription " layout: centerInParent". Click on the space next to it and select " horizontal". After that, the text hello world!» will move to the center:

Before creating an Android application without skills, let's change the text. Line " hello world!' is stored in the file ' strings.xml' under res->values . If you double click on this file, you will see several lines of XML that define the lines used by the application.
Find this line:
XMLSELECT ALL XMLSELECT ALL
And change it to:
CSSELECT ALL CSSELECT ALL
We have changed the alignment of the greeting and its text. Now let's add a button. Return to the " design» file « activity_main.xml”, find in the list “ Palette» to the left of the smartphone image, the item « button” and click on it. Now click somewhere under the inscription " Tap me if you dare!».
Double click the button to change its text. At the end of the field text:” there is a button with three dots, click on it. In the window " resources» click « new resource", and then " New String Value…". In field " resource name:» enter « tap me", and in the field " resource value:» — “ Tap me!". Then click " OK". Now we have a button Tap me!”.
The last step in creating a simple Android app is to add the Java code that responds to the click of a button. One of the Android user interface elements is “ toast.". It provides a simple message in a small popup. You have undoubtedly seen it. For example, in Gmail, when you exit an email before the email is sent, the message " Message saved to draft". After a certain time, it disappears.
For our sample application, we will display a message each time the button is clicked. The first step is to add Java code. Find the file " MainActivity.java" and add the following code to " onCreate«:
JAVASELECT ALL JAVASELECT ALL public void onButtonTap(View v) ( Toast myToast = Toast.makeText(getApplicationContext(), "Ouch!", Toast.LENGTH_LONG); myToast.show(); )
Word " view" in the phrase "( view v)" will be red, with a message next to it indicating that you have used a new construct ( view) without importing it in the import section at the top of the Java code. This is easy to fix. Click on the word " view' and then ALT + ENTER . If the word " Toast” is marked in red, do the same again:

Return to the file constructor section " activity_main.xml”, press the button and scroll the list of properties to the item “ onClick". Click on the box on the right and a list of functions will appear on the screen. Click on " onButtonTap”, which is the feature we just added.
Now the onButtonTap() function will be called whenever the button is pressed. To display a message, we call myToast.show() .
That's all about creating an Android application yourself, now let's test it in an emulator.
Building and Testing the Application
On the menu " Tools» go to Android AVD Manager. This tool displays a list of currently configured virtual Android devices. You will have one device set up by default, probably a Nexus 5. Click on the play icon (triangle ) in the " actions". This will launch the emulator.
Depending on the performance of your PC and the amount of allocated memory, it may take a few minutes for the emulator to start up. After the emulator is launched, go to the menu " Tools" and press " Run 'app". The application will be compiled and sent to the emulator. During this, Android Studio will ask you which emulator to use. You will see your current emulator listed. This should be the default option, so just click " OK»:

The application will appear in the emulator. Press the button Tap me!” - a message should appear at the bottom of the screen. Congratulations, everything works!
What to do next and conclusion
You can also run the app on a real device. The easiest way to do this is to enable USB Debugging on Android device and connect it to the computer. The USB debugging option can be found under Settings - For Developers. If you do not have this section, open "Settings" - "About phone", And then click " Build number"Seven times.
Once the device is connected, click " Run 'app" on the menu " Tools”, but this time don't push the app to a virtual device, but push to a real device. If the device is not listed, it means that you have not enabled USB debugging or you need to install the appropriate USB driver. See the OEM USB Drivers and Google USB Driver sections in the Google documentation.
You have successfully created a simple android application. The next thing to do is write a second application and get on with it. Google
In fact, to realize this idea is not as difficult and not as expensive as it might seem at first glance. You just need to have a good enough idea of what exactly you expect from a mobile application and determine how to achieve your goals.
Do you enjoy developing mobile applications for a business, blog, product or service, or are you just looking for a new source of income? Thinking about how to implement it and calculate future costs? In fact, to realize this idea is not as difficult and not as expensive as it might seem at first glance. You just need to have a good enough idea of what exactly you expect from an application for a mobile phone or tablet and determine in what ways to achieve your goals.PREPARATORY STAGE
Before you create a mobile application, you should decide on the following points:
- Do I have a specific vision of what the finished product will be and what its functionality will be?
- What tasks is the program designed to solve and what will be the benefit for a particular user?
- What platforms will the finished software product work on (iOS, Android, Windows Phone)?
- Will daily monitoring of its functioning be required?
- How much am I willing to spend?
- Will I create the application myself or will I turn to professional developers.
Also keep in mind that creating mobile applications for businesses, such as a cafe, pizzeria or fitness club, should be taken especially seriously. After all, the presence of such a modern tool in a company is a serious image factor that will contribute to greater customer loyalty to the brand and a significant increase in the number of repeat visits.
WAYS AND COST OF CREATING AN APP
There are two ways to create applications for mobile devices. The first involves the independent formation of programs for electronic devices based on Android or IOS according to a template type using special website builders. The second way, more costly, but resulting in serious and functional products, is to ask for help from individuals or companies involved in writing software. The second option is suitable when it comes to creating serious software products with specific characteristics that go beyond the ready-made kits available on website builders. It should also be taken into account that professional development for iOS or Android requires significant expenses. What is the cost of creating an application for Android and IOS platforms in the Russian market? The price range is quite wide - from several hundred to tens of thousands of dollars - it all depends on the type of software and its functionality. However, such serious investments are more than paid off in the long run. When planning the final cost, it is also worth considering the costs of placing a new product in the AppStore and Android Market. If you are limited by a small budget and you do not have time at all, then you can try to design an application for electronic devices yourself. You don't need to be a programmer to do this. Read on to find out how easy it is to do so.
HOW TO CREATE A FREE APP
To date, there are enough domestic and foreign platforms available on the network that allow you to construct an application on a ready-made basis on a conditionally free basis. Website builders host hundreds of ready-made applications, sorted into various categories: small business, education, entertainment, sports, blogs, and the like. On such resources, programs with a standard and limited set of functions are created for free. Restrictions apply to the number of installs and views of your application, the number of positions in the catalog, the ability to publish in stores, the availability of a payment acceptance system, the presence of third-party advertising, and the ability to refine the functionality to suit your needs. To remove restrictions on sites, you can choose a specific package with a fixed monthly fee, the amount of which is determined depending on the number of options enabled. Examples of site-constructors of shareware mobile applications for Android, iPhone, iPad.
- Appsgeyser.com (appsgeyser.ru - Russian version).
And now let's look at how a mobile application is developed in a few minutes using the ibuildapp site as an example. We chose this platform because it is very simple and straightforward to use. By the way, the iBuidApp resource also has a Russian version, which makes it even easier to use the constructor. Before starting work, register on the site. Next, on the main page, click the “Create” tab and select the template that suits us.
CHOOSE A TEMPLATE AND CATEGORY
This site offers a fairly large selection of standard options, which can be found in the category catalog in the left menu of the site page. For example, we chose the category “Photography” and the template “Photo Studio”. After choosing the design and the corresponding category, we start editing the menu items. 
CONTENT EDITING
The administrative panel of the designer opens up a wide range of options for editing menu items. You can change the background, add a logo, customize the navigation of the main and bottom menus on the screen of an electronic device, edit the contents of internal pages. By the way, on the right side of the screen you can see how the changes will look on the screen of the electronic device. The constructor also allows you to test your application on a tablet or smartphone. Also, the finished program can be published in the Appstore or Google Play, but this feature is only available for paid versions. The site offers 3 paid packages worth 490 rubles, 2400 rubles, 3700 rubles. per month. 
PAID PACKAGES
If you are not satisfied with the look of the templates available on the site, you can create your own design by clicking the “My templates” tab in your account. The capabilities of an individual designer are quite limited, they allow you to endow the software product with only the most necessary elements. 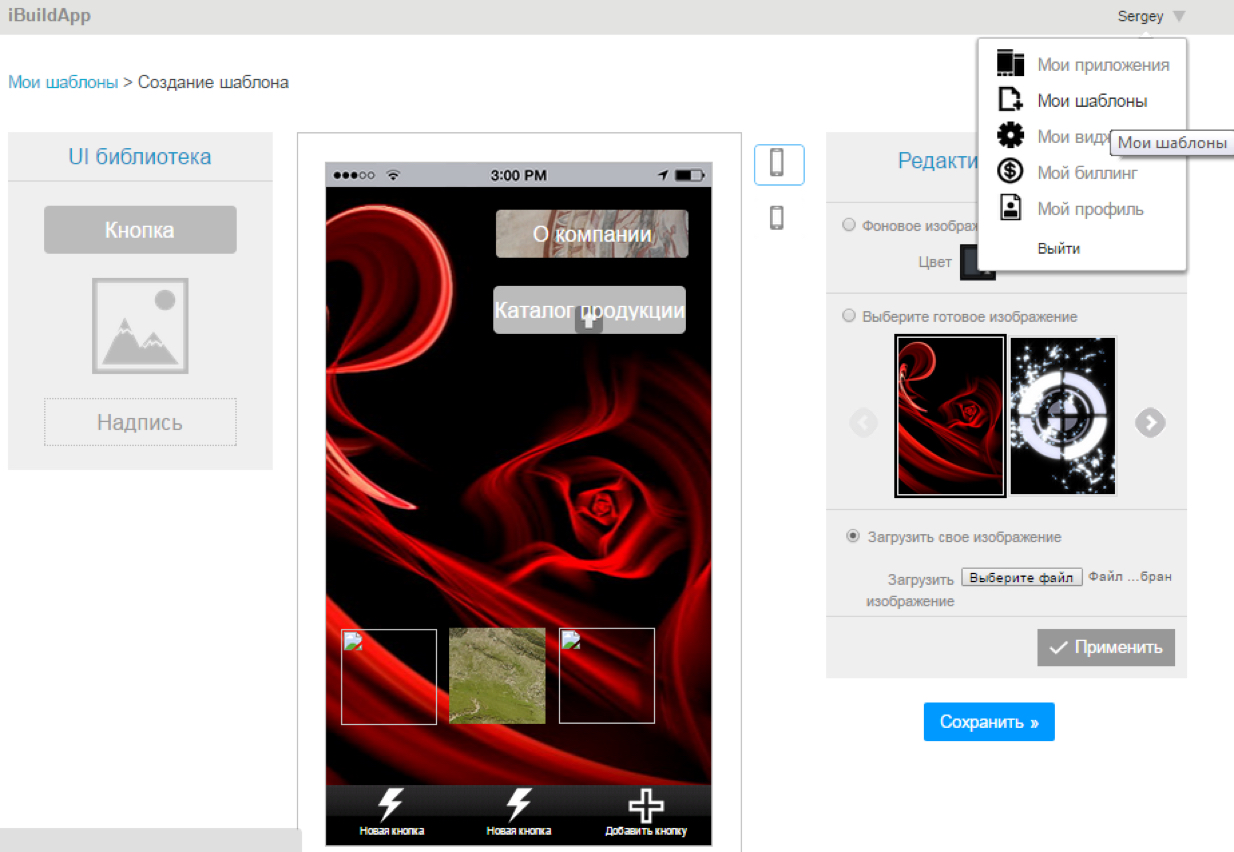 Now it's your turn to start creating applications and install it on your smartphone. Try it, it's easy enough!


