How to copy the operating system to another disk. Nuances of activation and launch of the original Windows. About AOMEI Backupper
Buying a new SSD or HDD doesn't have to mean installing Windows from scratch. On new hard disk, if the old one is still connected to the computer, Windows with all its settings and installed software can be transferred using special software. This process is called migration operating system. It involves cloning the system partition (drive C and boot sector) another HDD. Such operations can be Acronis software true image, various software builds from Paragon, including the Paragon Migrate OS to SSD utility specially designed for this purpose, as well as products from the developer AOMEI. But while products from Acronis and Paragon can only be used on a paid basis, software from AOMEI is available completely free of charge.
The ability to transfer Windows to another hard drive is contained in two AOMEI products - in the program for Reserve copy AOMEI Backupper Professional and in manager AOMEI discs Partition Assistant. You can use the Windows Migration feature in AOMEI Backupper Professional for free only for a month, until the full-featured trial version expires. But with the help of the free edition of the Standard Disk Manager AOMEI Partition Assistant to transfer Windows from one hard drive on the other you can always. But not only this point makes AOMEI Partition Assistant a profitable solution for moving Windows to another hard drive. This program is, in fact, a single tool for migrating the operating system and allocating space on a new hard drive for the specific needs of the user. Today we will look at how AOMEI help Partition Assistant is implemented Windows transfer to another empty hard drive.
1. Specifics of the operation: required reading
The Windows migration method described below does not preserve the partition structure and data of the target hard drive (the one to which the operating system will be migrated). Because this the way is fine only for cases where nothing should be stored on the target SSD or HDD. For example, in the case of purchasing a new device with unallocated space. Or when connecting a used device whose data is of no value. AOMEI Partition Assistant can transfer Windows to a separate system partition of the target hard drive while preserving the structure of the latter and data stored on other partitions. In this case, the migration method from the one below will be different. If there is important data on the target hard drive, you cannot use the instruction below.
2. Download and run the program
AOMEI Partition Assistant can be downloaded from the official website of the creators. In the list of editions of the program, you can select free Standard. Its capabilities will be enough to transfer Windows to another hard drive and create partitions on it (if necessary).
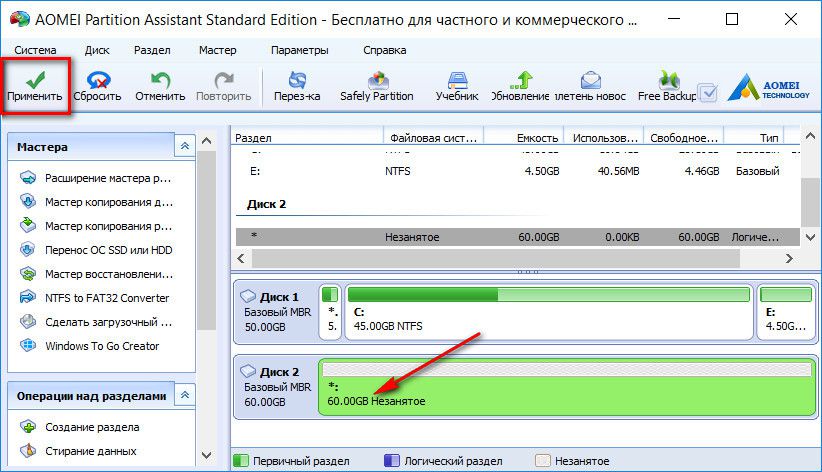
After starting the program, in the center of the window we will see a picture of all connected disks and their partitions - in a tabular version at the top and in a visual format at the bottom. If the target SSD or HDD new, its space will be unallocated as shown in the screenshot.
In this case, remember it serial number– Disk 1, Disk 2, etc. - and immediately proceed to paragraph 4 of the article.
3. Deleting partitions on the target hard drive with existing layout
Before starting a Windows Transfer operation, target hard disks with the existing markup, you need to get rid of the sections by deleting them. Partition deletion requires special care. If more than one is connected to the computer hard drives with a similar partition structure, their properties window will help you figure out which of them is the target to which you want to transfer Windows. To find out which of the hard drives is displayed as Disk 1, as Disk 2, etc., click on it (on the block of the entire disk, as shown in the screenshot), call context menu and select "Properties".

In the properties window in the first column we will see the brand and hard model disk.

We make sure that the desired hard drive is selected, and delete its partitions one by one. On each of the sections, we call the context menu and select "Delete Section".

For each of the sections, we confirm the deletion without changing the preset option "Quickly delete section".

When the target hard drive is all displayed as unallocated space, click the button at the top of the "Apply" program window.

Once again, we confirm the decision to delete partitions.

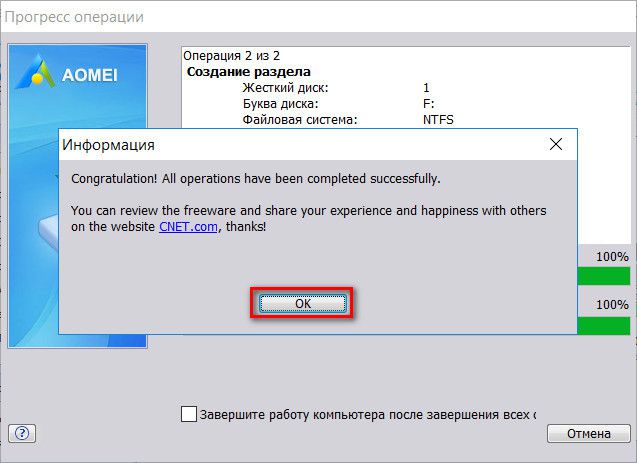
Upon completion of the operation, click "OK".

4. Transfer (migration) Windows to another hard drive
Well, on the target SSD or HDD disk space is not allocated, now we can proceed directly to the process of transferring Windows to it, which is located on the original hard drive and in this moment working. In the AOMEI Partition Assistant window, click the "Wizard" menu and select "Migrate SSD or HDD OS".


Then click on the target disk with unallocated space. Click "Next".

In the next window, the size of the future system partition on the target disk is configured. AOMEI Partition Assistant installs by default for C drive and bootable Windows sectors the same dimensions as the original hard drive. If the target disk is not a 60 GB SSD, but a media with large space, the system partition slider can be pulled up to 70-100 GB. it optimal size currently for Windows 7, 8.1 and 10. The remaining space of the target disk will later be given to non-system partitions for data storage. Click "Next".

The work of the wizard is completed - click "Finish".

Returning to the main window of the program, click the button at the top "Apply".


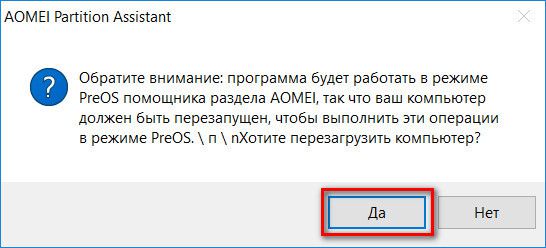
Then we will see another dialog box with a warning that the operation will be carried out in pre-boot mode. We save the files open on the computer, close the others active programs and in the AOMEI Partition Assistant window, click "Yes".
The computer will restart, and on the screen we will observe the progress of the Windows transfer operation.

5. Checking the target hard drive
When the operation is completed, the system will boot from the original hard drive. You need to restart the computer again in order to configure the BIOS to boot from the target hard drive and check the operability of the transferred Windows.
For cases of transferring Windows to a single SSD system partition, the process is complete.
6. Create non-system partitions on the target hard drive
Along with Windows, AOMEI Partition Assistant has also moved to the target hard drive. After booting the computer from the target disk, we can use the program to create non-system partitions. We click on the unallocated space after section C, call the context menu (or use the menu of the "Section" program) and select "Create Partition".

In the window that appears, drag the slider to visual block, allocate all available space or only part of it for the partition being created. Click "OK".

If the disk space is divided into several partitions, we perform this operation the required number of times. Upon completion of the formation of sections, we apply the planned operations.

We confirm their launch.

Click "OK".
Disk partitioning is complete.
Have a great day!
With the well-established operation of the Windows operating system, and with it the installed, configured, activated licensed programs, it is not necessary to say goodbye if there is a need for replacement motherboard computer. Windows itself provides for such events special tool- Sysprep utility. Below we will consider in detail how, with its help, not only to solve the issue with the operability of the operating system after replacing the motherboard, but also to completely transfer the working activated Windows to another computer with different hardware components than the current ones.
We will transfer to another computer the most current version the operating system from Microsoft is Windows 10. In addition to the built-in Sysprep utility, the free edition of the AOMEI Backupper backup program will help us in this matter. Any other backup program can be in its place, the essence of the process of transferring Windows to another computer with different hardware will not change. AOMEI Backupper is chosen because of its ease of operation and free usage.
1. About the Sysprep utility
The Sysprep utility removes drivers and other system data about the hardware components of the computer, while not affecting user data - installed and configured programs, files on system drive, shortcuts on the desktop and in the Start menu. This utility was created by Microsoft to simplify the installation of Windows and software on an industrial scale. The installed operating system with programs already deployed and configured upon completion of Sysprep becomes a reference image, which is then deployed to various computer devices companies. On each of them, it remains to install drivers for individual components and external devices which are not installed automatically. And, of course, in a separate order on each computer you need to activate Windows.
The Sysprep utility can be used when replacing not only the motherboard, but also the processor. Replacing the latter is not in all, but in some cases it may lead to failures and errors in Windows. If and as soon as they are found, you can resort to the help of Sysprep.
2. Preparatory stage
Whether it's replacing a motherboard or processor, or moving Windows to another computer with different hardware, it's best to create a restore point before using Sysprep, just in case. As an alternative to it - a backup using the AOMEI Backupper program, which we will use to transfer the system to another computer. Before running the Sysprep utility, it is also advisable to disable the antivirus and firewall.
These preparatory steps will be enough for cases of replacing the motherboard or processor, and for transferring Windows to another computer, you will need a couple more things.
After the Sysprep utility removes the binding to the hardware components of the computer, you will need to create a backup copy of Windows. You need to do this in pre-boot mode using bootable media with a backup program. To create one, you will need a CD / DVD media or USB flash drive.
You also need to think about how to transfer backup Windows. This will require external HDD, a capacious flash drive or access to a local network resource if the computers are on the same small network. When migrating an operating system from one build of a PC to another, you can save a backup copy on the hard drive of the first PC, and then temporarily connect this drive to the second PC. If the computers are located at a distance, while the target computer has at least some operating system, you can save a Windows backup on your hard drive source computer. And then transfer it to the target computer using cloud storage. But even if the target computer does not have any operating system, but the hard disk is partitioned, you can put any files from the Internet on it if you boot from a Live disk (or from a disk with Linux distribution in non-installation mode).
3. AOMEI Backupper bootable media
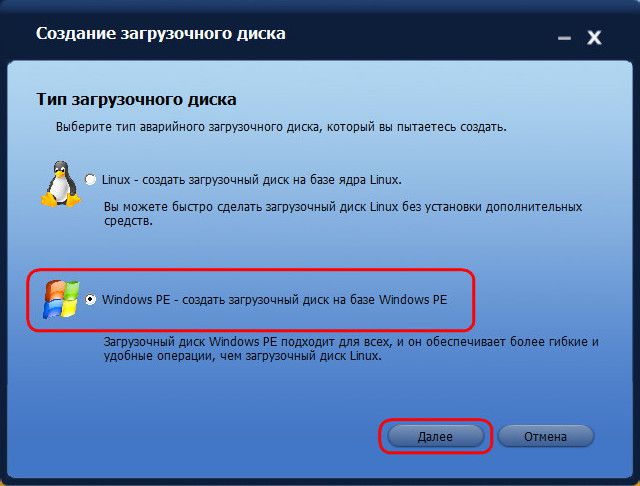
We omit this paragraph of the article for cases of replacing the motherboard or processor, but in the case of transferring Windows to another computer with a different hardware, we proceed to create a bootable media with a backup program. Using the AOMEI Backupper program, this is done very simply. Let's go to last section"Utilities" and click "Create bootable media."

Then select the item "Windows PE". Click "Next".

We select the media - CD / DVD-disk, USB flash drive or ISO image. The latter must be selected if you are working with a computer based on BIOS UEFI. AOMEI Backupper cannot write UEFI bootable media. But other programs (for example, ) can do this. With the help of those, using the created AOMEI program Backupper ISO image, you will need to create bootable media UEFI.


4. Reset the hardware settings with the Sysprep utility
Now we proceed directly to removing the binding to the hardware components of the computer. Press the + R keys and in the Run command field, enter:
After clicking "OK" in the explorer will open system folder with the executable file of the Sysprep utility. Let's launch it.

A window with Sysprep launch settings will open. We leave the default option to go to the system welcome window (OOBE). To prevent Windows activation from flying off, do not touch the checkbox of the preparation for use option. And, on the contrary, we expose it when you need to reset the activation. Why you may need to reset the activation will be discussed below, in paragraph 8 of this article. Third, she last setting- a way to complete the work. In the drop-down list, change the preset reboot to turn off the computer. Click "OK".

The Sysprep utility will do its job and the computer will shut down. The next time you start Windows, it will already adapt to the new hardware. Therefore, after turning off the computer, we can begin to replace the motherboard or to a backup Windows copy in preload mode. In case of replacing the motherboard or processor, the backup items can be omitted and you can immediately start the system - to paragraph 7 of the article.
5. Windows backup without being tied to the hardware of the computer
To create a backup copies of Windows, which after the operation of the Sysprep utility will not be tied to the hardware current computer, load it from a previously created CD / DVD-ROM or USB flash drive with the AOMEI Backupper program. If an external HDD or a capacious flash drive is used to save the backup, we connect them.
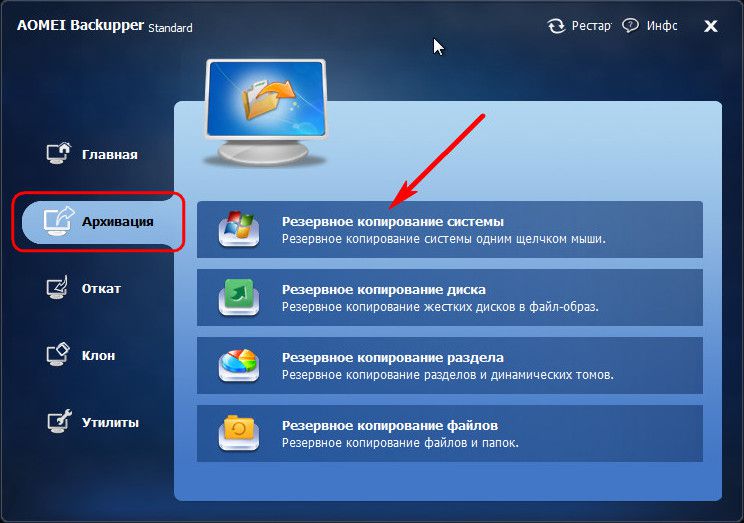
In the AOMEI Backupper window, go to the "Backup" section and select "System Backup".
The disk with AOMEI Backupper will be detected as 500 MB reserved by the system, the system drive will be marked with the letter D. Select the last one in step 1. In step 2, specify the path to the backup location - external media, non-system disk partition, network resource. Click "Start".

In the window of the backup process that has started, we will use the option to turn off the computer upon completion of the operation.

After creating a backup, the computer will turn off by itself, and the external, internal HDD or the flash drive can be disconnected and connected to the target computer where you plan to transfer Windows.
6. Restoring Windows on a computer with different hardware
By connecting the media with the created backup file to the target computer (or downloading the backup file from the cloud storage to its hard drive), now on this computer we set the boot priority from the CD/DVD or flash drive with the AOMEI Backupper program.
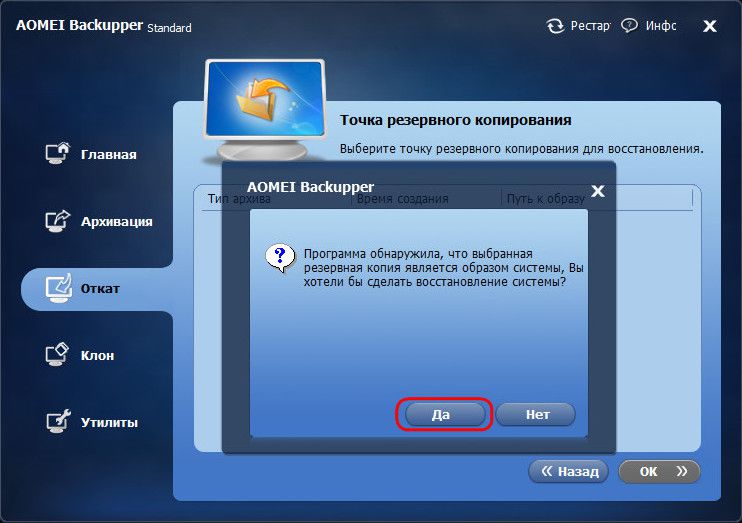
In the AOMEI Backupper window, we go to the "Rollback" section. Click on the path below.

Specify the path to store the backup file, after which the program will offer to restore the system from it. Click "Yes".
In the next window, at the top, click on the backup, and at the bottom, check the box "Restore the system to another location." And click "OK".

In our case, the backup file on the target computer got along with the one seized from the source computer. hard drive(Disc 1). The hard disk of the target computer (Disk 0), as we can see in the screenshot, is not even marked up. But this is not necessary. Just select it and click OK.

With a partitioned hard disk, select only the system partition. Important: when running backup programs from bootable media, the letters of the disk partitions may differ from those that appear in the system explorer. Therefore, in disk partitions, you need to navigate by their size.
If the system partition captured in the backup is smaller than the partition where Windows will be restored, we will find the option "Resize partition" in the summary window of the AOMEI Backupper operation. We press it.

So that Windows can be restored from a backup to the entire volume of the system partition, and after it there is no unallocated disk space, drag the slider of the visual graph of the disk layout to the end or to the desired limit. When finished, click "OK".

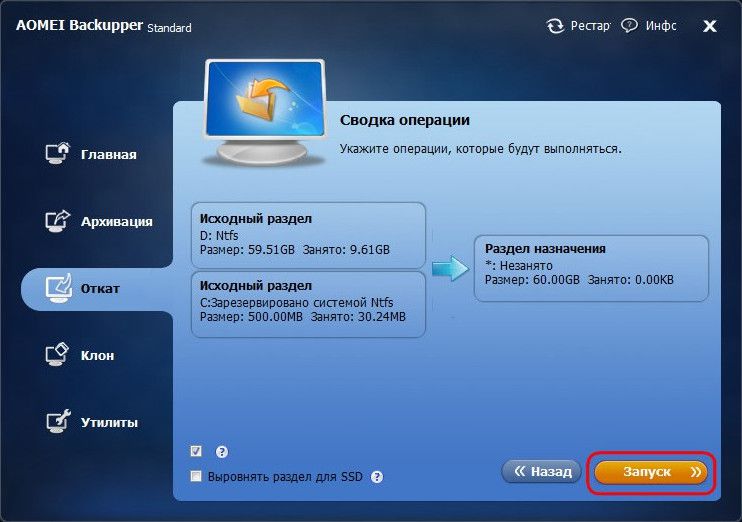
To start the process Windows recovery In the operation summary window, click "Start".
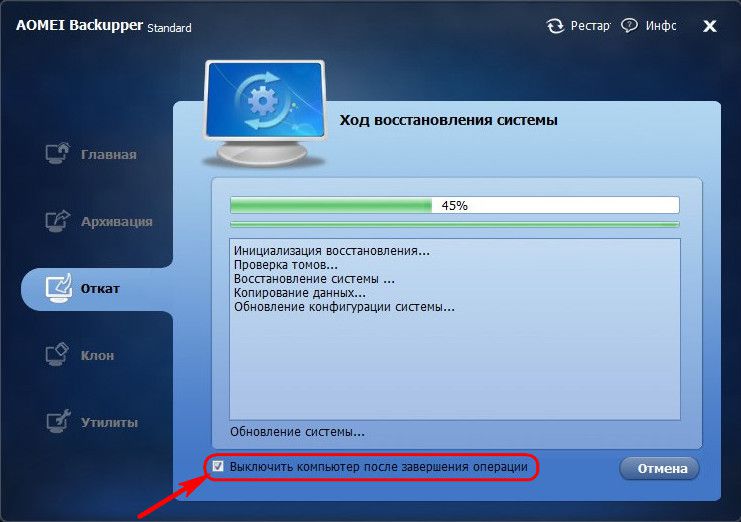
As when creating a backup, check the box automatic shutdown computer after the system restore operation is completed.
7. Running Windows on a computer with different hardware
When you turn on the target computer, set the boot priority from the hard drive. That after replacing the motherboard, that after transferring Windows to another computer, in any of the cases we will see the same picture - the process will begin new installation computer hardware drivers. This will be followed by a welcome window with options for choosing a language, region, time zone. Specify the required information and click "Next".

If the original Windows 10 was activated, the next window is to accept the license agreement.

At the same stage, if the original Windows 10 was previously unactivated, you will be prompted to enter . This can be done later in the system itself, if you click the "Do later" option.

In the settings window system parameters in our case, we choose the standard ones.

Further, as in the usual Windows installation 10, the account creation process will follow. Do not worry about the existing account with its settings and data. She's fine, and we'll get access to her later. The new account will be temporary and can be deleted later. Select "This computer belongs to me", click "Next".

We skip the offer to create account Microsoft.
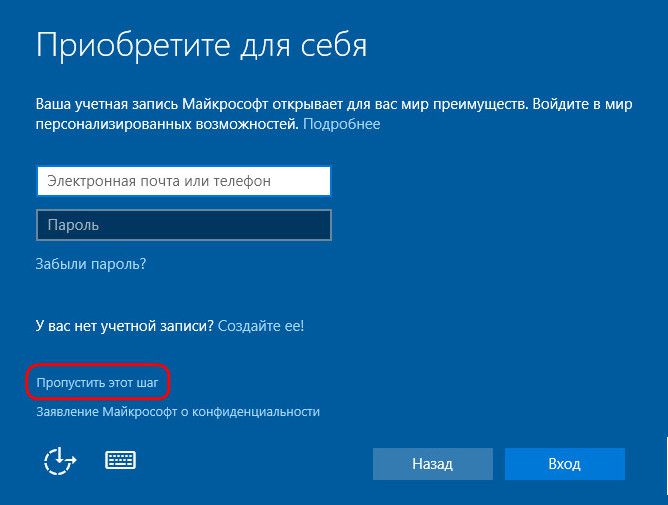
And we create a local (that same temporary) account. Enter a name, leave the password fields blank and click Next.

This will be followed by the final step. Windows settings 10.

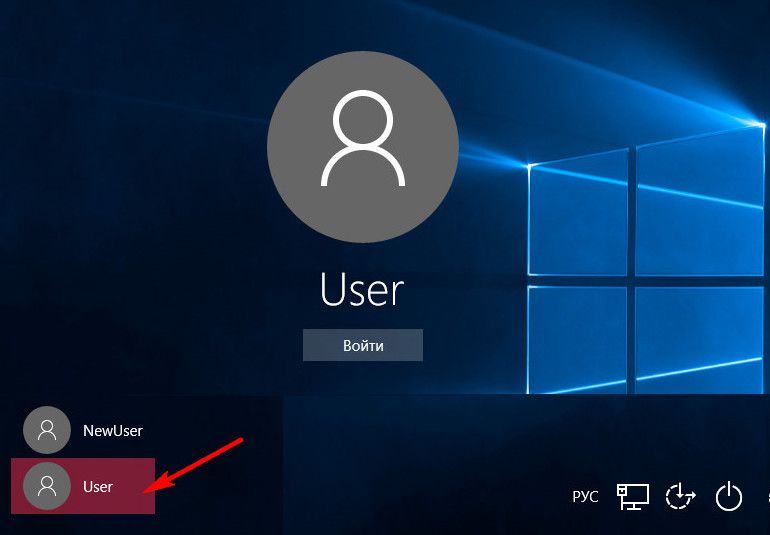
Finally, we are inside the new, just created account. Exit it: press the + X keys and select logout.

Let's go to the lock screen and see the old account. We go into it.
And we proceed to check whether everything is in order with the data. Start menu settings, desktop shortcuts, installed programs, files on drive C - all this should remain untouched.
Now it remains only to delete the temporary account if it is not needed. We go to the "Settings" application, open the "Accounts" section, and in it - "Family and other users". Delete unnecessary account.

8. Nuances of activation and launch of the original Windows
Since one product key can activate only one Windows, accordingly, there is a possibility that activation will fail on a system transferred to another computer. And this will happen shortly after original system access to the Internet will appear. Microsoft allows you to transfer the activated operating system to another computer, but on the condition that it will be deleted from the first computer. However, if, for example, a computer with original Windows is transferred to another family member, it is not necessary to say goodbye to this system. It can simply be temporarily without activation, while in family budget there will be no money to buy a new activation key. What needs to be done for this?
As mentioned, when activating the "Prepare for Use" setting, Sysprep may reset Windows activation. Reset activation is limited to only three times. This possibility in earlier Windows versions many abused to extend the trial 30-day period of use of the licensing system. In our case, the transfer of Windows was conceived along with its activation, and above, when running the Sysprep utility in its settings, we limited ourselves only to removing the binding of the computer to a specific hardware. So that the activation transferred to another does not fly off Windows computer, you must turn off the Internet before you turn on your Windows original computer. Then, after the same steps as described in the previous paragraph, in the original Windows, you need to re-run the Sysprep utility, but with the activation reset settings - that is, by checking the "Preparing for use" option.

That's all.
Have a great day!
When connecting a new hard drive or SSD drive to the computer, if at the same time old hard the disk remained in place, it is not necessary to reinstall the Windows operating system and mess around with the transfer of data stored on non-system partitions of the disk as a separate step. The partition structure of one hard drive can be transferred to another storage medium while maintaining healthy Windows and data. This process is called disk cloning, and some backup programs provide such an opportunity, in particular, one of the leaders in the software market for system administrators, program . Let's look at the process below cloning hard disk, but not with the paid Acronis True Image, but with the participation of its free analogue- programs .

1. About AOMEI Backupper
Most of the functionality in AOMEI Backupper is free to use. The free Standard edition allows you to create Windows backups, restore the system from them, back up user data, clone disks. With the help of AOMEI Backupper tools, you can create bootable media that will allow you to return the operating system to the state from the backup, even if Windows suddenly stops loading.
2. Paid and free editions of the program
In the free Standard edition, you can clone disks both while maintaining the original structure and size of partitions on the old hard drive, and redistributing disk space along the way on a new hard drive. But the ability to move only one system partition to a new hard drive while maintaining a healthy Windows AOMEI Backupper provides only in paid version professional programs. This feature is called cloning or system migration. There is absolutely no need for this if, accordingly, we are dealing with a newly acquired HDD or SSD drive. For new devices, disk space is usually unallocated and does not contain any data. There is no need for the paid version of AOMEI Backupper and provided that the new hard drive already has a partition structure and a small amount of data. Data can be moved to an old hard drive. During the disk cloning process, this data will then return to its place.
You can restore the original partition structure, if there was one on a new hard drive, when setting the cloning settings and after completing this process using the standard management utility Windows disks. This process will be discussed in detail below: in our case, disk cloning will be accompanied by a reallocation of space on a new hard disk.
Well, let's start cloning the disk. But first, install the AOMEI program Backupper Standard.
3. Download and install the program
You can download AOMEI Backupper Standard on the developer's website.

The installation is standard. The only moment that those who prefer the Russian-language interface, which was not initially supported by AOMEI Backupper Standard, will have to face is the manual placement of the Russification file in the program installation folder. Following the path C:\Program Files\AOMEI Backupper\lang, in the folder language settings the pre-installed .txt file "en" must be deleted.

And instead of it, you need to place a previously downloaded TXT file with the identical name "en", but with the settings Russian interface programs.

With a new launch, AOMEI Backupper Standard will already have a Russian interface.

4. Source hard drive and destination drive
In our case, there are two connected hard drives. Visualize the structure and volume of media partitions in the operating room Windows system can be seen in the regular disk management utility. In versions of Windows 8.1 and 10, this utility is launched in the context menu on the Start button.

In Windows 7, you can open it by typing the beginning of the name in the Start menu search box, as shown in the screenshot.

Connected to computer hard disks in the utility window will be labeled as Disk 0 and Disk 1. Disk 0 is the original hard disk, the scratch disk installed Windows 8.1 on one partition and user files on the second. Disk 1 is the destination hard disk, a disk with unallocated space, without any content, which will soon become a clone of Disk 0. You can then boot from it by setting it first in priority BIOS boot, and, as if nothing had happened, continue working with Windows that you started on Disk 0.

If the destination hard drive has a partition structure and stored data, all of this will disappear during the cloning process. The disk partitions will be repartitioned, the data will be deleted, and the new hard disk will become a clone of the old one with all its contents. Of course, provided that new disk will be able to contain all the contents of the old. If, on the contrary, the new disk is much larger than the old one, and the first one contains data that cannot be moved to the second, in this case without another storage device (USB-HDD, flash drives, SD cards) or cloud storage can't get by.
5. Disk cloning process
After ensuring the safety of the data, if any, on the new hard drive, you can begin the cloning process. We launch AOMEI Backupper Standard and go to the “Clone” program tab, and in it we select the “Disk Cloning” section.

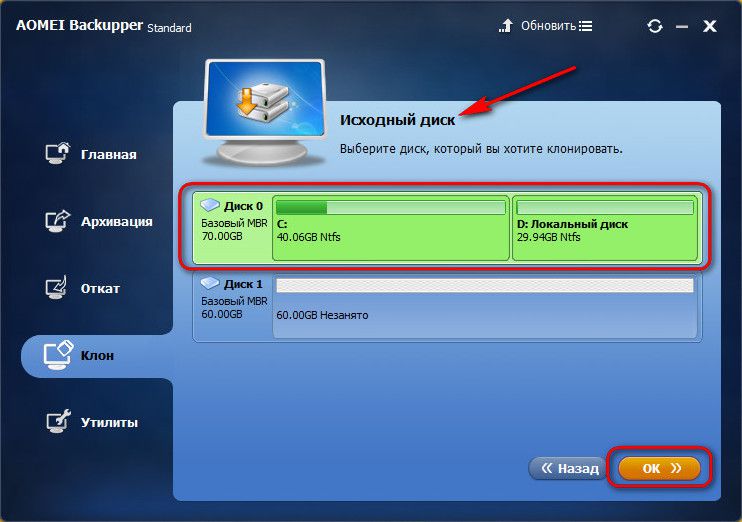
Then we click on the new hard drive, the destination drive. Click "OK".

The next window - the summary of operations window - will allow you to reallocate disk space on a new hard disk. We skip this process and immediately press the "Start" button if the partition structure source disk suits and would like to see it on a new disc. Otherwise, click on the inscription "Change partitions on the target disk."

By default, AOMEI Backupper provides for a proportional distribution of space between the partitions of the new disk if the volumes of the old and new disk are different. Therefore, in the options for changing partitions that open, we will find by default a checkmark on the option “Fit all partitions on the entire disk”. To change the structure of the new disk, check the box "Change partitions on the disk." The disk partition to be modified must be selected on visual panel at the top of the window. By dragging the slider on the right or left, the disk partition can be reduced.

The volume by which the disk partition is reduced will become unallocated space, which we will deal with later using the standard disk management utility.

But you cannot increase a disk partition at the expense of the space of another during the cloning process by dragging the slider. But you can pinch off a piece from one disk partition in order to attach it to another partition later. So, for example, to increase the system partition on a new disk, in our case it is partition E, click on the non-system partition F at the top, and, dragging the slider from left to right, leave the unallocated space. It will then be attached to system partition E.

By dragging the slider on the other side of partition F from right to left, you can also leave unallocated space for the formation of another non-system partition on a new disk in the future. Naturally, the unallocated space released for the system or extra non-system partition must be free so that there is enough space on the existing partitions to place data from the old disk.
Having dealt with the new disk structure, click "OK" to return to the summary window. If the new disk is an SSD drive, we additionally check the box below to align the partition. And we can start running the cloning operation. Click the "Start" button.

At the end of the operation, click "Finish".

6. Completing disk space allocation with a regular Windows utility
To complete the work of allocating disk space, you will need the help of the Windows Disk Management utility. The operating system and user data from Disk 0 has been successfully transferred to Disk 1, and all that remains is to deal with the unallocated space of the latter. By calling the context menu on it, you can select "Create a simple volume" and follow step by step wizard to form one or more non-system disk partitions.

And you can attach this unallocated space to the system partition E. Right-click on the last one and select "Expand volume".


In the column for choosing the allocated space, in our case, the entire unallocated volume is given, however, if necessary, this figure can be divided to give part to the system partition, and then form a non-system partition from the rest.


Unallocated space new hard disk is now organized, you can start testing the cloned operating system. We boot into the BIOS from a new hard drive, and old disk can be detached.
AT last case new hard drive Windows utility will show up as Disk 0...

And its sections, previously designated by the letters E and F, will become, respectively, sections C and D.
Have a great day!


