Installing win 7 from usb. Configuring operating system settings
Step by step installation Windows 7 from a flash drive!
Are you planning to install Windows 7, but your DVD drive refuses to work? Or do you not have one at all, since you use a netbook? Indeed, the situation is not pleasant, but there is no need to despair. Great way way out of this situation - installing Windows 7 from a USB flash drive.
Please note that for the installation process you will need:
- A flash drive, the volume of which must be more than 4GB.
- ISO image with Windows 7.
- Windows 7 USB/DVD Download Tool 1.0.
For simplicity, we will conditionally divide the entire process of installing Windows 7 into several stages:
- Creating a bootable USB flash drive.
- Installation operating system.
Go to the “Start” menu, select “Control Panel”, then click on the item “ Accounts users and family safety”, and lastly, select “User Accounts”. Here we click “Change User Account Control settings”.

Move the slider to the very bottom, then press OK.

We confirm our decision by clicking Yes.

Congratulations, you have completed the first stage - disabling User Account Control.
2. Creating a bootable USB flash drive
There are several ways to install an operating system windows system 7. Installation from a flash drive using Windows program 7 USB/DVD Download Tool 1.0 – the simplest and fastest. Connect the flash drive to your computer, having first copied all important information from it. Next, launch the USB/DVD Download Tool and click Browse.

Select the operating system ISO image and click Open.

After you have pointed to computer ISO image, click Next.

Click USB device.

In this window, select the connected flash drive and click Begin copying, which will start the copying process.

Click Erase USB Device to format the flash drive.

Click Yes to confirm your decision.
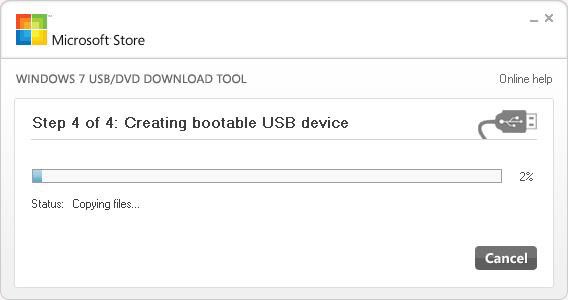
The process of writing the image to the flash drive has begun.
Once recording is complete, Backup completed will appear. You can safely close the program.

That's it. You created a bootable USB flash drive yourself. As you can see, installing Windows 7 from a flash drive is not at all difficult if you follow these steps.
Before you start installing Windows 7, you need to set the flash drive to first place in the boot priority in the BIOS. To get to the BIOS menu, you need to start a specific key when you boot your computer. This could be Del or F2. When loading, you may see this prompt at the bottom of the screen:

In Bios, look for the Boot tab. Here, in boot order, you need to put the bootable USB flash drive first. To do this, use the arrow keys, as well as F5 and F6. Use the arrow keys to select the flash drive, and use the F6 key to bring it to the first position. Next, save your changes and exit this menu by pressing F10.

A window will appear where you need to click Yes, confirming your intentions to put the flash drive first in the boot order. If you did everything as described here, then after restarting the computer, the installation of Windows 7 from the USB flash drive will begin.

Select the basic installation options and click Next.

Click Install.

We agree with license agreement by checking the appropriate box. Click Next.

At this point, you will be offered several installation types. We recommend choosing full installation.

Here you need to specify the partition (disk) on which Windows 7 will be installed. Please note! Do not install the operating system on hidden sections, if there are any.

After selecting the partition where you plan to install the OS, click Disk Setup.

Click Format. Pay attention! Formatting will permanently delete all data on this drive.

If there is no important information, feel free to press ok.


The installation of Windows 7 from the USB flash drive will begin.

If all files are copied, the computer will reboot for the first time. If you don't want to wait for the 10 seconds to pass and the computer to reboot itself, click “Restart now.” During reboot, be sure to return hard drive to the first place in boot priority, otherwise you will start installing the OS again.


Here you need to enter your Username and Computername. Let's move on.

If you wish, you can set a password for your account.

Enter license key in the field. Please note that you can enter the key after installing the system. Click Next.

Here we specify the security settings.

Enter the Date and Time.

Specify network settings.

If you followed these steps, then you will see this image, which indicates that the installation of Windows 7 is complete, with which we congratulate you!

Video tutorial on installing Windows 7 from a flash drive
Write in the comments below if something doesn’t work out for you or if you have any difficulties - we’ll figure it out together!
If you are the owner compact netbook If you sincerely believe that CDs and DVDs will soon take pride of place in the museum of storage media (next to cassettes and floppy disks), you definitely need to know the answer to the question “how to install Windows 7 from a flash drive?” And not only for this reason! There are more than enough motivations to study this computer wisdom.
An installation distribution on a USB drive is, at a minimum, convenient and compact. And most importantly, it’s reliable: you don’t need to worry that due to some scratch or speck of dust, a few bits will be lost and the OS installer will fail (again, as often happens with disks).
This article discusses in detail all the steps of installing Windows 7 from a flash drive: from selecting the media to setting up the distribution.
Preparing bootable USB media
Volume installation flash drive must exceed 4GB. Since some assemblies of the “seven”, in contrast to the standard distribution, include many updates, patches, applets, integrated components (Framework, WinRAR, DirectX, etc.) Accordingly, they are larger in size.
1. Connect the flash drive to the PC.
2. Open the Start menu (the first icon on the taskbar).
3. On the right side of the menu, click Computer.
4. In the “Devices with removable media” section, click on the flash drive shortcut.
5. Select the “Format...” command in the context submenu.
6. In the formatting settings window, in the “File system:” option, set “NTFS”. Necessarily! Installing Windows 7 from a flash drive is most stable and correct on this system.
7. Click the "Start" button.
8. Wait until formatting is complete.
Selecting and downloading Windows 7 distribution
To create an installation flash drive, you will need a distribution image in ISO format. It can be downloaded from specialized websites or popular torrent trackers (nnm-club.me, torrent-windows.net, etc.)
Advice! Installing Windows from a flash drive is a responsible and extremely serious matter. The success of this event guarantees a comfortable and safe work on PC. Therefore, before downloading any ISO image of a system, or, simply put, an assembly, onto your computer, find out what other users think about it. Better yet, consult with IT specialists (if, of course, there is such an opportunity).
Creating a bootable USB flash drive
In addition to a formatted flash drive of 6-8 GB and Windows distribution 7 in ISO format, to burn the installation USB media you will also need UltraISO program. And don’t be confused by the fact that this digital product is paid - you don’t need to buy it. For making bootable media The demo version of UltraISO will also work. Download it from the developer’s official website - ezbsystems.com/ultraiso/.
After downloading and installing the utility, do the following:
1. Launch UltraISO.
2. In the "File" menu, activate the "Open..." function.
3. Specify the path to the OS image:
- go to the section/folder where it is stored;
- select it with a mouse click;
- click the "Open" button.
4. Open “Boot” (third section of the UltraISO main menu) and click “Burn image” hard drive… ».
5. In the settings window, in the “Recording method:” option, set the value to “USB-HDD+”, and then click the “Record” button.
6. When recording is complete, close the program. Make sure that the distribution package is installed on the flash drive (visually view its contents; do not edit or change anything!)
Installing Windows 7 from a USB flash drive
Before installing windows from a flash drive , transfer data that is valuable to you (photos, videos, game saves) from the system partition (drive C, on which the OS is installed) to a logical partition (to drive D or E). Otherwise, they will be destroyed during the installation process.
So, to install windows 7 from a flash drive:
1. Restart your PC and hold down the F8 key until the display shows the boot selection ( Select boot device).
Attention! On your PC, this function can be activated by another key (for example F12, F2). Please check this specification in the manufacturer's data sheet.
2. Using the cursor keys, highlight the “USB” item in the menu (boot from a flash drive). Press the "ENTER" key.
4. In the "Windows Installation" window, click on system partition(on which the OS will be installed). In its column, in the “Type” column, there should be the value “System”.
5. Check again that the settings are correct! And only then launch the “Format” function.
Upon completion of the installation - after the PC automatically reboots - you can begin installing the software.
That's all the instructions, dear reader! As a result of minor efforts, you have a self-made bootable USB flash drive and a “fresh” Windows 7 on your PC. What's bad?!
If your computer device does not have an optical drive as standard equipment, you will probably be interested in properly installing Windows from a flash drive at some point. You will have to create an installation USB drive with all the files necessary for installation, and run from this device to begin the procedure Windows installations 7 from a flash drive. It is important to understand that simply copying files to a flash drive will not be effective. You first need to prepare the USB device by correctly copying the Windows installation files onto it before everything will function exactly as you need it to.
If you don’t know how to install Windows from a flash drive yourself, follow the instructions below.
The following instructions will tell you how to install Windows 10 from a flash drive, as well as seven and all its versions: Windows 7 Ultimate, Professional, Home Premium. Learn how to install with Windows flash drives XP, you can find it at the end of the instructions.
As you restart your computer, watch for a message during the power-on self test about a specific key, usually Del or F2, that you need to press to enter Setup. Press the key as soon as you see the message while your computer is booting.

The boot order is BIOS parameter, so it is independent of the operating system. In other words, it doesn't matter whether you're running Windows 10, 8, 7, Vista, XP, Linux, or any other system, the instructions for changing the boot order still apply.
Entering the BIOS Setup Utility
After executing the command in the previous step, you will be taken to BIOS settings.
All BIOS utilities are slightly different, but are basically a set of menus containing many settings hardware your computer.
BIOS settings are listed horizontally at the top of the screen, hardware settings are listed in the middle of the screen (gray area), and instructions for making BIOS changes are listed on a page at the bottom of the screen.
Using the instructions to navigate your BIOS utility, find the option to change the boot order. Since each BIOS setup utility is different, the layout of the boot order options varies from computer to computer. The menu item you need to find may be called Boot Options, Boot Menu or Boot Order. The boot order option can be found in the general menu, e.g. Advanced tabs Options, Advanced BIOS Features or Other Options.
Boot Order Options
Boot order settings in most BIOS utilities include information about all hardware connected to motherboard, from which booting can be done, for example, your hard drive, disk drive floppy disks, USB ports or optical drive.
The list that lists devices is the boot sequence in which the computer will look for operating system information.
If available BIOS OK will first try to boot from any devices it sees, like a drive on hard drives, which means an integrated hard drive built into the computer. If the hard drive you are booting from is not capable of booting, the BIOS will look for boot CD-ROM, and then the bootable connected media, i.e. a flash drive, and finally, the last network in the list.
You can change the device from which the computer will boot using the + and – keys. Keep in mind that your BIOS may have different instructions.
Make any necessary changes to the boot order, and then continue to the next step to save your settings.
You will need to save your changes before your boot order changes take effect. Follow the instructions given to you in the utility to go to the Exit or Save and Exit menu. Select the Exit Saving Changes option, confirm it by clicking Yes.
Changes made to the boot order, like any other changes made to the BIOS, are now saved and the computer will automatically restart.
Boot from your USB device and you are ready to install Windows.
Successful installation from a Windows XP flash drive is carried out in a similar way, but to create a USB installation media you can use WinToFlash program. By switching to wizard mode, you can easily make a bootable USB flash drive yourself.
As sad as it sounds, today there is a misconception that the problem of how to install Windows laptop 7 is quite complex and practically unsolvable for the average user. This is partly true, but often such myths have no basis.
Windows 7: first acquaintance
Windows 7 OS is one of the most popular and in demand systems among users computer equipment. Very often it is installed not so much on stationary computer terminals as on laptops.
Among the versions available for installation, you can find several main assemblies: initial, home basic, home advanced, professional and maximum. Actually, which version the user chooses to install depends only on him. In any case, the problem of how to install Windows 7 from a disk to a laptop, for almost all models of any manufacturer, has general solution. The same applies to installing operating systems from USB devices, popularly called flash drives.
General concepts about installing Windows 7 on laptops
Regarding the answer to the question of how to install Windows 7 from a disk on a laptop, usually here special problems not observed. This is understandable, because laptops, as a rule, are always equipped with optical CD/DVD-ROM drives. So to install the system it is enough to have original disc or a copy thereof.

In the future, of course, some specific situations may arise, but the same problems, say, how to install Windows 7 on an HP laptop or on a model from another manufacturer, generally appear only at the final stages of the installation process and most often come down to correct installation device drivers. This will be discussed a little later.
Installing Windows 7 on netbooks
It's another matter when a user tries to install an operating system on a netbook. This is where the problems begin in most cases. This is due to the fact that netbooks do not have optical drives, and the system must be installed from a flash drive. However, here too, as practice shows, the problem is how to install Windows 7 on Lenovo laptop or some other model, also has a general solution.

Here the fundamental link in the installation process will be correct entry image installation distribution on removable USB drive, and this must be done in such a way that the flash drive is bootable, and the launch must be done before the start present system, if available on board.
Pre-preparation of the disk
Now let's look at some preliminary actions, without which the question of how to install Windows 7 on a laptop cannot be resolved. It's good if the user has the original disk with specific version operating systems. But what to do when he is missing?
IN in this case you need to either make a copy of it or write it down installation disk from a pre-created image. You can create such an image using any program. UltraISO type or Daemon Tools. In addition, you can use standard means OS itself and create a boot disk.
The first option looks preferable, since this is exactly how you can create exact copy distribution, which will be practically no different from the original. I think there is no need to explain exactly how this is done, since the process of writing an image to disk is very similar in all programs. Sometimes only the menus and corresponding commands differ. This comes down to using the image recording functions, after which a blank optical media, and then the path to the pre-created image file is specified. The image itself is created using the same programs using the appropriate function and saving the image file on the hard drive or in a logical partition.
Creating a bootable USB flash drive
In some cases, for example, the answer to the question of how to install Windows 7 on Asus laptop(or any other), may directly depend on the device model itself. As is already clear, we're talking about about netbooks, although they are classified as laptops. Here you will initially need to create a bootable USB flash drive.
This is done using the above software packages the only difference is that the image is recorded not on an optical disk, but on a removable USB drive. The pre-imaging remains unchanged. Below we will show you how to install Windows 7 from a flash drive on an Asus laptop. Moreover, this does not concern any specific model or manufacturer.
Required BIOS settings
In the preparatory process, it is important to understand how to install Windows 7 on a laptop via BIOS. The fact is that when using the default BIOS settings, an already installed OS (for example, Windows XP) will simply ignore the media with the “seven” distribution kit. Here you need to take a responsible approach to setting the priority order of boot devices.
To enter the BIOS, depending on the laptop model and the manufacturer of the BIOS itself, the Del, F2, F12, etc. keys can be used. Now you need to find Boot section(Boot Sequence) or something similar, where the line will be specified Boot Device Priority. By default, the first device is the HDD.

If you intend to install the system with optical disk, the first device you need to specify is the CD/DVD drive. If the question is being solved, say, about how to install Windows 7 from BIOS on a laptop when using a flash drive, naturally, it is this that needs to be specified as the first priority device. However, sometimes problems may arise in that the USB drive may not be displayed in the settings. The main reason this happens is that the flash drive must be inserted into the appropriate USB port before turning on the laptop (netbook) and calling up the BIOS settings.
After all the settings have been made, you must save the changes before exiting (Save and Exit Setup), after which a reboot will occur. If everything is done correctly, the installation of Windows 7 should start from the selected media.
Start installation and format partitions
So, the start has been made. Don't rush to rejoice. Of course, the installation process is automated. First, as usual, you need to select the system language, time and date format, and then specify the keyboard layout. Let us immediately note that entering the activation key and license is postponed until the end of the process. The fact is that the "seven" can work in normal mode up to 30 days as a regular shareware program.
Now, in the question of how to install Windows 7 on an HP laptop (or on other models), you should correctly choose which version of Windows 7 OS should be installed. This is due to the fact that the license key is designed specifically for a specific assembly and, after installing any other, will not lead to activation of the system simply because of its inconsistency.

Now all that remains is to accept the terms of the installation and use agreement. Next, a window will appear in which there are two types of installation: update and full installation. Almost all experts and users recommend performing a complete installation from scratch (before starting the process, you need to copy the files and folders necessary for the user, since formatting will destroy the data). Another advantage of this installation is the fact that new system will not “pick up” from the old one system errors or, worse, viruses.
Problems arising at the initial stage of installation
The installation wizard will prompt you to select the partition into which the new OS will be installed. It will need to be formatted. And as it turns out, it is at this stage that the question of how to install Windows 7 from a flash drive to a laptop (or from an optical disk) may seem insoluble, since the system flatly refuses to perform the formatting operation, and sometimes also indicates that formatting requires hard drive driver.

Let us say right away that you should not be afraid of such messages. In fact, everything is connected only with the fact that some hard drives may contain incorrect boot records MBR or disk layout errors. In some cases, the problem may be due to the presence of different file systems on the disks and their partitions.
You can get out of this problematic situation by running command line directly during the installation process. For this, a combination is used Shift keys+ F10. In the window that appears, you must enter the command bootrec /fixmbr, which allows you to restore the bootloader.

Sometimes, in solving the problem of how to install Windows 7 on a Lenovo (or some other) laptop, re-entering the BIOS can help, where in the SATA controller settings you need to change the hard drive access mode from AHCI to IDE.
After this you need to return to the installation. In this case, the problem of how to install Windows 7 on an Asus laptop (as an example) when the error described above occurs should disappear, and you can proceed to directly formatting the disk or partition (you need to click on the “Format” hyperlink below). All you have to do is wait for the process to complete, after which a window will appear indicating the main steps that will be applied during the installation process.
Initial system settings
Upon completion installation process the user will need to enter the laptop name, username (if prompted), and then serial number product.

After the steps described above, the same answer to the question of how to install Windows 7 from a flash drive on an Asus laptop or an Acer netbook (or even from a disk on other device models) comes down to setting the time zone, time and date. Then, if desired, you can configure the network. If there is no clear certainty in choosing the type of network, you can postpone this process until later.
When everything is done, the system will start for the first time, after which the familiar “Desktop” will appear.
Installing device drivers
But that's not all. You need to understand that some versions of the 7 (especially unofficial ones) are supplied without the necessary driver package. For example, the problem is how to install Windows 7 on Acer laptop with a full set of drivers, the solution is quite simple, if when purchasing the device itself, among the additional software there was also special disk with drivers. This applies to any laptop model.

As a rule, this issue is resolved quite simply. True, the drivers will have to be installed manually if there is no special “Wizard” on the disk, which, upon startup, will install absolutely all device drivers that are present in the laptop itself as components. As you can see, the problem of how to install Windows 7 on a laptop is not as scary as some users tend to describe it. Yes, of course, you will have to pay attention to some specific settings and problem solving during the installation of the “seven”, but a user of any level of training can solve this. As they say, there would be desire and a little patience.
Installing additional utilities
As for additional software, the problem of how to install Windows 7 on a laptop with all the capabilities of the system can also be solved quite simply. You will need to additionally install an antivirus, archiver, codecs, office programs etc. True, if all this is on the original disk, there is nothing to think about; you should install applications from such a disk (usually Acronis is present as the shell).
It goes without saying that during the installation of the system itself or after finishing the “Wizard”, you can split the hard drive into logical partitions. Utilities for this today can be found very large number. Even on some discs there are own funds like Partition Magic, etc.
Windows 8 compatibility issues
Finally, one more problem. Let's say we need to solve the question of how to install Windows 7 from a flash drive on an Asus laptop with G8 preinstalled. Version 7 and 8 systems have different file systems. Although it is believed that the “seven” supports the “eight” file systems, in fact this is a conditional statement. In practice, this causes a lot of confusion. A way out of this situation may be to include BIOS mode Legacy compatibility and subsequent conversion of G8 partitions from GPT or UEFI to standard format"seven" MBR.
Conclusion
Probably, many have already noticed that the question of how to install Windows 7 on a laptop, although it has several specific points that you will have to pay special attention to, is nevertheless not too difficult. Depending on the laptop model, you may sometimes have to tinker. But if all the settings are made correctly, and the original CD with drivers is included in the kit, there is no need to strain too much.
Hello, dear readers! The obvious fact is that even the neatest and least active users PC sooner or later there is a need to reinstall the operating system. Computer, long time running on the same OS starts to work slower, new errors appear and make it difficult normal work with the device.
That is why it is recommended to periodically reinstall the system. Here the question arises: how can this be done if the distribution kit on disk is not at hand? There is only one answer - using a flash drive. This manual will help you quickly figure out how to properly reinstall Windows 7 from a flash drive without any problems - the debriefing will take a maximum of a few minutes!
Preparing for the upcoming procedure
Before you begin the reinstallation procedure, you need to prepare:
- Copy from system disk(usually “C”) all the necessary and valuable information for you to another partition of the hard drive, or better yet to removable media. During the reinstallation process, data from local disk“C” is erased as a result of formatting, so it is recommended to duplicate the necessary information.
- Prepare in advance all the drivers necessary for the operation of your devices. It often happens that after Windows is reinstalled, some external devices will stop working due to lack of drivers. To avoid this problem, you will have to look for the drivers yourself before the procedure.
- Make sure that bootable flash drive with the distribution, the OS was recorded correctly. Check whether all the files from the image are on the media - to do this, just compare the number of files and volume. If the flash drive does not have all the data, it is recommended to overwrite it so that no problems arise during installation.
Now that everything is ready, you can start Windows installations 7 from a flash drive. Don’t be alarmed ahead of time - this procedure is much easier and faster than it might seem to a user, especially an inexperienced one.
Setting up the BIOS to reinstall the OS correctly
BIOS is a place where all the parameters of your PC are written, be it a computer or a laptop. These include system boot settings. In order for the device to start from a flash drive, you need to configure the BIOS to work with it. This is quite simple to do - follow the instructions below:
- Insert the media into the USB port and restart your PC.
- During reboot, press F2. In some BIOS models you need to press F11 or Delete. More detailed information you can find out when the OS starts - everything will be written in white font on a black background.
- In the BIOS menu that opens, select BOOT (the name may vary). After this, a list will open with devices from which the system can boot. Select your media and move it to first place using the keys on your keyboard. Save the changes by pressing F10 and confirming exit from BIOS.
After setting up the BIOS, you can proceed directly to something like installing Windows 7. How to do this?
Reinstalling the system in a few simple steps
In fact, you have already done the most difficult part in the previous stages - the actual installation of the system is carried out almost in automatic mode. We recommend that you read the following instructions:
- Insert the media into the USB port and restart your computer. The download should come from your flash drive.
- Wait for the installer's welcome window and follow the instructions it offers you.
- At the stage of selecting a disk for installation, select the system partition, format it and click “Next”.
- Wait while Windows 7 is installed on your PC - this procedure is performed automatically.
During installation, the PC will reboot several times. At the final stage, you will be asked to specify the PC name, date and time settings, and administration settings. There will be no problems at these stages.
After you have entered all the data, you will need to wait a few more minutes - after configuring the OS, you can start working - at this point the procedure for reinstalling the operating system is considered complete!
Share this article with your friends using social networks– they will be grateful to you when they learn to install the system from a flash drive! Subscribe to updates to always stay up to date with the latest blog articles!


