ADB for Android, basic adb Android commands. What is ADB? Adb commands for Android
Most Android users don't know anything about A.D.B.. Full name - Android Debug Bridge, stands for Android Debug Bridge. ADB is part of the Android SDK . Using ADB, you can perform various actions on your Android tablet or smartphone, such as flashing, copying files from your computer to Android and vice versa, restoring the system and others.
ADB for Android - what is it?
You probably know that the Android operating system is based on a modified Linux kernel. Therefore, there is a need to use the command line with it. It is the program adb helps establish communication between computer and Android. It is part of the Android SDK development environment, so to install the Android Debug Bridge, you need to download the Android SDK from the official website. There are versions for all popular operating systems: Windows, Mac OS and Linux. That is, to put it simply, adb allows control your phone or tablet using a computer.
I also recommend the following instructions:
Basic adb commands Android
Connect your device to your PC via USB. Make sure all drivers are installed and USB debugging is enabled.
Work with Android Debug Bridge The best way is through the Windows command line. To do this, in Windows XP, click “Start” and in the “Search programs and files” input field, enter “cmd”, then press “Enter”. If you have Windows 7 or higher, click "Start" and in the "Run" field type "cmd" and press "Enter" again.
adb devices
The most common adb command. Using it, you can determine whether your PC sees the connected device. If you did everything correctly, the following line will appear: “List of devices attached.” After it you will see the serial number of your smartphone or tablet and its status: “online” or “offline”.
If it says “offline”, this means that the device is in sleep mode, if “online”, then the device is ready to execute your commands.

Thanks to this command you can install applications on your smartphone or tablet. To do this, you need to specify the path where the APK file is located:
adb intsall D:\papka_s_faylom\nazvanie_prilogeniya.apk
To avoid writing long paths, copy the file to the android-tools directory. Then the path will be like this:
adb intsall nazvanie_prilogeniya.apk
adb uninstall
You need to enter it in the same way as the previous command. This will remove the application.
This team has an interesting feature. If you add the key -k, then when you delete a game or program, its data and cache will not be deleted, but will remain on the Android device.

Thanks to this command, you can transfer files from your computer to Android. To do this, you need to know the full path where the file is stored and where to move it.
adb push D:\papka_s_faylom\nazvanie_fayla/sdcard/Android
To avoid writing long paths, copy the file to the android-tools directory. Then you need to enter:
adb push nazvanie_fayla/sdcard/Android

This command copies files from Android to computer. You need to know the path where the file is located on your smartphone or tablet and indicate the location where you want to save the file. If you do not specify the latter, the file will be saved in the android-tools directory.
adb pull /sdcard/nazvanie_fayla\D:\papka_gde_sohranity

This command will reboot your Android phone or tablet.

With this command you can directly boot into bootloader mode.
adb reboot recovery
Not all devices support this command. Using it you can get into recovery mode.
adb connect
Using this command you can connect your device to a Wi-Fi network. To do this, you need to know the IP address and port of the device.
adb connect ip:port
With this command you get full access to all files on your device.

The second way to use adb shell is to execute a single Android shell command using this construct:
adb shell<команда>
If you put your Android phone or tablet into bootloader mode, then the commands adb will not work anymore. Here you need to use fastboot commands.

To check whether PC and Android can see each other, use the command:
After entering it, the serial number of your device should appear.

By entering this command, you can unlock the bootloader of Asus and HTC phones and tablets. When your device is in bootloader mode, enter:
Also, all your installed programs and personal data will be lost.

Using this command you can display the contents of a log file: changes, errors, etc. The data will scroll too quickly, so the right solution would be to save it in one TXT file. To do this, enter:
adb logcat > filename.txt
adb sideload
The command will be useful for owners of Google Nexus devices. Using it you can update the firmware of the device. Download it to your computer, connect your Nexus to it, go into Recovery mode, select “Apply update from ADB” and then enter the command.
Android Debug Bridge, or ADB for short, is a multifunctional utility for working with Android devices through the command line. ADB is a component of the Android SDK. In this series of articles we will try to understand the basics of working with Android Debug Bridge.
Android Debug Bridge is primarily designed to work with HTC devices, however, most of the functions are available on other Android-based mobile gadgets. Using ADB, you can debug Android devices, both physical and emulators. The program is based on the client-server principle. During the first launch, ADB using any command creates a so-called server in the form of a daemon (system service). This service will “listen” to all commands that are sent to port number 5037. Using ADB, you can perform actions such as: viewing connected devices and whether they can work with ADB; viewing system logs; copying files to and from an Android device; installing and uninstalling applications; deleting, clearing or rewriting (flashing) the data partition on an Android device; execution of scripts to control an Android mobile gadget; Manage some network parameters of an Android device.
Whether the Android Debug Bridge service is running can be done through the “Task Manager”; there, accordingly, you can stop it if you wish. ADB comes bundled with a complete developer kit (SDK), including an emulator - which is why it weighs quite a lot. In order to get started, you need to unpack the archive from ADB, it is recommended to do this directly to the root of the disk C: adb. Important - there should be no Russian characters in the path to the folder. The folder where we unzipped ADB should contain the following files:
adb. exe– directly ADB, with which we will work.
AdbWinApi. dll– a library necessary for correct operation of ADB.
AdbWinUsbApi. dll– another necessary ADB library, as the name suggests – for interacting with a device via USB.
fastboot. exe– a file for managing an Android device switched to fastboot mode. WITH .
ADB is a console application, that is, it is operated and controlled via the command line. To open the command line in Windows, press the keyboard shortcut Win + R. You can also write cmd in the “Run” field (in Windows XP it can be called by clicking “Start” - “Run”, in Windows Vista/7 - “Task Manager” - “File” - “Run ...”). In order to go to the directory with ADB, enter on the command line:
CDc: adb(or another path where we installed Android Debug Bridge)
Let's figure out how to set up a connection to the device and drivers for correct interaction with our mobile device based on the Android system.. First, go to “Settings” - “Applications” - “Development” - check the “USB Debugging” box. The names of the items may differ depending on the mobile device model and firmware version, but the general meaning is the same in any case. After connecting the USB cable, select “Charge only”. After that, we recheck the connection between the Android device and the computer via ADB. Create in a folder adb file devices. cmd(please note that . cmd was a file extension, and not part of its name), we write the following into it.
- Tutorial
And here an unpleasant surprise awaited me - either the native driver turned out to be crooked, or Windows, or the wire... in general, the driver stopped working, the Windows Device Manager reported that the device was fully operational, but upon request adb devices I received an empty list in the console and, naturally, I was unable to test the application on the tablet.
I wrote a request to TeXeT support, they even answered me with a link to the driver itself, which, as I was already convinced, did not work. I started looking for an answer on the Internet and found a bunch of different assemblies of this driver and manuals, but still none of them started up properly, and even the native driver from the SDK did not work at all, which made me despondent... but not despair.
Here I decided to try my hand at writing drivers using the good old method of scientific poking and opened the driver inf file. What gave me hope was the understanding that the software part of the adb interface on the tablet side should be identical for all devices, and USB worked anyway. And so, after several unsuccessful attempts at manually editing the inf file, I found a recipe for treating the inf file seasoning so that it would install and, most importantly, work.
So let's get started.
Step 1. Download the driver. If you haven't already done so, open Android SDK Manager, find the Extras section, check the Google USB Driver box, and click Install Packages. It's simple. Wait for it to load.
Step 2. Find the driver and make a copy of it in a separate folder. Go to the %android-sdk%\extras\google\ folder and see the treasured usb_driver folder there. Copy it somewhere, and we will carry out further manipulations there. In principle, you can edit the “original”, but I preferred to keep the original intact just in case.
Step 3. Edit the inf file. In the folder, open the file android_winusb.inf and look for lines like this:
;Google Nexus One %SingleAdbInterface% = USB_Install, USB\VID_18D1&PID_0D02 %CompositeAdbInterface% = USB_Install, USB\VID_18D1&PID_0D02&MI_01 %SingleAdbInterface% = USB_Install, USB\VID_18D1&PID_4E11 %CompositeAdbInterface% = USB_In stall, USB\VID_18D1&PID_4E12&MI_01
Make a copy of these lines and replace Google Nexus One on %your_device_name% for identification in the future and... open the Windows Device Manager. We are looking for our device there ( Android, Android Composite ADB Interface or something like that). Open the device properties, the “Details” tab, select the “Equipment ID” item in the list and see this picture.
We copy the line that is most similar to the one shown in the figure (It is, in theory, just a little shorter), and paste it into our inf file.
;TEXET TM-7025 %SingleAdbInterface% = USB_Install, USB\VID_18D1&PID_0003 %CompositeAdbInterface% = USB_Install, USB\VID_18D1&PID_0003&MI_01 %SingleAdbInterface% = USB_Install, USB\VID_18D1&PID_0003 %CompositeAdbInterface % = USB_Install, USB\VID_18D1&PID_0003&MI_01
In %SingleAdbInterface% we delete the end of the line; as you can see, in %CompositeAdbInterface% we insert the whole line. There’s probably no need to repeat everything twice, but I already have everything and I’m too lazy to experiment :)
We save (be careful - in some cases you need to run notepad with administrator rights, because in user mode you will not be allowed to overwrite the inf file).
Step 4. Driver installation. Now that everything is prepared, go back to the device manager and remove all previously installed adb drivers (if any). We update the list of devices and see our device without drivers. We open its properties and select “update drivers”, select the installation from the folder, specify the folder with the corrected inf and start the installation - our driver is instantly found, but during installation it may swear about incompatibility with the question “should I continue, nasalneka?” Let's continue. That's it, the driver is installed.
Step 5. Final. To be precise, take out the USB port, wait until everything is detected, open the console (Win+R, enter cmd) and write adb devices. If everything went well, we see the treasured list item, indicating that adb now sees our device. 
From now on, you can safely launch eclipse and build programs, enjoying convenient automatic assembly, installation and the ability to debug directly on your device.
If the adb command does not work for you at all. Computer -> Properties -> Environment Variables. We are looking for the Path variable and at the end we add(in no case do we overwrite it) at the end there is a semicolon, and after that the address of the folder where adb lives (usually %android-sdk%\platform-tools\). After a reboot it should work.
Sometimes adb does not start automatically when the system starts. Start manually.
What was that?
It's actually simple. For some reason (Winda is a must-have / progers have crooked hands / the Google inf-file was written only for native Google devices / the Higgs bosons have ruined everything on your computer), Windows does not want to use the Google driver for non-Google devices that are not recorded in the inf-file. Apparently, everything there is tied to these ID equipment. But the software on the vast majority of Android devices is identical in terms of the debugger connector to the PC, so the driver should communicate normally with any Android device. Our task is to deceive Windows and force it to accept the device as “driver-compatible,” which we did by adding its ID to the driver inf file.
I hope this manual will help someone get their own Chinese or other device for which they forgot to make a normal adb driver when assembling the system, or for those who are bothered to download the official driver from the device manufacturer (this can be so annoying that it’s faster to do everything described above - This happened to me with the driver for the LG E510 phone).
P.S. I have not conducted mass testing of this method, so I cannot guarantee that it will work 100% in all cases. But it worked for me on Windows 7, and then on Windows 8. I had to edit the file separately for each time, but I don’t think that’s such a problem.
APP OVERVIEW
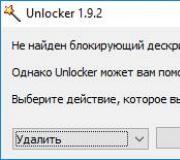
Adb Run is a convenient program that allows you to quickly and visually manage the main ADB tools and commands for Android.
Surely many of the users of our site have heard about ADB at least once; it is possible that some users even used the main functionality of this program (console). To make life easier for beginners and experienced users, an interesting program called Adb Run was released. What kind of program this is and where exactly it can be useful, you will learn from today's review.
The first thing you should pay attention to is the need to enable USB debugging on your device, otherwise the program simply will not function.
The point of this program is to automate familiar actions by simplifying them by entering numbers through a special console, which is offered by the author of the Adb Run program.
The screenshot shows that at the time of writing the review, the program consists of 16 main points, each of which is responsible for performing a particular action. So that you don’t have any unnecessary questions, we will briefly describe each of the points and tell you exactly what they are needed for. As a control, you need to use the numeric keyboard layout and the “Enter” key to confirm the selected action.
Overview of the main functions (items) of Adb Run
1.Device attached? – a command that allows you to check whether the smartphone/tablet is currently connected to the computer (we first enable USB debugging).

2. Move – the command responsible for moving files from an Android smartphone/tablet to a PC and vice versa. This item contains an additional menu with a selection of the necessary parameters and a separate item for returning to the main menu.

3. Install Android App to Device – a command designed to install applications on your Android device. There are items for: copying the application to a specific folder on the device; instant installation of the application; installation on a memory card; reinstallation with preservation of information; reinstallation with saving information and moving to a memory card and mass installation of several applications at once.

4. Reboot Devices – reboot the device into several available modes with the possibility of further selection.
Reboot – normal device reboot;
Reboot Fast (only Rooted) – fast reboot (only for devices with superuser rights);
Reboot Bootloader – reboot into the bootloader;
Reboot Download (for Samsung) – reboot into the bootloader (for Samsung devices);
Reboot Recovery – reboot to the recovery menu;
Fastboot Reboot to Normal Mode – quick reboot to normal mode;
Fastboot Reboot to Bootloader – quick reboot to the bootloader;
Go to Fastboot – switch to fast boot mode, also called “sleep mode”.

5. Fastboot – basic commands that allow you to flash an Android smartphone/tablet using fastboot mode.

6. Unlock Gesture Key / Pin Key - one of the most useful items that allows you to unlock a forgotten pattern key on Android, as well as unlock Pin codes.

7. Manual Command and Unlock Bootloader - an item that allows you to manually enter ADB commands you know and work with them. In addition, there are pre-prepared commands for selection.

8. Check for update program Adb Run - instantly check for a new version of the Adb Run program.

9. Install Bootanimation.zip - a quick and easy way to change/install the boot animation of your Android device.

10. Memory and Partitions – detailed information about the memory blocks and available partitions of your Android device.

11. Run Script – a menu item that allows you to automate the execution of certain scripts in bat format. The bat format files themselves must be placed in the following path: C:\adb\runscr\*.bat.
12. Backup - quickly create and restore a backup copy of data/applications from your Android device.

13. Odex system *.apk and *.jar – Odexization of system firmware files with certain parameters to choose from.

14. Screenshot/Record – an item that allows you to instantly create/view screenshots and record video from the screen of your device with further saving on your PC. There are a number of settings for recording duration and video bitrate.

15. Root Android - information on obtaining Root rights for all devices running on Android.
16. Download Android Driver – a page with all the necessary drivers for your device.
At the moment, these are all the functions presented in the program. According to the developer, the functionality is constantly increasing, and new functions will certainly appear in the latest versions of Adb Run.
Below you will find instructions that allow you to do various interesting things yourself with your Android smartphone/tablet.
Instructions: How to control Android from a PC on Windows:
What to do if you accidentally dropped and broke the display of your Android device, and the data stored on it is extremely important to you?!
Despite the wide variety of shockproof cases and protective films/glasses for Android smartphones and tablets, it happens that the screen breaks after a fall and does not respond to pressure. The cost of repairs is not always cheap, especially for modern smartphone models, but as luck would have it, you need the data stored on your smartphone? It doesn’t matter, we will tell you in detail about the main ways that will help you “pull out” all the essentials without any costs or trips to the service center.
We would like to warn you right away that this article is suitable for users whose device does not respond to touches, but still displays information on the display.
Method one (simple):
If you don’t know what Root rights are and have never installed them on your device in your life, then this method is designed just for you. The problem with data recovery is solved literally in a matter of minutes.
All you need is to go to the official website of your device, download a proprietary data management program, for example, HTC Sync or Samsung Kies, connect your smartphone via USB to your PC and copy all the data you need to your PC.

Method two (simple)
For the second method, you will need a USB OTG cable or a computer mouse with a microUSB connector. However, it is worth noting that not all devices are able to work correctly/work at all via a USB OTG cable.
What you will need:
1. USB OTG cable/mouse with microUSB connector.
2. Smartphone/tablet with a broken display.
3. A mouse and some free time.
All we need to do is connect a computer mouse to our device and then control it with the mouse, transferring data, contacts and other information using a memory card or appropriate applications, for example.
Method three (for experienced ones)
This method is suitable for all users, but to implement it, some details are required, described below.
1. Personal computer/laptop with Windows installed.
2. USB cable to connect the device to a PC.
3. Pre-installed drivers for Android.
4. USB debugging mode enabled.
5. Downloaded and installed the ADB Run program.
How to display smartphone/tablet images on a PC display:
1. Launch the installed ADB Run.
2. Using the number “7”, go to the Manual Command and Unlock Bootloader item, then enter the number “9” and get to the Control Android out Windows section, then press the number “1” Go to Website Java (Download Java JDK, and install) and go to the Java website to install the Java JDK package.
3. From the Java JDK website, you need to download the latest version of Java, taking into account the bitness of the Windows operating system.

4. After you install the Java SDK, you must select Run Control Android out Windows and specify the path to the Java file, as shown in the figure below (the SDK version may differ, look carefully!).

5. If all the steps are completed correctly, then you will see a window depicting the desktop of your device, and the computer mouse acts as control.

Using these very simple methods, you can “pull out” all the data you need from a device with a broken display within a couple of minutes.
Instructions: How to take a screenshot and record video from the Android screen using ADB Run:
Many of us know that to take screenshots on your Android device, you can use either built-in methods by pressing a certain combination of buttons, or use third-party applications that require Root rights to work. Today we will look at a way to take screenshots and record videos from the screen of your Android device on a computer, using only the ADB Run program; Root rights are not necessary.
What we need:
1. ADB Run program.
2. Device with USB debugging enabled.
3. USB cable and computer.
How to take a screenshot on Android using ADB Run.


3. To take a screenshot, select the first item - Take a Screenshot, after which the screenshot you just took will appear in the Adb_Run_Screenshot folder on your desktop.

How to Record Android Screen Video Using ADB Run.
1. Launch the ADB Run program and connect the device to the computer via a USB cable.
2. Go to the Screenshot/Record menu.
3. To record video from the screen of your Android device, you need to select the Record Video Android item, then specify the video recording bitrate that interests you, and enter the desired recording time in seconds. The recording process will begin, after which the newly recorded video will appear in the Adb_Run_Record folder on the desktop.
As you can see, there is nothing complicated, these actions do not take much time, and the result is pleasantly surprising.
Instructions: How to make a backup using ADB run:
There are a huge number of ways to create and restore backups on your Android device, but today we will look at a non-standard approach, namely using the ADB Run program.
What we need to create a data backup:
1. Enabled USB debugging on Android.
2. Installed ADB Run program (preferably the latest version).
3. Drivers for your device.
4. USB cable and PC/laptop.
How to make a backup using ADB Run.
2. Select the desired backup item (data, data and applications, all together + memory card).
4. After which the following message will appear on your smartphone/tablet, where you need to select the “Back up data” option. The backup copy with the files will be placed in a special folder on the desktop of your computer.

How to restore data from a backup using ADB Run.
1. Launch ADB Run and go to the Backup menu.
2. Select ADB Restore.
3. A window with data recovery will appear on your device, where you need to select the option “Recover data”.
At this point, creating a backup copy of your data and restoring it using the ADB Run program can be considered complete.
Instructions: How to apply a patch to a system text file using ADB Run:
Many people know that the Android operating system is the most flexible in terms of settings, customization and modding, which allows professionals and amateurs not only to create their own firmware based on the official ones, but also to create patches that, to one degree or another, affect the operation of the system/ individual components of your device.
Today we will look at an example of how you can copy a system text file using build.prop as an example from the Android OS to your computer, edit it and then create a patch that you can safely apply to your device, and, if necessary, roll back the actions taken.
What we need for work:
1. PC or laptop running Windows OS.
2. USB cable for your device (preferably branded).
3. Downloaded and installed the ADB Run program on your computer.
4. Enabled USB debugging on Android.
5. Availability of Root rights.
6. Installed BusyBox program on Android.
The process of creating and applying a patch:
First we must connect the device to the PC via a USB cable, then launch the ADB Run program and go to the Manual Command and Unlock Bootloader->ADB menu; detailed instructions on how to use ADB Run can be found at the very beginning of the program review.
Now we need to copy the build.prop file, for which we enter the following command in the program window that opens:
adb pull /system/build.prop %USERPROFILE%\Desktop
Once done, the build.prop file will be copied to your PC's desktop, from where you can open it and edit it, but don't forget to change the file name. Once the file is edited and saved, you will need to copy it back to the device, for which we will use the following command.
adb push %USERPROFILE%\Desktop\android_build.prop /sdcard/
This command allowed us to move the text file to the device's memory card, and the next step is to move it to the system folder, but before you start doing this, you need to give the file write permissions. To do this, you need to enter the following commands in the system section:
adb shell
su
mount -o rw,remount,rw /system
After these steps, you can safely send the file we created to the system partition by entering the following command:
cp /storage/emulated/0/android_build.prop /system
Now we just have to create the patch itself. To do this, go to the system partition with the command:
And use the following command to create the match itself:
diff -u android_build.prop build.prop > ptch.diff
At this moment, a file named ptch.diff will be created in which our changes will be made.
The last thing to do is to apply the patch we just created, and this is done with a very simple command:
patch -R< ptch.diff
At this point, the process of creating and applying a patch to a text system file can be considered complete.
Instructions: How to remove an image from Android:
Many users who decide to create their own firmware for Android do not always understand how exactly to remove images from Android. In today's article, you can learn in as much detail as possible about which blocks you need, how to dump dumps from them, disassemble them and then restore them, if necessary. In other words, you will learn how to take dumps from such partitions as: system, data, efs, preload, cache.
What you might need to take an image on Android:
1. Installed ADB Run program.
2. Smartphone/tablet with Root rights obtained on it.
3. USB debugging enabled.
4. Installed drivers for Android, if this is your first time connecting your smartphone to your PC.
5. The PC itself and the USB cable.
How to remove an image from Android (preparation):
1. Connect your smartphone/tablet to your computer via a USB cable.
2. Launch the ADB Run program and go to the Memory and Partitions menu, we need to find out /dev/block/, in other words, the location of the blocks we need in the device’s memory. To do this, you need to go to the Memory and Partitions -> Partitions /dev/block/ section, try one of the 7 presented methods, which will allow you to find out all the blocks we need.
Once we know where exactly all the Android sections we need are located, we can begin to directly remove the image. Before carrying out this procedure, you must make sure that there is more than enough free memory on the memory card of your device.
1. Turn on the ADB Run program, go to the Backup menu -> Backup and Restore dev/block (IMG) -> Backup dev/block.
2. We indicate the block we need and wait until the image is taken (at this moment it is better not to touch the device).
How to restore Android images to their original state:
1. Put your smartphone/tablet into fastboot (bootloader) mode and connect it to the computer using a USB cable.
2. The boot.img and system.img files from your device must be copied to the following path C:/adb/progbin.
3. Launch ADB Run and go to the Manual Command and Unlock Bootloader –> ADB menu.
4. Enter (copy) the following commands:
fastboot flash boot boot.img
fastboot flash system system.img
fastboot reboot
When restoring the system to its original state, it is better not to touch the device and only after completing all actions can you disconnect the USB cable from the computer.
There are many tools for working with a smartphone connected via a USB cable or Wi-Fi. Particularly advanced tools allow you to move files, install and uninstall software, view contacts, take screenshots and even send SMS, but no graphical tool can compare with the power that the Android console can provide. In this article we will talk about ADB (Android Debug Bridge) - a standard tool for debugging and working with the Android console from a computer.
The commands described in the article can be executed directly on the device by downloading a terminal emulator from the market, but it is more convenient to do this, of course, from a computer via adb.
ADB Basics
To start working with ADB, you need to activate it on your device and install the adb utility and drivers on your computer. The first task is performed by enabling “USB Debugging” in the “For Developers” settings item (if this item is hidden, click seven times on the build number in the “About Phone” menu).
To install ADB on your computer, download Adb Kit and unpack it into any folder (I recommend using folder names without Russian characters). We also download and install ADB drivers.
You need to work with adb from the command line. Press Win + R and enter cmd, then go to the folder in which adb is located. For my folder the command would be:
Cd\android
In order not to do all these manipulations every time, you can add the desired folder to the Path variable. To do this, go to “Control Panel -> System -> Advanced system settings -> Environment variables”, find the Path variable and add the path to the adb folder to the end of the line, separated by a semicolon. Now, after starting the console, you can immediately enter the necessary commands.
Let's check our connection to the phone using the following command (it should display a list of connected devices):
adb devices
You can work with ADB via Wi-Fi. To do this, you need root rights and the WiFi ADB application. We launch the application, press the switch and connect to the smartphone using the connect command and the IP address shown by the application:
INFO
You can copy the console output after selecting it with the mouse, as well as paste the copied command or file name into the console with the right mouse button. Enabled in the console properties.Installing programs
ADB can be used to install applications without having to copy them to your smartphone. All you need to do is run the following command:
Adb install d:/downloads/filename.apk
You can also add additional keys to the command. Will be useful -e- reinstall the application while saving the data and -d- install a version less than the current one.
Programs can be removed, but to do this you need to know the name of the package (I’ll tell you how to find out a little later). Using the game Angry Birds Seasons as an example, the command would look like this:
Adb uninstall com.rovio.angrybirdsseasons
Application backup
Android has built-in backup functions that can also be launched using the command line. To do this, use the adb backup command and a set of options:
Adb backup [options]<приложения>
- -f indicates the name of the file being created and its location on the computer. If the key is missing, the backup.ab file will be created in the current directory;
- -apk|-noapk indicates whether to include only the application data or the apk itself in the backup (does not include it by default);
- -obb|-noobb specifies whether to include .obb extensions for applications in the backup (not included by default);
- -shared|-noshared specifies whether to include the contents of the application on the SD card in the backup (not included by default);
- -all indicates the need to backup all installed applications;
- -system|-nosystem specifies whether to include system applications in the backup (includes by default);
- - list of packages for backup.
If we want to create a backup of all non-system programs, including .apk, to a specific location, then the command will look like this:
Adb backup -f c:\android\backup.ab -apk -all -nosystem
After entering, you must confirm the start of the backup on the device itself. To restore the resulting backup, you need to run the appropriate command:
Adb restore c:\android\backup.ab 
Console within a console
Along with the mentioned console, which is a DOS console for Windows, Android also has its own. It is called via adb shell and is essentially a standard Linux console, but with an incomplete set of commands, which can be expanded by installing BusyBox from the market. There are two ways to use this console. In interactive mode it is launched with the command
adb shell
The $ sign appears in the console (hereinafter in the text this sign will mean the need to enter the preliminary adb shell command), and after that you can enter a series of commands, receiving a response after each. The second method is if you need to enter only one command, you can write it in a row using the adb shell.
The shell uses standard commands for copying, moving and deleting files: cp, mv And rm. You can change directories ( CD) and view their contents ( ls). In addition to standard Linux commands, which you can learn about from any reference book, Android has several of its own specialized tools, but to use some of them, you will have to gain root rights on your smartphone, and after launching the console, run the su command:
adb shell su
This needs to be done if, in response to any command, you see a line similar to “access denied” or “are you root?”. If successful, the $ sign will change to #.


Taking a screenshot
Done in one line:
Adb shell screencap /sdcard/screen.png
After this, the picture needs to be pulled out of the device with the command adb pull:
Adb pull /sdcard/screen.png
In recovery, you can take a screenshot with the following command:
Adb pull /dev/graphics/fb0
Then you need to convert the fb0 file into a normal image using FFmpeg, which you need to download and put in the adb folder. The extension must be installed on your device:
Ffmpeg -f rawvideo -pix_fmt rgb32 -s 1080x1920 -i fb0 fb0.png
Record video happening on the device screen
adb shell screenrecord --size 1280x720 --bit-rate 6000000 --time-limit 20 --verbose /sdcard/video.mp4This command will start recording video with a resolution of 1280 x 720 (if not specified, the native screen resolution of the device will be used), with a bitrate of 6 Mbit/s, length 20 s (if not specified, the maximum value will be set to 180 s), with display logs in the console. The recorded video will be located in /sdcard (video.mp4 file).
INFO
All launched from the console and in adb shell processes that take some time to complete can be interrupted using the combination Ctrl + C. Exit the shell and return to executing regular adb commands - Ctrl + D.Application management
Two commands are used to manage applications: pm(package manager) - package manager and am(activity manager) - activity manager. These teams have many keys, which can be viewed on the developers portal. Let's look at a few.
To begin with, we will get a list of applications installed on the device in the form of package names that will be useful later:
Continuation is available only to subscribers
Option 1. Subscribe to Hacker to read all materials on the site
Subscription will allow you to read ALL paid materials on the site within the specified period. We accept payments by bank cards, electronic money and transfers from mobile operator accounts.