How to download files to an Android memory card. How to install applications on an Android SD card: existing setup methods
Articles and Lifehacks
Every mobile device running on the Android system has two types of memory: phone memory and a flash drive, that is, a memory card, and in order not to take up phone space with voluminous programs, it is better to dump them on an sdcard. Moreover, it is no more difficult than working with another language. There are two options, how to install on a flash drive in android third party applications:
1) Swap internal and external memory by installing the Root External 2 Internal SD program.
2) Manually transfer downloaded applications from phone memory to a flash drive. The second option is simpler and safer for your gadget, but the Android system does not always allow you to transfer the necessary applications from one place to another.
How to transfer to a flash drive in Android
If you do not want to take risks and use the Root External 2 Internal SD program, then you will not be able to download services directly to the sdcard; by default, they will be installed in the phone’s memory. But you can move them from one place to another. To do this:
1) Go to the main menu and select “Settings”.
2) Here you will need the “Applications” section, in which you need to go to “Application Management”.
3) Select the desired service and click on it.
4) In the window that appears, find the item “Move to sdcard” and click on it.
Now the application will be located on the flash drive, and not in the internal memory of the device. Perhaps you still doubt, why, in fact, do this? Yes, then, to improve his work.
But there are situations when the system does not allow you to move a particular program from one place to another, that is, when you select it in “Application Management”, a window pops up that does not contain the line “Move to sdcard”. Then the only thing that will help you is installing a third-party service that will help free up space on your gadget.
How to use Root External 2 Internal SD in Android
Root External 2 Internal SD is a program that swaps the internal and external memory of a mobile device. Therefore, if the Android system for some reason does not allow you to transfer files to a memory card, you should know how to install on a flash drive in Android using Root External 2 Internal SD. And for this you need:
1) After downloading the program, go into it and check the boxes next to “Use per dafault” and “Default SGS3 Roms”.
2) At the very end of the list, select “View the different device” and find your SD card.
3) After searching, paste its location into “The ext. sdcard device access".
4) Return to the main menu of the program and select “External > Internal”.
After all the steps, the internal memory will change with the external one, and everything that you install on your device will automatically be on the flash drive. But this will happen until the device is rebooted for the first time, and then the programs will again be downloaded to where they were before.
Good afternoon, our dear readers and at the same time users of modern devices. Today we will talk about a problem that is so familiar to many of us.
It happens that you install a new application, but the download does not turn on, and a window pops up asking you to delete old applications to free up memory on the device. When Android does not save to the memory card, what to do about it?
Danger of the problem
Tablets and smartphones today have different sizes of built-in memory. True, given the abundance of applications and the ability to connect different gadgets, the main memory may not be enough.
Of course, in our age, everyone understands that the elementary solution here is to connect an SD card, because today phones store not only contacts, but also a lot of useful and entertaining things.
So modern microSD can add up to 8 GB of memory, microSDHC - up to 32 GB, microSDXC - optimally offer 64 or 128 GB, but the most expensive of them can accommodate 2 TB of information.
For comparison, music downloaded to a phone usually weighs 3-10 MB, a photograph on a smartphone takes 1-5 MB, and a movie of the poorest quality starts from 700 MB. Not to mention games for smartphones. In general, when purchasing a card, you will, of course, be guided not only by the capabilities of your device, but also by your needs.
It just happens that the card is finally inserted, the problem should get better, but here it is again: you download the application from the Play Market, and it again goes to the smartphone’s memory.
Clearing the cache is only a temporary measure. So why doesn't Android want to save to the card? The issue of forcing files to be moved to an external card directly depends on the OS version.
Find out the Android version
How to find out the Android version? To do this you need:
- go to “Settings”;
- in the list of items, find “About phone”;
- Now click “Version Information” and here you will see the version of the operating system.
Solution for Android versions 4.0 - 6.0

The sequence for solving this issue is different for certain operating systems. So today, a large number of mid-segment smartphones run on Android from version 4, as well as Android 5.1 and 6.0.
Android 4.0, 4.1 and 4.2 allow you to configure saving files to an SD card without having a . You just need to go to “Settings”, enter the “Memory” submenu and specify there the installed memory card as the default resource for saving data.
From now on, the new application from the Play Market will be saved there. True, old applications will have to be moved manually, and if that doesn’t work, install them again.
To carry out the task, go to “Applications”, select the one you need and indicate the path each time - “Transfer to SD”. But not all applications, especially system ones, will “listen” to you, because to transfer data to Android from 4.4 and higher you will need to obtain Root rights.
Obtaining superuser rights occurs through special utilities.

The most famous of them are Framaroot and Kingo Android Root. But with full access to your files, you suffer some costs when obtaining Root rights: you lose your rights to warranty service for the device, updates do not come by themselves over the air, and unknowingly you can damage the system by accidentally deleting important files.
Using Third Party Applications
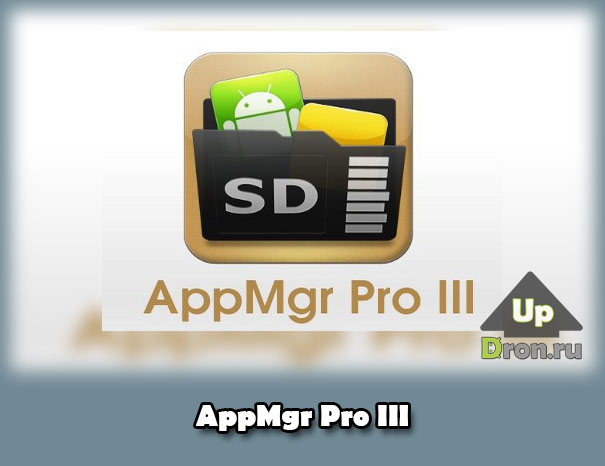
You can force your smartphone to transfer applications faster through AppMgr Pro III.
Download the application from the Google Market, clear the application cache automatically and perform other manipulations. The program divides applications into three characteristics: those stored on the SD card, those stored on the phone, and those that are moved. The latter can be broadcast to an external card. You can even click “transfer everything” right away - quickly and conveniently.
An alternative is the Link2SD program, which works with OS from 4.4. It creates separate libraries on the card, transferring applications partially. But be careful here too - do not touch system files.
Telephone does not see the memory card
There are several reasons why the phone does not recognize the card:
- Lost contacts is the first reason. Simply remove and reinsert the SD card.
- Sectors are damaged. What to do in this case? Format the memory card.
- The reason is a block in the phone's security system. The service center can help you remove it.
- The service center will tell you if something inside the phone is not going well, and will help you fix this element, returning the device to a responsive “dialogue” with the memory card.
- Incompatible card. All you have to do is replace the card, carefully reading the instructions about the compatibility of your device.
When the device detects the presence of the card, you can try to transfer programs to it according to the instructions above. And the unloaded system memory will serve you uninterruptedly, save applications, videos and photos to your smartphone and will not bother you with unpleasant notifications when downloading new applications from the Google Store.
I hope we have provided you with real help and are happy to continue talking about the intricacies of modern devices. Also visit us with your friends in the VK group, on Facebook, on Twitter, as well as on YouTube channel.
There was a site with you

Installing applications on a memory card is required by almost every owner of an Android device, especially if the internal storage is designed for a small number of files. Regardless of the purpose for which you use your device - for work, study, entertainment, games, the allocated memory capacity may not be enough. If you are interested in how to install an application on a memory card in Android, then you can use two methods - system functions or special utilities. Which we will now look into in more detail.
Android system capabilities
The Android platform, starting with version 2.2, provides a system function for moving content from external memory to a card. This feature does not always work, since its functionality also depends on the properties of each specific program or game.
How to install applications on a memory card in Android:
1 . It is assumed that you already have apk downloaded and installed on your device, which now needs to be moved to SD to free up memory. Open your device settings and go to the applications tab.

2 . The new window should contain several items - downloaded, located on the SD card and all programs. We need the first point.
3 . The downloaded section contains all the software that you downloaded and installed yourself. Now you have to work with all the programs displayed in the list separately, since it will not be possible to transfer all of them at once.
4 . To move applications to the memory card, select any of them in the list and click on it. The display will show all the information about it, including the required amount of memory, access to data and other information.
5 . If a certain program has a function for installing on external storage, then the “ Transfer to SD" will be active - click on it and the moving operation will start.

6 . If the button is not active, then the system tools are powerless in this case - you will have to use third-party utilities.
It is worth noting that the above instructions apply exclusively up to platform version 4.2, including it, but how to save applications to a memory card in Android if the device runs on newer versions of the platform? These include the following OS: 4.4, 5.0, 5.1, 6.0.
In such a situation, you will have to find an additional utility. It may also be necessary to have root rights. However, in version 4.4, in some cases you can still do without additional programs, but a lot depends on the model of the mobile device. For example, Sony made sure that the devices included installation of programs on the memory card in Android directly without additional applications and utilities.
Using third party applications
There are quite a lot of special utilities that solve the problem of installing software on SD, but only a few of them can effectively help the user. The most interesting applications for transferring applications to an SD card should be noted:
- App 2SD
- Link 2 SD
- Total Commander
App 2SD

This is one of the most popular utilities among Android owners, which greatly simplifies working with content. The latest version of the program has a redesigned and improved design.
Basic functions:
- moving programs;
- software management;
- hiding programs.
Directly in the utility, all content on your device is divided into two categories - that which is already located on SD, and that which can be moved there. On Android, transferring applications to a memory card is possible for one selected program or all existing software. If you install a program that can be moved, App 2 SD will notify you about it.
Every owner of an Android device is extremely dissatisfied with the presence of a large number of unnecessary system applications on his device. There is no way to get rid of them in the usual way - to remove them you need to have root rights. However, you may accidentally touch important files, which may cause the device to malfunction. There is a way out of this situation, thanks to the functionality of the presented program. App 2 SD can hide system content, due to which it will not load the system.
As for managing downloaded applications, thanks to App 2 SD you can remove programs (while performing a full system scan for unnecessary data), clear data and cache.
Download Apps2SD program possible ->
Instructions for working withApps2SD ->
Link 2 SD

The program is designed as a functional application manager, with its help you can not only transfer content to storage, but also clear cache files. The program has the usual software installation function, as well as moving with advanced functionality, which requires two partitions on SD and .
Link 2 SD is suitable for experienced users who understand the features of file systems and SD partitions. Main functions:
- moving apk., lib., dex files. to SD and back;
- automatic installation to SD;
- transfer even of content that does not provide this feature;
- choosing a location to install new applications;
- notifications about the possibility of transfer;
- “freezing” embedded content;
- clearing cache and data;
- converting user programs into built-in ones.
Download Link 2 SD program possible ->
Total Commander

Total Commander– a well-known manager among Android and PC owners. The manager provides a huge number of functions that are designed to manage various data in the system. Main functions:
- moving, copying, renaming, deleting files/folders;
- data transfer via Bluetooth;
- selecting and sorting files;
- built-in archiver;
- text editor;
- search for files and data;
- audio and video player;
- support for functions provided by root rights;
- changing file properties, etc.
The functionality does not provide a special option for installing applications to external storage, however, it is thanks to the support root rights it becomes available.
Download Total Commander possible ->
Conclusion
Now you know how to transfer applications to a memory card, what may be required for this, what difficulties users encounter most often. It should be noted that this function is considered very useful, since over time the amount of available memory in the device becomes less and less, and you don’t want to get rid of important programs. Unfortunately, automatic installation of programs on SD is not possible, so after each installation you will have to move the content to external storage yourself.
Today we will talk about automatically installing applications on a memory card for tablets running Android. Devices from Apple, due to the lack of a MicroSD slot, are immediately eliminated - they are limited by the amount of built-in memory, so they have to store some of the data on the cloud. Whereas in most Android tablets this slot is present. Let's say more, recently gadgets have begun to support memory cards with a capacity of up to two terabytes! And no, we didn’t mistype it - it’s really true.
If the method below does not work for you, then try the one we wrote quite recently.
Why are applications not saved to the memory card?
We hasten to disappoint you - in some devices it will not be possible to allow automatic installation to MicroSD using software. In particular, this applies to devices running Android 4.4.2 and higher – right down to the “marshmallow”. Fortunately, there is third-party software that allows you to do this. But let’s not rush things – we’ll find out about everything in order.Find out the Android version
Well, now let’s put everything into pieces. First, we need to find out the Android version.

Go to the menu;
- Go to “Settings”;
- Scroll to the very bottom and click on the “About phone” item;
- In the submenu that opens, look for information on the version;
In this case it is Android 5.1.1. This method is suitable for both smartphones and tablets. As a matter of fact, on this device, without “external” intervention, it will not be possible to ensure that all applications are automatically installed on the card. But, as you have already noticed, we have third-party firmware with built-in Root rights.
With their help, you can easily install additional software, which, working in the background, will “scatter” all the files from programs and games across a flash drive.
Saving applications to a memory card for Android 2.2 – 4.2.2
Everything here is extremely simple and banal:

1. We still go to the menu and look for “Settings” there - the icon, as a rule, resembles a gear in appearance - there should be no problems finding it;
2. Next, look for the “Memory” sub-item. In our case, it is located between “Screen” and “Battery”. The menu may differ depending on the device manufacturer. The screenshot shows an example of a clean version of Android, without shells that are preinstalled at the manufacturing plants;
3. And now the most important thing - tap once on the “SD card” item, located below the inscription: “Default recording disk”. On the contrary, a circle or a tick should appear;
4. Profit! Now all applications downloaded through the Play Market will be automatically installed on external memory.
By the way, if the flash drive is slow, and there are such things, then applications may not work correctly. So buy a good SD card - don't skimp.
What to do with devices running Android KitKat and higher?
Unfortunately, you won’t be able to do this without obtaining Root rights. Google has officially stopped supporting this feature in new versions of the operating system. The fact is that cloud services are becoming more widespread and, as a result, problems with insufficient memory should not arise. But in our country there is no such high-speed Internet as in the USA, and traffic is not cheap, so clouds are not in demand.Is there any way to make sure that applications are automatically installed on the memory card? As we said above, this is real.
If you have a tablet from one of the Chinese companies, then it probably already has built-in Root rights, but you will have to tinker with other manufacturers. Naturally, in the course of this article we cannot talk about obtaining them, because the process for each gadget is unique - the instructions can only fit into a multi-volume book. But oh well, it doesn't matter.
You can contact a specialist with a request to install Root rights or do it yourself at home. The last option is the most risky; there is a chance to turn your gadget into a so-called “brick” and only be able to restore it in one of the service centers. However, if you have already carried out a similar procedure, there should be no problems. As a last resort, on the Internet you can also find solutions to these same problems. So, go ahead and experiment!


- Somehow we have strayed quite far from the main topic of the article. So, let's return to the instructions: Using any of the possible methods (flashing, unlocking the bootloader, etc.) we get Root rights;
- Go to Google Play;
- In the search bar we write: “SDFix: KitKat Writable MicroSD” - this is the assistant application that will be useful to us in the future. Let's install it. We hope this doesn't need to be explained to anyone? Just tap once on the “Install” button and the process will take place automatically, after which a shortcut to launch will appear in the menu;
- We open it and see a bunch of, most likely incomprehensible, inscriptions in English. There is no need to translate them - everything is resolved in a few clicks;
- Click on “Continue”, as shown in the first screenshot;
- We tick our agreement that by clicking the “Continue” button, the device will be slightly modified;
- We wait literally a couple of minutes until the orange screen changes to green.
- On the green screen we are informed that automatic installation of applications on the SD card has been successfully enabled.
![]()
Installation of programs on the internal memory of the tablet is carried out by default. To place the application on the built-in memory card, you just need to perform a standard installation. It will take a little longer to send it to external media. One simple setup session will bring order to the device's file system, installing each new application on the SD card.
Option 1: specifying the installation address
During installation, some programs ask the user where to locate them. Specifying the installation address is not difficult. Choose a removable memory card, and that's the end of it. But this applies only to some applications, such are the minority.
Option 2: Set the installation path in advance
The application must support the app2sd patch if the Android OS version on the tablet is earlier than 2.2. There will be no such items in the settings. For all new versions, this algorithm for solving the problem is suitable.
Go to “Settings”, find the “Memory” item. Click on it and the memory settings menu will open. Here you can find out about the amount of free memory on your device, how much space there is on the tablet in general, and how much internal memory is occupied. Some people insert an SD card into a card reader and find out the data about the flash drive on the computer, not knowing that this can be done on the tablet.
Find the “Default Burnable Disk” section, where you are offered several sources for installing applications. Among them, select “SD card”. Click on this item and you will see a circle opposite it. Now installation of applications on the memory card on the tablet occurs by default.
Option 3: Using third party programs
Most likely this is the method that will help you. But he demands. You can find out whether or not you have root rights on your tablet. We download special applications, like FolderMount or GL to SD, which will help transfer data from games and programs to an SD memory card. Watch video instructions below:
Option 3
Install a program on your tablet PC that will allow you to select the installation address. Before installing the application directly, a dialog box will appear in which you specify the installation address.
This is the most convenient option offered. Because forcing a default setting is not desirable in all cases. Utilities such as InstallManager and MagicUneracer will help organize the economical and rational filling of the tablet’s memory. By the way, these same programs also remove programs with all auxiliary files.
If the application is not installed on an SD card
Open Applications in Settings. In the list of applications, select the one you would like to transfer to the removable card. Click on the application icon and a menu will open. See if it has a "Transfer" option. If there is, click on the option button and select the memory card. This procedure does not require installing additional software; you can do it yourself.


