What program is needed for gifs. GIF file extension
The topic of website optimization is now being discussed more and more often. And for good reason, since the Internet is becoming faster and faster, and there is more and more information. Just look at the number of image optimization services, CSS styles, JS styles that have appeared recently. Achieving fast loading of a website has become much easier than it was before. But even here, not everything can be solved with simple services. Today we'll look at a simple way to download GIFs only on click.
If you want to study the topic of loading speed in more detail, I recommend reading the following articles:
Since the article relates specifically to GIF images, I recommend studying the article on creating GIFs online:
There will be no examples before and after, since everything here will be clear in numbers. And below you can see and download a ready-made example of loading a GIF image when clicked:
DOWNLOAD DEMO
Pros and cons of loading GIFs on click
To clearly evaluate all the pros and cons of this method, I presented everything clearly in the table:
The first point is a little controversial, because it was possible to write a script in pure Javascript, then it would be absent, but the rest will definitely remain in any case.
It is not yet entirely clear what the point of this method is, if it has so many disadvantages. But the last plus for many (including me) will be much more important than all the minuses listed above. To achieve good download speeds, there are a few things you need to do.
Now I want to talk a little about the last method of downloading and show in numbers how much the downloaded volumes of data differ when simply inserting a GIF, as well as in the second case. I will give examples of those GIF images that you can see in .
In this particular example, the differences are colossal!
What needs to be done before implementing the code...
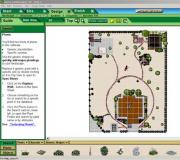
Let's say you are inspired by this method and you understand that your site contains a large number of GIF images, but the loading speed suffers. And you decided to implement this functionality in your project (possibly in the future). There is a small preliminary procedure in which you need to prepare preview images that need to be shown as soon as the site has loaded. That is, these are exactly the images that the user sees until he clicks on the Play button.
What can you put on a preview image? There are 2 options here: either make a preview for each GIF image, which is its first frame, or make one image that will be used throughout the site, regardless of the GIF image. But you need to decide what will be best for your project yourself.
So, you have prepared all the preview images for each GIF image and are now ready to implement the functionality, then let’s move on to the most interesting block! 🙂
Block "COPY-PASTED"
Everything will be really simple here, and if not, then just download the demo example and see how everything works inside and take the appropriate actions for your project.
Let's start, as usual, with the markup:
Stage 1. HTML markup
| 1 2 3 | <div class = "gif-with-play" > <img src = "img/self-portrait.jpg" alt = "Self Portrait" data-srcgif= "img/self-portrait.gif" > !} </div> |
IMPORTANT: all images must be in a block with the "gif-with-play" class. And the second important note: you must specify the address before the preview image in the "src" attribute and MUST specify the address before the GIF image in the "data-alt" attribute .
Stage 2. CSS styles
In fact, you can do without CSS styles, and implement the functionality and that’s it. But a person is unlikely to understand that they can click on the image and simply scroll down the page further. Therefore, we still need styles that will help the user understand how to work with this page component:
| 1 2 3 4 5 6 7 8 9 10 11 12 13 14 15 16 17 18 19 20 21 22 23 24 25 26 27 28 29 30 31 32 33 34 35 36 37 38 39 40 41 42 43 44 45 46 47 48 49 50 51 52 53 54 55 56 57 58 59 60 61 62 63 64 65 66 67 68 69 70 71 72 73 74 75 76 77 78 79 80 81 82 83 84 85 86 87 88 | .gif-with-play ( position : relative ; background ) transparent no-repeat center center ; ) .gif-with-play :hover ( cursor : pointer ; ) .gif-with-play :hover :before ( background-color : rgba(255 , 255 , 255 , .56) ; ) .gif-with-play : after , .play .gif-with-play :after ( content : "" ; position : absolute ; top : 0 ; left : 0 ; right : 0 ; bottom : 0 ; margin : auto ; height : 120px ; width : 120px ; -webkit-background-size: background-size: cover; -webkit-transition: all .35s ease; -o-transition: all .35s ease; 1 ; ) .gif-with-play :after ( background-image : url ( "../img/player-buttons/play_button.svg") ; ) .play .gif-with-play :after ( background-image : url ( "../img/player-buttons/stop_button.svg") ; ) .play .gif-with-play : not(: hover) :after ( opacity : .35; ) .gif-with-play :before ( content : "" ; position : absolute ; top : 0 ; left : 0 ; height : 100% ; width : 100% ; background-color : rgba(255 , 255 , .7) ; -webkit-transition : all .35s ease ease; transition : all .35s ease; opacity : 1 ; ) .play .gif-with-play :before ( background-color : rgba(255 , 255 , 255 , 0 ) ; ) .gif-with-play img ( opacity : 1 ; -webkit-transition : all .35s ease; -o-transition : all .35s ease; transition : all .35s ease img ( opacity . play . gif-with-play : after ( opacity : 0 ; ) @media screen and (max-width: 768px) (.gif-with-play :after , .play .gif-with-play :after ( height : 60px ; width : 60px ; ) ) |
This is the most basic set of styles to show the Play button. I wrote them only so that you understand the principle and can change the button (and any styles) to suit yourself and your project. If you noticed, for a GIF image that will be substituted using JS instead of preview, the container block (in our case, the block with the "gif-with-play" class) is added with the "play" class.
Some will say that it was possible to add additional tags to the HTML markup and attach the GIF playback and stop event to them. But I like the format with the :before and :after pseudo-elements.
Stage 3. Javascript
The first thing you need to do is connect jQuery library. And then place the following script below:
JAVASCRIPT CODE
| 1 2 3 4 5 6 7 8 9 10 11 12 13 14 15 16 17 18 19 20 21 22 23 24 25 26 27 | (function ($) ( $(".gif-with-play") .on ("click" , function () ( var $this = $(this ) , $img = $this.children ( "img" ) , $imgSrc = $img.attr ("src" ) , $imgSrcgif = $img.attr ("data-srcgif" ) , $imgExt = $imgSrcgif.split ("." ) ; if ($imgExt[ 1 ] == = "gif" ) ; $img.attr ( "src" , $img.data ( "srcgif" ) .attr ( "data-srcgif" , $imgSrc ) ; ) ) ; ) else ( $img.attr ( "src" , $imgSrcgif) .attr ( "data-srcgif" , $img.data ( "srcgif" ) ) ; ) $this.toggleClass ( "play" ) ; ) ; ) ) (jQuery) ; |
For WordPress owners
There is an excellent ready-made solution for you in the form of a plugin for WordPress. The plugin is called "WP GIF Player". You can download it here - download the plugin "WP GIF Player" .
Announcement
GIF Raster image file format
GIF is the most popular file type on the Internet because it allows you to create animated images. GIF files use raster images up to 8 bits/pixel. This resolution allows the use of 256 colors of the RGB palette. It should be noted that not all GIF images are animated. A large number of logos and images with clear, well-defined lines, as well as transparent backgrounds, are saved in GIF format. Compression of files in GIF format occurs without losses, i.e. The size is reduced without reducing image quality. This allows you to convert files to other formats without any significant loss of quality.
Technical information about GIF files
Compuserve created the GIF (Graphics Interchange Format) format for use on the Internet. That is why data about him was open to the general public. The 256 colors of the GIF file are capable of using the Lempel-Ziv-Welch algorithm, which allows you to compress files while simultaneously removing areas with insufficient data in order to minimize loss of image quality. Raster information is compressed to a minimum size. The number of colors required to construct an image is reduced by removing colors that are not used to form the image. The maximum number of colors is 256, but the image can even have 2 of them - white and black (the minimum requirement for the number of colors in a GIF file). Reducing the number of colors reduces the overall file size.
More information about the GIF format
| File extension | .gif |
| File category | |
| Example file | (5.6 MiB) (7.7 MiB) (141.77 KiB) (118.95 KiB) |
| Related programs | Adobe Photoshop Microsoft Windows Photo Gallery Viewer Apple Preview Corel Paint Shop Pro |