“Find iPhone”: how to enable or disable the function. How to find a lost iPhone or iPad
Mobile Apple devices with iOS version above 5.0 are equipped with an excellent security mechanism - the Find iPhone function. The function allows you to remotely block a lost/stolen gadget and find out its location. Thanks to Find My iPhone, the number of reported thefts of Apple devices around the world has decreased significantly - in London, for example, by as much as 50%.
Russian users, alas, have not yet “tried” the “anti-theft” Apple feature— many of them do not believe in its effectiveness; Some even suggest that this is America’s way of keeping tabs on the Russians. In fact, the search mechanism proposed by Apple is effective. It makes sense to abandon paranoid prejudices in order not to shed tears after the theft of an expensive device.
The Find My iPhone service allows the user to:
- Find out the geographical location of the lost gadget. You can only find out where the device is if it is connected to the Internet.
- Remotely delete all contents of your smartphone.
- Activate “Lost Mode” on the device. It is impossible to use such a gadget - you can only sell it for spare parts and then for next to nothing.
- Remotely start loud on your smartphone beep to make your search easier.
The function can only be used if it is actually activated. mobile device and if the owner of the gadget remembers the password for his iCloud account.
After the loss Apple smartphone the user can go to www.icloud.com using the data of the account that is activated on the device, select the “Find iPhone” section and see a city map on which green dot The location of the gadget is marked.
The owner of the lost “mobile phone” can only turn on “Lost Mode” and go out in search. It’s better to take a friend with you who also has an Apple device – but only with installed application"Find iPhone." Through the application, you can play a signal on a lost device.
More detailed instructions on the use of Apple’s “anti-theft” technology is present in our article on how to find a lost iPhone.
How to enable the Find My iPhone feature?
To set up the Find iPhone function on your mobile device, do the following:
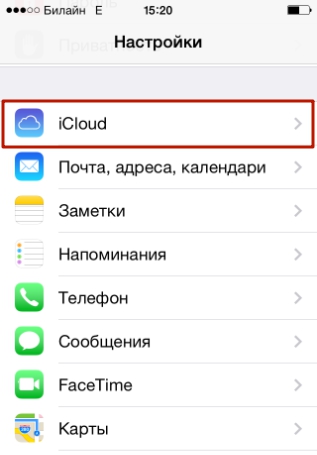
Step 1. Go to the section " iCloud" V " Settings» iPhone.
Step 2. Enter your Apple ID and password if you haven't done so before.
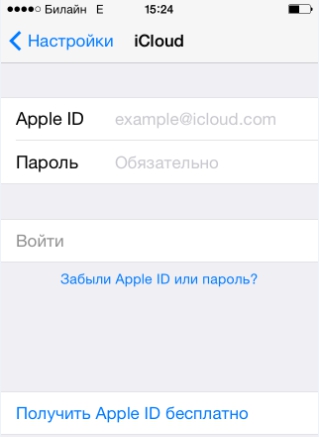
Then click " Login».
Step 3. Agree to merge data stored in iCloud and on iPhone - or refuse if you want to separate the “flies from the cutlets”. Also allow iCloud to use your iPhone's location.

These two requests will appear on the screen sequentially, one after the other.
Step 4. Scroll down the screen and find the " Find iPhone».

Move it to the active position.
Step 5. A notification will appear on your screen indicating that Find My iPhone will be activated. Click " OK».

Step 6. It remains to check whether the “Find iPhone” function is enabled in “ Location services" Go to " Settings" and follow the path " Privacy» — « Location services».
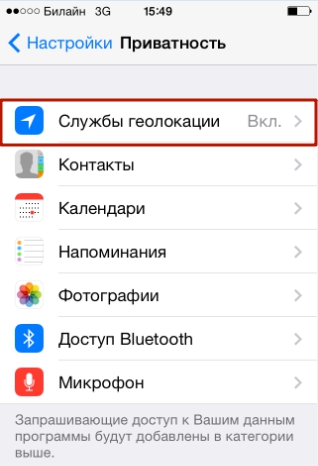
In the section " Location services" there is a subsection " Find iPhone» - visit him.

Make sure that the toggle switch of the same name is activated.

It is very important to carry out this check. If Find My iPhone doesn't use geolocation, you won't be able to see your lost device on the map.
What is Activation Lock?
A useful add-on for Find My iPhone called " Activation Lock" (or " Activation Lock ") first appeared on iOS 7. The addition allows you to “tightly” lock a mobile device linked to Apple account ID – that is, actually turning a smartphone into a “brick”. Neither flashing nor restoring in DFU mode will help to revive the gadget.
“Activation Lock” is, in fact, the “Lost Mode” that was mentioned earlier and which can be enabled on the iCloud website.

With the current " Activation lock» you will have to enter your Apple ID every time you need to perform next steps:
- Deactivate Find My iPhone.
- Delete information from the gadget.
- Re-activate the smartphone.
That is, an attacker who stole a gadget will find that he has a device in his hands with which he cannot do anything. The smartest thing for a thief to do would be to contact the owner and, pretending to have found the gadget, offer to return the device for a symbolic reward.
The user needs to be careful and activate “Lost Mode” only after the Apple ID password has been written down in various notepads and computer programs. If he loses the password or forgets it, he himself will not be able to return the device to functionality. Under such circumstances, both service centers and service Apple support, and even computer hackers will be powerless.
Conclusion
A person who has activated the Find My iPhone function on his mobile phone will have to take the confidentiality of his Apple ID credentials very seriously. If the data ends up in the hands of attackers, they will be able to block the gadget and, by changing the iCloud password, blackmail the owner of the mobile device. This method of fraud is not “out of the realm of science fiction”; V lately More and more users are suffering from such illegal actions.
All Apple tablets and phones have the “Find My iPhone” function, which allows you to determine the location of a stolen or lost device using satellite geolocation. If you sync your device with iCloud servers via Apple ID, you will have access to it. But in some cases this feature should be disabled. This can be done in several ways, including through your home computer.
When to turn off Find My iPhone
Perhaps the feature was activated accidentally, or you may not be the only person with access to your Apple ID account, and you don't want that person to be able to determine your location. Also, it is worth remembering that people in the group “ Family Sharing", can view each other's location, unless you prohibit this in the settings.
If you try to restore or update your device's firmware through iTunes while Find My iPhone is enabled, you will see an error asking you to disable it.
Error when trying to restore the device
If you try to erase your device's settings and content, you will also receive a notification asking you to deactivate Find My iPhone.

It is impossible to reset device settings and content
How to deactivate the feature
There are several ways to help you turn off Find My iPhone. Which one to choose depends on what device you are going to do it from.
iOS for iPhone or iPad
The following methods are suitable for those who will perform all the steps from an iPhone, iPad or iPod touch.
Through iCloud settings

By completely disabling iCloud

Via the app

The disadvantage of this method is that the device on which you disabled the function will reactivate it the first time you connect to the Internet. That is, in order to permanently deactivate the function, you need to do this through the iCloud settings.
Via Windows, Mac OS or Android computer
Valid for all these platforms one way disabling the Find iPhone function - through the official iCloud website. The only thing you need is an Internet browser.
- Follow the link: https://www.icloud.com/#find and log in.

- Expand the All Devices menu.

Click the All Devices button
- Select the phone or tablet on which you are going to disable the feature.

Selecting a device
- Will open detailed information about the device, click the “Erase iPhone, iPad” button.

Click the “Erase” button
- Confirm the action by clicking the “Erase” button.

Confirm the action
- Enter the password for your account Apple records ID.

Enter the password
- If you want, enter the number, it will be sent to the device on which the function was disabled.

Enter the number
- You can add a text message to the entered number.

Enter a message
- Done, confirmation sent to the device. Find My iPhone will be disabled as soon as your phone or tablet connects to the Internet.

Feature disabled
Can I turn off Find My iPhone without my Apple ID password?
The answer is no, because this is a violation simple rules security, which Apple company won't work. If it were possible to disable this feature without a password, then there would simply be no point in it. Attackers would steal devices and disable this function, and it would become completely impossible to find the device. In one of the versions iOS firmware There was a hole that could be used to disable Find My iPhone without a passcode, but it was quickly fixed in the next update.
What should I do if I can’t turn off Find My iPhone?
The problem may arise if you disable the function not through the settings of the device itself, but from another phone or computer. The error occurs if the device is connected to the Internet or simply turned on during the process of disabling the function. There is only one way out - disconnect the device from Wi-Fi networks or mobile internet, and, if the first does not help, completely turn off the device so that it goes into offline mode.

Disconnecting the device
Remember that you should disable the Find My iPhone function only as a last resort, since you can never predict whether you will have to search for the device or not. If you disabled it to perform an operation to restore, update or reset your device, then once you finish the process, enable the function again.
22.01.2018
If you no longer plan to use your iOS device, Apple Watch, AirPods headphones or Mac computer, you can remove them from Find My iPhone in the Find My iPhone app on iCloud.com or on your device. When deleted, the device will be removed from the list of devices in the Find My iPhone app. If your device has iOS 8 or later later version, activation lock will also be disabled.
You can then access settings using the gear icon located either at the bottom or top of the app. To read the contents of a message, you must first open the application. To view messages back, simply drop the settings switch again and then gets back displayed directly on the screen without having to open the app preview messages.
Somewhat hidden system services: These are the individual apps that access your location. Many of them can be deactivated without permanent restrictions. Onsite services do get a worse reputation than they deserve. With these, you can use location-based services, which are location-based services.
Before you sell or give away your iOS device, erase your content and reset all settings (go to Settings > General > Reset > Erase Content & Settings). When you erase your data, Find My iPhone and Activation Lock are disabled. For more information, see the Apple Support article. To receive additional information what to do before selling or giving away your watch Apple Watch for use, see article Selling Apple Watch, transfer to another user and protection if lost manuals Apple user Watch.
Disable localization services - completely or individually
Then you already see location services. The prompt on it takes you to the location menu. There you can click the slider. If the dot is on the left and the slider is gray, your location services are disabled. But you don't have to completely avoid location-based services. In addition, you can also deny access individual applications to your location. There you will leave top control, but active. At the bottom, you'll find a list of apps that access your location, and you can revoke your permissions individually.
Note. Apple Watch and AirPods remain in the Find My iPhone app until you remove all paired devices.
Removing a device from iOS or Mac
On an iOS device: go to Settings > [ your name] > iCloud (or Settings > iCloud), then turn off Find [ device]».
On a Mac: open apple menu > « System Settings", click iCloud, then uncheck Find My Mac.
The same applies to "Send last location" Your device's last known location is backed up before the battery runs out. If you don't want to use these features, you can also disable them. After entering the text, you will again find two sliders with which you can turn off the location. And not just once, but constantly. This way, all your friends with location access can see where you are at any time. If you don't want this, you can also turn off this tracking feature.
Note. You can also remove a device by completely disabling iCloud on it. Disabling iCloud on a device will disable all iCloud features for that device.
Removing an Apple Watch or AirPods
To remove your Apple Watch or AirPods, make sure they are offline, then remove them from Find My iPhone on iCloud.com.
Additionally, you select “data security” and then “location services” in settings again. In the middle you will find the “Swap Places” option. Here you can view all active promotions and delete them individually. You can also disable the space there completely. If you don't want this, you can also disable it.
At the bottom, click "System Services" and at the bottom, "Regular Places." You can also turn it off using the slider. There are more than 10 services activated by default, but not all that you will certainly use regularly. Many of the settings are mostly self-explanatory, but we briefly describe each sub-item of what happens in the background. First, you need to select “privacy” in the settings.
Note. You can also remove your Apple Watch by following the steps in Remove an iOS device, Apple Watch, or Mac computer that no longer belong to you. Later you can restore Apple data Watch from an iCloud or iTunes backup.
When your Apple Watch or AirPods come back online to Device view, they'll appear in Find My iPhone. If the device appears again, in the Bluetooth settings, How to break the pairing between it and all your devices.
Click "Location Services" to continue. The “System Services” item appears at the bottom. Here, redundant system services can be deactivated at will. If you look at the list, you can probably identify some system services that can be easily disabled without major restrictions. This not only saves battery capacity, but also ensures that too much data is not collected from you. However, with what system services you can get by safely, but ultimately everyone has to decide for themselves.
Removing an iOS device, Apple Watch, or Mac that you no longer own
If you traded in or sold your iOS device, Apple Watch, or Mac and you no longer own it, you'll need to: remote erase data from the device before it can be deleted. To remove an Apple Watch, it must be running watchOS 3 or later.
This is nothing more than photographs that are added, both front and back, second and a half video. This video is stored in cache by the device until we decide to take a photo, at which time it performs an assembly of the moment before the photo, the photo itself, and the later moment.
When you open the camera app, you may see an icon with three concentric circles in the top center. This icon is used to activate or deactivate the Live Photos option. If, as in the picture, the icon yellow, this means Live Photos are activated, if the opposite is white or light gray, Live Photos are disabled.
Click the All Devices button, then select the device you want to erase. Performing an erase:
On an iOS device or Apple watch Watch: Enter the password for your Apple ID or a family member's Apple ID. If you are using an unverified browser, answer the security questions or enter the verification code sent to other devices. If you are using own computer and want to skip the verification step in the future, click "Trust". If you're using a friend's computer, click Don't Trust. If the device you want to erase has iOS 8 or later, enter your phone number and message.
To activate or deactivate Live Photos, simply click on this icon. We're going to show you a series of steps to achieve it. Step On the Settings screen, scroll down until you find the Photos & Camera option. Click on it.
On the new screen that appears, go back down to scroll down until you find the Camera section, inside of which is the Save Settings option. Otherwise, every time you open the camera app, they will be activated. Activate this option to save your settings. This feature is used to locate your device if it is lost or stolen.
On a Mac: Enter the password for your Apple ID or a family member's Apple ID. If you are using an unverified browser, answer the security questions or enter the verification code sent to other devices. If you're using your own computer and want to skip the verification step in the future, click Trust. If you're using a friend's computer, click Don't Trust. Enter your password to lock your Mac (you'll need this password to unlock it), and then enter your message.
Activate data deletion with your smartphone
On the Home screen, tap Settings. After that, click on your name and profile photo. Find your device in the list. If you want more, you will have to pay. There are so many applications that can sometimes confuse us. If you lose your cell phone in the house, you can make an alarm sound, if they steal your cell phone, you can reset it remotely and see where this one is mobile phone. This is only recommended if you have little information, otherwise you will use up all your space.
If the device is not connected to a network, remote erasing will begin only after next connection devices to the network. You will receive an email when your device data is erased.
Once you receive confirmation that you have erased data from your device, click “Remove from” account».
All your content will be erased and another user will be able to activate the device.
However, it is still useful. The only problem is the size of this backup copy. Files of any format are allowed. There are also many free options. That is, if any device fails, you have all your information. From this date, information sharing will be mandatory for new users of the services and for those who have saved the option to share flagged data. Those who do not agree to the terms of use will not be able to use the app from next Sunday.
Step by step. The simplest thing is to log into the application, go to the settings or preferences tab, select the Account option, and then uncheck the “account information” item public access" Another method depends on the version of the application: if it is updated, the user will receive a warning on the smartphone screen in the new conditions of use as soon as new version will be installed on the device.
After release final version iOS 10.3, the notorious hacker Luca Todesco, who worked on hacking the operating system, - This is a hell of a security update, I'm quitting jailbreak.
Today iOS 10.3 is the most secure mobile platform. But together we will make it even more reliable - hackers and ill-wishers will never get to your data.
Disabling the option on the device itself
Impact. More than 100 million people use it in Brazil. As a difference, the application can help a chat robot that uses artificial intelligence to help its users choose, for example, a restaurant where they can meet.
The application is known a large number stickers. It is popular in Japan but has a Brazilian version. The connection is made via an Internet connection. Of South Korean origin, it is available in Brazil. In addition to the basic messaging and file sharing features, it creates links within the app. You can follow celebrities' posts on the app.
1. Be sure to use Find iPhone

How: Settings - Apple ID - iCloud - Find iPhone
Using the built-in iOS applications you can find or block your smartphone from a distance.
But it’s more important to erase data if you lose your device.
Even if it's in your hands, placed on a desk, or downloaded from a laptop, it may reveal some matches or personal photos, or even banking information and other identifiers. You don't have to follow all of our advice, so feel free to choose what you're willing to sacrifice for your safety - it's up to you. Use strong password instead of a 4-digit code.
It is best to use a combination of letters, numbers and symbols. It's even better if the password is required immediately after locking the screen without any delay. As an additional option, you can also activate the "wipe data" feature to have the device erase all your memory after 10 failed password attempts.
2. Use iOS platform restrictions

How: Settings - Basic - Limitations
Using them, you can disable the removal of applications or limit programs’ access to information.
Be sure to configure this section of iOS to avoid losing data.
3. Turn off location tracking

This is useful so that ill-wishers cannot find you and your device through your friends' trusted Apple IDs.
4. Remove unnecessary devices from your Apple ID

How do I turn off Find My iPhone on my iPhone, iPad, and iPod Touch?
Besides, being a little embarrassed isn't the most important price you'll have to pay to protect your data. 
Disable the autofill option in browsers. And you wouldn't want that to happen, right? Again, it's not very convenient, but it's worth it. Don't let apps access your contacts, photos, messages and other personal data.
This advice is pretty extreme, but if you've already followed all the advice we've given, follow this a lot. For example, if you install third party keyboard, you'll need to give it access to everything you type in order to use it. If you think this is risky enough, then you will have no choice but to go to Settings and block these apps from accessing your data. After this, you will of course not be able to use some applications, but that's how it is.
How: Settings - Apple ID
The list of devices in this section contains those that can receive verification codes for two-factor authentication to sign in to your Apple ID.
5. Set the time to delete messages

How: Settings - Messages - Leave messages
By standard, messages from the application of the same name are never deleted.
But this period can be limited to a month, so that old important data that you do not need cannot be used against it.
6. Enable two-factor authentication

How: Settings - Apple ID - Password & Security - Two-Factor Authentication
When a corresponding requirement appears, the geolocation of the attacker can be tracked.
7. Set up a complex activation password

How:
8. Activate data deletion with your smartphone

How: Settings - Touch ID & Passcode
The smartphone will erase all information if the unlock password is entered incorrectly several times.
Let's say that your iPhone mobile device has failed for some reason. You decide to hand over the phone to an employee who repairs such devices, but a problem arises because he simply does not want to accept such a communicator for repair. The motivation in most cases is that almost every gadget has special function"Find iPhone." If you decide to return the device to service center, then you should definitely deactivate it first. Today we decided to look at very interesting question- on how to disable the Find My iPhone feature.
Necessity
This feature is actually very useful in the case when you do not have access to your mobile device, this may be after loss or even theft. Using the function, you can block the device and send absolutely any text messages, enable sounds and erase any data. If your phone has been stolen, then you can put a “lock” on it, so that the attacker will no longer be able to activate it independently, even if the firmware is changed. Be sure to remember that you can only lock your phone if you know your Apple ID and password. If this is not the case, you may have problems activating the device in the future.
Turnover

On the one hand, we can say with confidence that the Find iPhone function is very useful and relevant. But if we consider the other side, then it is easy to understand that this is fraught for the user himself. After all, if the device failed or was blocked, then you should definitely know how to disable the “Find iPhone” function through a computer.
iTunes Features

If you have previously had to contact a service center to have your mobile phone repaired, iPhone devices, then you know that the employee always asks to disable the search function. This is required not only for personal safety, but also to ensure that after a system recovery of the device, it is automatic mode not blocked, and if this already happens, then the device cannot be restored. After you find out the answer to the question of how to disable the “Find iPhone” function and do it, remember that your gadget will no longer be found. Let's now look at what not to do until Find My iPhone is disabled. Firstly, you won't be able to restore your device in iTunes if necessary, and even if you try, the program will give you a warning anyway. Secondly, you will not be able to delete all settings and data from your mobile device (in fact, this action is also sometimes required). In any case, if necessary, you can always turn the function back.
So, let's start solving the question of how to disable the "Find iPhone" function through iTunes. Go to the program and find how to disable the required feature. You must remember that the function must be deactivated from another device or from one, but in any case there must be an active connection to the Internet. Let's now look at where to find the opportunity we are interested in and solve the question of how to disable the "Find iPhone" function. On your mobile device, you should visit Settings and go to iCloud. Next, there you can find the “Find iPhone” function, and you only need to disable the switch.
No password

Or your device. When you remove a device, it’s removed from your Find My iPhone Devices list, and if your device has iOS 7 or later, Activation Lock is also turned off.
Before giving away or selling your iOS device, be sure to erase your content and settings (in Settings > General > Reset > Erase All Content and Settings). When you erase your content, Find My iPhone and Activation Lock are also turned off. See the Apple Support article. For more information about what to do before selling or giving away Apple Watch, see in the Apple Watch User Guide.
Note: Apple Watch and AirPods remain in Find My iPhone until you also remove any devices that are paired with them.
Remove an iOS device or Mac
Remove Apple Watch or AirPods
To remove Apple Watch or AirPods, make sure that they’re offline , then remove them from Find My iPhone on iCloud.com.

When the device is erased, click Remove from Account.
All your content is erased, and someone else can now activate the device.
You can also use a different iOS device to remove your device. For more information, open Find My iPhone, tap Help, then go to “Remove your device.” Or you can remove your devices from your account. For more information, see


