Why is the google app stopped? Google Play services error: how to fix? What to do if an error occurs in the Google Play Services application
Most owners of Android devices use the services of the official Play Market store from the IT giant Google, which, in general, is not surprising. Here, every user can find any content to meet their needs, be it special programs, films, music or games. However, situations are not uncommon when Google Play Market does not work on Android.
Such service failures can occur for a variety of reasons. Now we will look at what may be causing the problem and suggest the most effective ways to eliminate it.
In fact, the reasons that provoke such an error can be very diverse, the most common are:
- There is no Internet connection, caused, for example, by a settings failure (smartphone, router, etc.).
- Technical problems on the part of the Play Market itself are quite rare, but not excluded.
- Problems with the file hosts, which is edited by the system automatically.
- There is a conflict between an installed application and Google Play.
- The date/time parameters are incorrect.
- Other.
First, what we have to do is simply restart our smartphone. The fact is that this banal procedure can be an effective solution not only with the problem described, but also in other cases of system freezing. If rebooting the device did not have any effect, move on.
Reset updates
Quite an effective procedure. Our actions - go to “Settings”:

Open " Applications"(maybe "Application Manager"), from the list that opens we find Google Play, press. In the window that opens, click on the position “ Uninstall updates"to return the Play Store to its original state:

We reboot the gadget and try to log in. What, there is no reason for joy yet? Then let's continue.
Reset settings and clear cache
Again, through the main settings, go to “ Applications", we find " Google Play", open. First, “tap” on “ Erase data", then " Clear cache»:

We restart and try to log into Google Play. If the question “why the play market doesn’t open” is still relevant, let’s continue “dancing with a tambourine.”
Correction of GP service data
As in the third step, from “Settings” we go to “ Applications", we find " Google Play Services", erase the data and clear the cache:

Clear Google Services Framework data and cache
Let's follow the beaten path " Settings» → « Applications" In the " All"find and open" Google Services Framework" Erase data and clear cache:

Checking the operation of Google accounts
It is quite possible that for some reason this function was disabled, which was the reason why the play market does not work on Android. It's easy to fix the situation. From the settings in " Applications"we need to open the tab " All", choose " Google Accounts"and, if this application is really disabled, then connect it, and at the same time (if necessary) clear the cache:

Debugging the Boot Manager
Disabling the boot manager can also be a likely problem, so to rule it out we go to “ Applications", swipe left to go to " All" and open " Download Manager" If necessary, activate it, and if the presence of a cache is detected, then clear it too:

Removing and restoring your Google account
Another effective method, to which detailed instructions “” were dedicated on our website. After the described exit procedure, .
Resolving application conflict
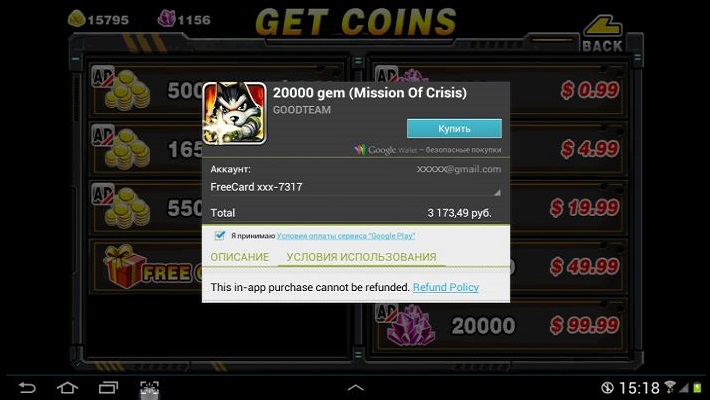
As mentioned above, there are applications that can block Google Play. One such program is Freedom. Advanced gamers probably understand what we're talking about. The fact is that Freedom allows you to bypass the Market license check in order to purchase for free all sorts of paid goodies in games (coins, crystals, extensions, etc.), for which the user can pay with a fake card:
Inept use of an application, or improper deletion of it, is one of the most common reasons for Google Play Market failure caused by changes in the “ hosts" To work with the application (installation and uninstallation). More information on how to correct the situation can be seen in a special video:
Cleaning the "hosts" file
It is worth dwelling on this point in more detail. The fact is that you probably don’t have the Freedom application installed (see above), but there may well be a problem with the file, and here’s why. The hosts file of the Android system (as well as Windows) stores a database of sites, as well as their IP addresses. And every time you open a particular site, the system will access the “hosts” file, and only after that the DNS server. That is, in fact, being in principle a primitive filter (firewall), hosts can, for security purposes, block access to almost any site, including Google Play.
That's when the need to edit it arises. For this we will need a file manager, for example, and (since we will be dealing with a system file).
Launch ROOT Explorer, find the folder system:

It contains a folder etc, go into it and set the rights R/W(Read/Write) by clicking on the corresponding button in the upper right corner:

Upon request of the Superuser rights system, we provide:

Now let's open hosts and start editing it. By default, it should contain only one line - 127.0.0.1 localhost. If you see two or more lines, this means that other programs have made their changes, so we delete everything unnecessary without pity:

Correcting date and time settings
If there was a failure in this position (which could also block access to the play market), then:
- Open " Settings»
- In the section " System"find the item " Date and time", open.
- Enter the correct data and save the changes.
Reset Android settings (or Hard Reset)
This is the last, so to speak, control shot from our arsenal, if you are convinced that there are no problems with the Internet connection, and all the described methods did not bring the expected result (which I very much doubt). What should we do:
- Go to " Settings" and open " Recovery and reset", without forgetting to make a backup copy.
- Select the item " Reset settings».
- “Tap” on the field “ Reset your phone».
- Finally, click “ Erase everything».
This procedure will delete all data on the device's internal storage, leaving the information on the memory card intact.
Perhaps this is all we wanted to talk about on the topic. Maybe you had a successful experience in solving a problem that was not described in the article, we will be grateful if you share it with our readers. Good luck!
This problem occurs quite often, and if it bypasses you, then you are very lucky. I have repeatedly encountered various errors and a completely non-functional Google Play Market on Android, so I am sharing my personal experience on how to return the most popular service from the Good Corporation to working condition.
So, there are various types of failures in the Google Play Store: technical problems on the service side, constant errors, application crashes and complete inoperability. In this instruction I will give some useful tips on how to fix it all.
1. Reboot Android
The first step is to restart your device. This usually solves most problems with Google Play. If it doesn't help, move on.
2. Reset Google Play Market settings
To do this:
1. Go to settings.
2. Open Applications or Application Manager.
3. Find Google Play Store in the list and click on it.
4. In the application settings window, select “Erase data” and “Clear cache”.

I think this should help even more users, but if not, move on.
3. Uninstall Google Play Market updates
We proceed in the same way as in step 2, but now instead of “Erase data” and “Clear cache”, click “Delete updates”.

This will return the Play Market to its original state at the time of installation.
4. Reset Google Play Services app settings
Go to settings again, open “Applications” and find “Google Play Services” in the list. Open it and clear cache and data as well.

5. Clear Google Services Framework cache and data
Go to Settings → Applications → All tab. Select "Google Services Framework". Click "Erase data" and "Clear cache".

6. Google Accounts app is disabled
Go to Settings → Applications → All tab. Select Google Accounts. If this application is disabled, please enable it.

7. Enable "Download Manager"
In the applications section, swipe left to go to the “All” tab and open “Download Manager”. If you have it disabled, click "Enable".

If it is already activated, and the previous tips did not help and Google Play does not work, proceed further.
8. Delete your Google account and restore it
You can find out more about this in the instructions: . There, in step 6, select “Delete account.”

9. Applications blocking the Google Play Market
Some programs may block the Play Store. For example, the well-known Freedom application, which allows you to make in-app purchases for free, can interfere with the normal operation of the Google app store.
10. Set up the “hosts” file
If you have the application installed, then this item is just for you.
This method requires root rights. You can get them using the following instructions:
First, disable the Freedom application (in the program menu, select “Stop”), and only then delete it.
After that, install the application or . Then find along the way /system/etc/“hosts” file, open it with a text editor and leave only this line (if not, write it):
127.0.0.1 localhost

Save your changes. After this, restart your Android gadget.
11. Hard Reset Android
This is the most radical method that will delete all data from the internal drive. The data on the memory card will remain intact. Full instructions are on our website: (follow the link, you need the second method from the article).

This advice will definitely help, so don’t be afraid - it can also be used. The main thing is to create a backup copy of the system before this. How to do this, read in paragraph 6 of these instructions.
After this, at the first start, you will be able to restore all data from the previously created backup (backup).
12. Check your Internet connection
Check your network connection. If no website opens in the browser, reboot the router and correctly.
13. Set the correct time (error “No connection”)
If the error “No connection” occurs, although the Internet is working, then this point in our instructions should help you.
Set the correct time and enter the correct time zone. It's best to keep these settings in sync with your network. To do this, go to “Settings” → “Date and Time” and check the box next to “Network Date and Time” and “Network Time Zone”.
14. Google IP Blocking
UPD 04/23/2018 After the ban on Telegram in Russia, Roskomnadzor blocked more than 18 million Google IP addresses, which is why many users had problems connecting to the company’s services, including the Play Market.
To restore access to the app store on Android, use . Since Google Play does not open, you will have to download a VPN client (for example,
The Android operating system has been successfully developing and improving for almost ten years. However, problems still appear from time to time, even taking into account the fact that hundreds, or even thousands of people are working to get rid of them. As you understand, today we will tell you what to do with the message “An error occurred in the Google Play Services application.” To be honest, there are plenty of options for solving the problem, but in this article we will analyze only the main ones that we encounter most often.
What to do if the Google Play Services app crashes
I would like to immediately note that with this error, not only this application can crash, but also any other one, if it is in any way connected with Google Play Services. In general, such problems are divided into two types:
If the error is indicated, this makes our task easier - identifying it is much easier. Consequently, elimination will take less time. But first, we want to tell you how to deal with the problem if there is no error code. So let's get started:
Next, you should check whether this error appears again or whether you managed to get rid of it. If all else fails, move on to plan B:  This time the problem should be solved. Most likely, when you log into Google Play, the above-mentioned application will ask for permission to update - this is normal, because we have just deleted these same updates. For correct operation in the future, we recommend that you update it.
Error 403: how to fix it
You are lucky if you have this particular type of error. The fact is that it can be solved as simply as possible. This occurs when purchasing applications from users who use two or more Google accounts.
The solution is simple: tap the “Buy” button again and the error will disappear. You may have to repeat the procedure a couple of times.

As you can see, there is nothing complicated. It will be a little more difficult for those who experience 901 errors.
Getting rid of error number 901
It is most often encountered when working in a browser or while downloading applications from the official store - Google Play. The problem is that the Wi-Fi network authentication ends abruptly. There are several ways to solve this:- Clear the cache of the Google Play Services application. You already know how to do this from the very first instructions described in this article.
- Reconnect to this or another Wi-Fi network.
- Use to open a page in a browser or download a mobile data application.
If you receive the message “An error has occurred in the Google Play Services application” with a number not described in our article, then it can be solved in the same way - by clearing the cache, deleting updates, or reconnecting to the Wi-Fi network, as described above.
In cases where the Google Play Market begins to act up, does not want to download applications, errors during updating, or simply does not open, in most cases it can be brought to reason and made to work as it should. Despite the fact that these instructions are written for devices: Samsung Galaxy Note 2, Samsung Galaxy S3 and Samsung Galaxy S4, it can be used for any Android phones or tablets that have the Play Store, not necessarily Samsung, just some item names may be called a little different, but I think in general you can figure it out and find a similarity.
One of these points should help, you don't always need to do all the points!
1. Reboot your phone (tablet).
Those. turn it off and then turn it on again, I think it’s not difficult to understand how to do this.
2. Check for device updates
Settings - About the device - Software update - Update

3. Check your phone (tablet) for viruses
Both using an antivirus on your phone, for example, or any other one of your choice, or by connecting it to a computer and checking the antivirus through the PC
4. Check in your Google account settings to see if Two-Step Verification is required:
- Safety - Two-Step Verification- must be off status

5. Update the Play Store application itself by installing the new version from the file -
Don’t worry if the version of the installed file is less than the version of the Market that you had before; after a while the Market will update itself to the latest version again.
Before doing this, do not forget to check whether the installation of third-party programs on the device is allowed: Settings - Safety - Unknown sources- there must be a check mark

6. Go to Settings - Application Manager
In the tab LOADED we find Google Play Market and click on it

Click Clear cache
Click Clear data
Return to the Application Manager, scroll right to the tab ALL
Looking for a process com.google.process.gapps(it may not exist), if it is not there, then everything is fine, try the Market, if there is one, go to it and force stop it
7. Go to Settings - Application Manager- scroll right to the tab ALL- looking for an application Downloads

We go into it and click Clear data
Clear cache
Force stop (if the application is stopped - Enable it and then there is no need to disable it)
If the power button appears after stopping, be sure to turn it on
8. Go to Settings - Application Manager- scroll right to the tab ALL- looking for an application Google Accounts

Clear data
Clear cache
9. Go to Settings - Application Manager- scroll right to the tab ALL- looking for Google Play Market
Galaxy S3, S4, S5 and S6 many users began to encounter the message “Contacts app has stopped”. This error appears when adding a new contact to the phone book and does not appear at all in other situations. Consequently, some users may not notice the problem immediately. What to do if you still encounter a similar problem, we will tell you in this material.
Where does the error come from?
The exact reason for this error is not known, but many users noticed that it began to appear immediately after installing a new version of Android software. Since rolling back a version to the previous one is a troublesome task and not everyone will decide to do it, we tried to find another effective solution. Below are two ways to resolve the “Contacts app has stopped” error, try them one by one to find out which one will be useful in your case.
How to fix the error?
The first and simplest thing we recommend doing is clearing the Contacts application cache and deleting temporary data. This is necessary in order to return contacts to their original state and eliminate a variety of errors that may arise due to the accumulation of a large volume of temporary files and data. Please note that the phone book entries themselves will not be affected!
- Open Settings and select the Applications category.
- Find the Contacts app and open its properties page.
- Click the Clear cache and Erase data buttons one by one.
- Restart your device and try saving the new contact again.
If the error is displayed again while saving the information, proceed to the next step.
Since contacts are saved in the device's memory as separate files, errors may occur during the process of saving files in the smartphone's memory. Some errors may be due to an incorrectly set date in the smartphone settings or a date format conflict.
- Open your smartphone's Settings and select More.
- Find Date and Time.
- Depending on the default format, change it to an alternative - 12 hours or 24 hours.
- Restart your device and try saving the new contact again. As a rule, after these procedures, the Contacts application error will no longer bother you.
Probably the most common mistake among Android users is a crash in Google applications. Today we will tell you about one of them: “The Play Market application has stopped.” This notification constantly pops up when you try to download or update any application. You will learn what to do first when faced with this error and what options will be useful to you.
What is this error?
Failures in the App Store can occur for a variety of reasons: an outdated version of the software on the phone, a full data cache, synchronization errors with the connected account on the phone. In rare cases, third-party programs and even viruses are to blame, which can block some system options.
Error in Android - Play Market application has stopped
How to fix an error in Samsung devices
This problem is very common on smartphones and tablets from Samsung (Galaxy Tab, Grand Prime, etc.), which have their own proprietary version of Android OS. Next, we will describe a list of priority instructions, which, by the way, are suitable for other Android devices. I won’t write about the standard ones - restart the device, wait a little, write to support, etc.
Checking for updates
System updates are definitely an important part of the stability of your Android. They contain fixes and improvements to many functions. Be sure to check that they are up to date on your device.
Reset all Google services
The second step is to reset and erase all temporary data in "Play" And "Play Market". This is done as standard:

Don't forget to perform a thorough cleaning of your device. For example, Samsung has a system cleaner called Smart Manager. With its help, you can optimize battery consumption, free up memory, RAM, and check security settings. It is also possible to use third-party utilities, such as Master Cleaner.
Account synchronization
After all the cleaning, you need to check whether there is a failure in the synchronization of your Google account and reconnect the account itself. Follow the path "Settings" - "Accounts" - "Google". Click on the active account, after which you will be taken to the synchronization menu. At the top there will be three dots (menu), there is an item Delete account. records. Erase all data, and after rebooting, activate the account on your smartphone again. This reconnection will help ensure full synchronization with cloud data. Try using the store.

Use analogues
If nothing works for you and the “Play Store application has stopped” error remains, the last option is “Reset settings”, which will erase everything from the device. The extreme case would be new firmware. If you don’t have time to do this at the moment, then you can safely use similar stores.
Contents of the article
Samsung, a seemingly serious giant that has recently specialized in smartphones, offers its customers the ideal devices! Oh no! If you are reading this article, it means that not everything is in order. Quite often, users of this brand encounter a problem when the interface begins to jitter a little, resulting in an error of the following format: “The TouchWiz Screen application has stopped.” What to do in this case? Flash your phone? Should I take it to the workshop? Should I hand over the warranty if it is still valid?
The problem can be solved independently, and it is not a fact that it appeared due to improper use of the user himself. Most likely, this is a bug of the shell itself installed in your Samsung. In this article we will tell you about several ways to solve this problem.
Reset the error by simply turning off the phone
We will proceed from simpler to more complex methods, so we recommend that you perform them in the same order. If you have an error for the first time, then there is a chance to clear it by removing the battery.
Here's what we do:
- Without turning off the device, remove the battery from it;
- Next, press the power button for about 30 seconds;
- Put the battery back, close the lid, and try to turn on the smartphone.
Why is this being done, you ask? Using this method, we completely deplete the capacitors until they are completely discharged. After this, the phone's memory reboots without any problems or interference.
After this procedure, we need to turn on our Samsung in safe mode (this procedure is temporary). Don't know how to do this?
For Samsung devices, the operation is as follows:
- Press the Power button so that our device starts to turn on.
- Next, press and hold the Menu key while waiting for the device to boot into safe mode.
Didn't work? Then let's try another method.
- We press three keys at the same time - Home, Power and Menu, wait until our device turns on in the appropriate mode. Please note that in this case the operating system will not load third-party programs. You can easily remove unnecessary and problematic applications.
If after the described steps the problem still remains and a notification appears with the text “TouchWiz Screen application has stopped,” proceed to the next step.
Enable disabled applications
Perhaps your smartphone has disabled standard programs and systems that are necessary for the device to function correctly. To do this, we perform the following operations:
- Go to "Settings" of your Samsung and go to the tab "Application Manager";
- At the top of the screen, click on the “Disabled” item so that the system displays a list of disabled programs;
- Now we restore each one in turn and check whether the error still appears or not.
We recommend restoring everyone's functionality at once to save yourself time. In most cases, the problem goes away after following these steps. If you still haven’t succeeded, move on to the next point.
Clear cache and data
- Go to the “Settings” of your device, select the tab "Application Manager";
- Select the “All” option there, find the “Contacts” item;
- Go to this tab, clear the cache;
- Next, return to the previous menu, select your phone settings there;
- Press the button "Clear cache and data".
Please note that clicking this tab will delete all settings you have previously created.
Clearing the Touchwiz cache
As a rule, any widget located on your screen can be the cause. Try removing them all first and rebooting your smartphone. If it doesn’t help, then click “Settings” and go to application settings. In the general list, find “Information” and click on “Touchwiz Screen”. All that remains is to clear the cache and restart your phone again.
If this method does not help, then you will have to do a full reset to factory settings so that all user data is completely deleted from the phone. We also recommend checking your OS version for new versions.
Samsung has known about this problem for a long time, and for most versions and shells they have already released fixes that completely solve the problem. Just be sure to create copies, because all information from the phone will be deleted, that is, you will completely lose all contacts stored on the phone. In some cases, a full phone firmware may be required, for example, if your version of Android is no longer supported by the developer.
If you get this error, and at the same time you cannot go to another menu item or the “Back” button does not work, and the phone seems to be frozen, you can use the quick menu by swiping down and selecting “Settings” from the list. Users very often forget about this, although in many cases this method saves the day.
Speaking generally about the situation of users, most often the problem arises due to applications stopping, as a result of which a notification appears. Moreover, sometimes it is not the user himself who is to blame, because... he might not have disabled them, but additional programs that were installed from third-party services or various utilities to speed up the system, cleaning programs, for example, the same Clean Master.


