What you need to be able to do in a single page application. Single Page Application
- Tutorial
Single Page Applications (SPAs) have many advantages, such as speed, really good UX, and full control of the HTML markup. There are more and more SPA sites; There are more and more tools that simplify the SPA development process. You've probably already read about the young and promising framework Vue.js. I suggest you dive deeper into Vue and use a specific example to understand a simple SPA.
We will write a client-server application for a simple blog. The application will display a list of entries as well as the full text of each individual entry. And of course, all this will happen without reloading the page.
After reading this example application, you will learn how to extract data in Vue, create routes, and understand an interesting feature of Vue - single-file components.
Backend In this tutorial, we will mainly focus on the frontend in Vue. We won’t think about writing a REST backend. For example, we will use the service jsonplaceholder.typicode.com providing a stub in the form of a REST API. FrontendTools Getting started with Vue is very easy. With the right tools it's even easier. I recommend taking a look at the vue-awesome project, which contains a list of tools, components, libraries and plugins for all occasions. Vue-cli When creating a new project, it is recommended to use Vue-cli. This way you can create projects using the official Vue template projects, or one of the many open source template projects, and of course you can create your own and use it anywhere.So, first, let's install vue-cli as a global package:
$ npm install -g vue-cli
Then we initialize the project with the selected template; For our example, using webpack-simple is more than enough.
$ vue init webpack-simple vue-spa
Next, go to the vue-spa folder and run npm install in the terminal. After installing all the packages, we can run our application in development mode.
$ npm run dev
This command will automatically run our project on the local webpack dev server. Our simplest Vue application will appear in the browser. Of course, it doesn’t look at all like we would like, and is only suitable as a starting point for starting something bigger. To continue working, I suggest you first familiarize yourself with the structure of our template.
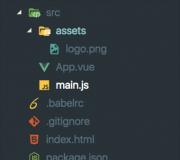
Internally, the webpack-simple template has the following structure:

File index.html contains simple HTML markup with a single “app” element in the body. It will be replaced with the DOM generated by vue. For this reason the tag body It is not recommended to use as a root element.
In folder src lies the main.js file, which contains the webpack entry point. Vue components are imported there. It also describes the root instance of Vue, which so far has two properties. The 'el' property provides a Vue instance with an association with the specified DOM element. Another one is a rendering function that generates the DOM from App.vue. All in all, that's all we need to know about webpack-simple template structure, not much, right? The main part of our application will be programmed in App.vue. The .vue extension identifies the file as a single-file vue component. This is one of the features of Vue that we will now take a closer look at.

Each *.vue file consists of three types of blocks: , and optionally . As a result, we can divide the project into related components. Within a component, its template, logic, and styles are intrinsically linked, and combining them actually makes the component more cohesive and easier to maintain. Now we are ready to start creating a blog in Vue.
Let's see what we are actually going to implement. We will have a header with our blog name at the top of the page. On the left side we will have a fixed sidebar in which we will display the titles of our posts, it will be something like a table of contents. The rest of the page will be occupied by a dynamic block in which the post text itself will be displayed.

Vue.js SPA
Secondly, we will create a Vue instance with a data property, which we will place in an array with our messages. At the moment it is empty, but soon we will place the data received from the server inside the array.
After the first call, you will no longer be able to add reactive properties to the root data object. Therefore, before creating a Vue instance, it is recommended to declare all reactive properties at the root level.
export default(data()(return(posts:)))
You can also add some styling to make the app look better.
The application code is hosted on github.com. It is enough to clone the repository and switch the branch by step number to trace the development of the application step by step, for example:
$ git checkout step-1
We currently have absolutely nothing to display in our navigation bar, so let's get the data from the server. For this I chose Axios, an easy-to-use HTTP client. You can also use any method you like, such as a Vue resource or a custom fetch or even jQuery Ajax.
$ npm install --save-dev axios
Then we import it into the App component and define the getAllPosts() method which will make a request to the server and assign it to the posts property. We call the method in the created() hook, which will be called after creating a Vue instance and after setting the data access settings.
Import axios from "axios" export default ( data () ( return ( posts: null, endpoint: "https://jsonplaceholder.typicode.com/posts/", ) ), created() ( this.getAllPosts(); ) , methods: ( getAllPosts() ( axios.get(this.endpoint) .then(response => ( this.posts = response.data; )) .catch(error => ( console.log("----- error-------"); console.log(error); )) ) ) )
Now let's display all the post titles in the sidebar.
((post.title))
So far we have only displayed post titles, but we can't yet see the posts themselves. Now you need to display the full post in the content section according to the selected title in the sidebar. At the same time, I would like each record to be available at its own unique address.
Let's install the library:
$ npm install --save-dev vue-router
To configure routing, let's return to the main.js file. Here we will define the routing settings and add them to our Vue instance.
Import Vue from "vue" import Router from "vue-router" import App from "./App.vue" import Post from "./components/Post.vue" import Hello from "./components/Hello.vue" Vue. use(Router) const router = new Router(( routes: [ ( path: "/", name: "home", component: Hello, ), ( path: "/post/:id", name: "post", component: Post, props: true, ] )) new Vue(( el: "#app", render: h => h(App), router ))
In the routing settings, we specified which component causes rendering along the corresponding path. Since only the Post.vue component will be responsible for rendering each post, we won't need to define the path to each post, just define a dynamic path.
Path: "/post/:id"
This path contains a dynamic segment:id which points to a specific post. Moreover, we have access to this segment in the Post component via this.$route.params.id. However, using $route in our component will hardwire it to the route, which in turn limits the component's flexibility since it can only be used on certain URLs. Instead we can use the option props and install it in true. After this, $route.params will become associated with the props option of the Post component.
Now that we've created the router, we can go back to our application and add a few more lines to the template.
((post.id)). ((post.title))
Here we have two components vue-router: And . The first is a component for enabling user navigation in a routing-enabled application. The second component is a functional component that renders a consistent component for a given path.
The final step remains. We need to display the contents of the post entry.
Step 4 Let's move on to the Post.vue file, in which we will add a simple template:((post.title))
((post.body))
((post.id))
Next we need to set the Vue instance parameters for this component. Everything here is the same as in the settings for displaying all posts. Let's declare an option props with changing id, which will receive our post number. Next, let's declare a data object, as we already did in App.vue:
Import axios from "axios"; export default ( props: ["id"], data() ( return ( post: null, endpoint: "https://jsonplaceholder.typicode.com/posts/", ) ) )
Then we will describe the method getPost(), which will receive only one post entry by id and call it in the hook created().
Methods: ( getPost(id) ( axios(this.endpoint + id) .then(response => ( this.post = response.data )) .catch(error => ( console.log(error) )) ) ), created() ( this.getPost(this.id); ),
Almost done. If we run the application now, we can see that although the URL changes, we see the single post that was rendered first. The point is that we have the same component to render different posts, and Vue does not need to recreate it due to unnecessary waste of resources, which also means that the component's lifecycle hooks will not be called.
To fix this we just need to set a watcher on the object $route.
Watch: ( "$route"() ( this.getPost(this.id); ) )
Now everything works as it should. To get the production version, just run the command npm run build in the console.
Single Page Applications
This and subsequent articles will describe the Web API tool, which is a relatively new addition to the ASP.NET platform that allows you to quickly and easily create web services that expose an API to HTTP clients.
The Web API tool is based on the same foundation as ASP.NET MVC Framework applications, but is not part of the ASP.NET MVC Framework. Instead, Microsoft took a set of key classes and associated characteristics from the System.Web.Mvc namespace and duplicated it in the namespace System.Web.Http.
The idea is that the Web API is part of the main ASP.NET framework and can be used in other types of web applications or as a standalone web services engine. One of the main uses of the Web API tool is to create single-page applications (SPA) by combining the Web API with the capabilities of the ASP.NET MVC Framework. Next we will show you what SPA applications are and how they work.
Simplifying the creation of web services is an integral feature of the Web API. It represents a significant improvement over other web service technologies that Microsoft has offered over the past decade. I love the Web API tool and you should use it in your projects, not least because it's simple and builds on the same design philosophy as the ASP.NET MVC Framework.
The term single page application (SPA) is used quite widely. The most consistent definition is that it is a web application whose initial content is delivered as a combination of HTML markup and JavaScript code, and subsequent operations are performed using a REST web service that delivers data in JSON format in response to Ajax requests.
This is different from the kind of applications that were built in the previous examples, where the results of user operations were new HTML documents generated in response to synchronous HTTP requests. Such applications will be called round-trip applications (RTA).
The benefits of the SPA application are that it requires less bandwidth and the user gets a smoother interface. Disadvantages include that this sleeker interface can be difficult to achieve, and the complexity of the JavaScript code required for an SPA application means careful design and testing is required.
Most applications mix SPA and RTA techniques, with each major area of application functionality delivered as an SPA, and navigation between areas of functionality managed using standard HTTP requests that create a new HTML document.
Single Page Application ExampleFor the purposes of these articles, a new MVC project named WebServices is created in Visual Studio using the Empty template. In the Add folders and core references for section, the MVC and Web API checkboxes have been checked as shown in the image below:
This project will be used to create a regular ASP.NET MVC Framework application and then create a web service using the Web API. Once the web service is ready, the ASP.NET MVC Framework application will be turned into a single page application.
Creating a ModelThe application will create and maintain a set of requests for room reservations. The application is planned to be kept simple so that you can focus on the mechanics of the facility being described, so booking requests will consist of only the customer's name and location of the premises. A class file named Reservation.cs has been added to the Models folder, the contents of which are shown in the example below:
Namespace WebServices.Models ( public class Reservation ( public int ReservationId ( get; set; ) public string ClientName ( get; set; ) public string Location ( get; set; ) ) )
The plan is to create a simple in-memory collection of Reservation objects that will act as a data store. There is no need to install a database, but you do need to be able to perform CRUD operations on a collection of model objects to demonstrate some important aspects of the Web API. A class file called ReservationRepository.cs is also added to the Models folder:
Using System.Collections.Generic; using System.Linq; namespace WebServices.Models ( public class ReservationRepository ( private static ReservationRepository repo = new ReservationRepository(); public static ReservationRepository Current ( get ( return repo; ) ) private List data = new List ( new Reservation ( ReservationId = 1, ClientName = "Peter" , Location = "Hotel"), new Reservation (ReservationId = 2, ClientName = "Vasya", Location = "Library"), new Reservation (ReservationId = 3, ClientName = "Igor", Location = "Dining Room"), ); public IEnumerable GetAll() ( return data; ) public Reservation Get(int id) ( return data.Where(r => r.ReservationId == id).FirstOrDefault(); ) public Reservation Add(Reservation item) ( item.ReservationId = data.Count + 1; data.Add(item); return item; ) public void Remove(int id) ( Reservation item = Get(id); if (item != null) ( data.Remove(item); ) ) public bool Update(Reservation item) ( Reservation storedItem = Get(item.ReservationId); if (storedItem != null) ( storedItem.ClientName = item.ClientName; storedItem.Location = item.Location; return true; ) else ( return false; ) ) ) )
In a real project, we would have to take care of breaking the tight coupling between classes and introducing interfaces into the application, as well as providing dependency injection. However, this topic only focuses on Web APIs and SPA applications, so when it comes to standard practices, some simplifications will be made.
The storage class has an initial list of three Reservation objects and defines methods that let you view, add, delete, and update the collection. Because there is no persistence in the store, any changes made to the store are lost when the application is stopped and restarted, but this example is entirely focused on the way the content can be delivered rather than how it is stored on the server. To provide a certain amount of persistence between requests, an instance of the ReservationRepository class is created, which is accessible through the static property Current.
Installing NuGet packagesThis and subsequent articles will use three NuGet packages: jQuery, Bootstrap, and Knockout. The jQuery and Bootstrap libraries have already been described and used before. Knockout is a library that Microsoft has adapted for single page applications. It was created by Steve Sanderson. Although Steve works for Microsoft, the Knockout package is available as open source on the Knockout library website and has been widely adopted. We'll show you how Knockout works later, but for now you'll need to install the packages mentioned above.
Select Tools --> Library Package Manager --> Package Manager Console to open the NuGet command line window and enter the following commands:
Install-Package jquery -version 1.10.2 -projectname WebServices Install-Package bootstrap -version 3.0.0 -projectname WebServices Install-Package knockoutjs -version 3.0.0 -projectname WebServices
Adding a ControllerA controller named Home is added to the example project, the definition of which can be seen in the example:
Using WebServices.Models; using System.Web.Mvc; namespace WebServices.Controllers ( public class HomeController: Controller ( ReservationRepository repository = ReservationRepository.Current; public ViewResult Index() ( return View(repository.GetAll()); ) public ActionResult Add(Reservation item) ( if (ModelState.IsValid) ( repository.Add(item); return RedirectToAction("Index"); else return View("Index"); public ActionResult Update(Reservation item) ( if (ModelState.IsValid && repository.Update(item)) return RedirectToAction( "Index"); else return View("Index");
This is a completely typical controller for such a simple application. Each action method corresponds directly to one of the methods in the store. The controller's only usefulness comes from performing model validation, selecting views, and performing redirection. Of course, in a real project there would be additional domain logic, but since the example application is so basic, the controller ends up being little more than a simple wrapper around the store.
Adding Layout and ViewsTo generate content for the application, a Views/Shared folder is created and a view file named _Layout.cshtml is added to it with the content shown in the example below:
@ViewBag.Title @RenderSection("Scripts") @RenderSection("Body")
This basic layout provides elements for the Bootstrap library CSS files. The layout defines two sections, Scripts and Body, which will be used to insert content within the layout. The next step is to create a top-level view for the application. Although the next step will be to build a regular ASP.NET MVC Framework application, you know that you will eventually build a single page application.
It will be easier to do the transformation if you create a single view that contains all the HTML markup required for the application, even if the result initially looks a little strange. A view file named Index.cshtml is added to the Views/Home folder, the contents of which are shown in the example below:
@using WebServices.Models @model IEnumerable @( ViewBag.Title = "Reservations"; } @section Scripts { } @section Body { @Html.Partial("Summary", Model) @Html.Partial("Editor", new Reservation()) }!}
The view model for this view is an enumeration of Reservation objects, and two partial views are created to provide the building blocks of functionality that the user will see. The file with the first partial view is called Summary.cshtml. This file is created in the Views/Home folder:
@model IEnumerable All orders
| @item.ReservationId | @item.ClientName | @item.Location | @Html.ActionLink("Delete", "Remove", new ( id = item.ReservationId), new ( @class = "btn btn-xs btn-primary" )) |
The view model for the partial view is the same enumeration of Reservation objects and it is used to generate a styled table using Bootstrap as an element