How to send an image by email. How to send photos by email, letters and documents
This article will tell you how to send a photo via email to Gmail, Yandex, Mail.ru, which is stored on your computer or in the service’s file storage. You will also learn from it how to upload and prepare pictures and photographs for sending.
Preparing screenshots and photos
Downloading images from the Internet
Suppose you really liked a picture on some site, and you want to send it by mail to a friend.
In this case, the first thing you need to do is “drag” this very picture to the disk of your computer. This simple procedure is performed like this:
Advice! Before uploading, create a new folder for images and give it a “explanatory” name. For example, “foto_for_email” (photo for mail) or something in this style. This way you will definitely not mix up the directories and send something else to the recipient.
1. Expand the image in full scale (as a rule, this function is activated by clicking the left mouse button or a special option directly on the site).
2. Hover over the image. Click the right mouse button.
4. In the system window that appears, click the folder created for pictures.

5. In the “File name” line, enter your name for the picture.
6. Click the “Open” button.
7. Wait for the download to complete.
If you need to download several images, follow these instructions again. But do not forget to specify the same folder during downloading. Otherwise, you will have to look for images in other directories later.
Screenshots
Or screenshots are an irreplaceable thing in cases where you need to demonstrate to technical support of a service or a friend a problem that has occurred in a system or program. Or, on the contrary, provide instructions for action. After all, it’s better to “reinforce” the information you’ve read with a visual picture, you’ll agree.
A screenshot is taken and saved on a PC using special utilities - Clip2Net, FastStone Capture, IrfanView, etc. Many of them are distributed free of charge. Installing and running them on the system is not particularly difficult.

The algorithm for using them is as follows:
- Launch the utility.
- Activate the "Capture Image Region" function (in FastStone Capture it is called Capture Rectangle Region).
- Select the desired area of the display and take a photo.
- Save the screen, select the format (depending on how you want to send the file - JPEG, PNG).
Archiving images
Many users ask the question: “How many photos can you send in a letter by e-mail?” On mail services, restrictions on the size of attached files (in particular, images) are different - no more than 10, 20, 30 MB, etc.
But no matter what the requirements are for e-mail, if you decide to send a lot of pictures, it makes sense to reduce their volume by archiving. This procedure will not only allow you to bypass capacity restrictions, but will also reduce the time it takes to upload files to the mail server.
Attention! Before following the instructions below, make sure that an archiver program is installed on your PC - WinRAR, ZIP, 7-Zip or others. You can view the list of installed programs in the system: Start → Control Panel → Programs → Programs Components.
To archive pictures, do the following:
Note. Archiving is performed in the WinRAR program.
1. Open the folder with files prepared for sending.

2. Select them: press the key combination “CTRL + A”.
3. Move the cursor over one of the selected pictures, press the right button.
4. In the system menu, click “Add to archive...”.
5. Give the archive a name (the “Name…” field).

Advice! If you decide to transfer confidential information, protect access to the archive with a password. In the archiving settings panel, click the “Install…” button and set the key. And then, by phone or via messenger, tell the recipient the password for the archive.
6. Click OK.

7. At the end of the operation, an archive with pictures will appear in the same folder. In this form, they will already “weigh” less - at least 10-20% of the original volume.
How to attach pictures to a letter?
The processes for downloading individual images and an archive with images are no different from each other. Also, to send a photo by email, regardless of the service used, you need to perform an almost identical set of actions.
1. Open the “Mail” section, click “Write a letter”.
2. Fill out the form to send a letter (read more about this procedure here).
3. After you prepare the text of the message:
To load images from a PC disk:

- click “Attach file”;
- Click the mouse to select the picture and click “Open”.
To download content from storage:

- click the “cloud” icon next to the button;
- in the additional panel, select files/archive;
- click "Attach".
Yandex.ru
- Under the field for entering the text of the letter, click “Attach files.”
- In the Windows window, go to the folder with the prepared photos or archive, select the objects with a mouse click.
- Click "Open".

To upload files from Yandex.Disk, click the “flying saucer” icon. Then in the “My Disk” panel, select the images (select them by clicking) and click “Attach”.

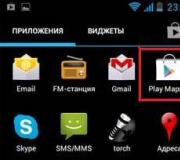
Gmail
1. In your service account, click the “Write” button.
2. Formalize the message (specify the recipient's address, title, print and edit the text).

3. To upload a photo from a PC, click the “paperclip” button in the bottom panel.

If you need to send pictures from Google.Disk, click the adjacent button (service logo). Mark the required files with a mouse click and click “Add”.
1. If there are a lot of pictures in the folder, in order not to make a mistake with the choice, click on the “picture” icon (Change view) in the right part of the top panel of the system window and use the slider to set the display mode to “Huge icons” or “Large...”.

2. If you need to select several pictures in a directory so as not to perform the download operation multiple times, do the following:
- while holding down the “Ctrl” key, click the left button to mark the images that you want to send to the recipient;
- click “Submit” (they will all be uploaded to the server at once).

3. To upload a group of photos that are located next to each other:
Hold down the Shift key and click the mouse to select the first photo of the group and the last one;

click “Open”;

wait for the selected group of pictures to be uploaded to the mail service.
The postal service allows you to exchange photos, files, and write letters. To answer the question of how to send a photo by email, you need to know some nuances. Before using it, you need to create a mailbox on one of the Internet portals and find out the email addresses of those with whom you plan to correspond. These addresses have two parts: one is your personal name, the other is the name of the mail server.
To send a letter by mail, you need to log into your email box, click on the “Write” button, select a recipient from the address book, indicate the subject in the appropriate field and write the text. The message can be formatted depending on the purpose of the letter. The text input field has appropriate settings: changing the font size and name, inserting graphic images, and so on.
How to send documents by email
A file saved on your computer can be sent from one email account to another. Log in to your mail, click “Write”, select the recipient, specify the subject in the appropriate field. Then you need to select the file you want to send, write a comment for it, click the send button, and after a certain time the file will be delivered to the recipient.

How to send a photo by email
This is done in the same way as transferring a file. However, it is only suitable when the volume of information sent is possible for a given postal service. If your email inbox is limited to a certain number of megabytes, then images need to be optimized for transmission. This does not affect the quality and actual size of photos saved on the computer, but significantly reduces their “weight”. How to send photos by email in large quantities? When there are a lot of images, their transmission is possible only in a certain format. You can deliver images to the recipient using an archive. To create one, select the photos you want to send and right-click and select the “Add to Archive” option. In the window that appears, set the name, parameters and click “OK”. Please note that the created file directory can be protected with a password to protect it from viewing by third parties. To send the created archive of images, you need to open your mailbox, select the “Write” function, fill out the “Recipient” field, specify the subject, format the accompaniment in the form of text or comment and attach it. When everything necessary is completed, you can send.

How do I send a photo by email using Windows Live? Sending images here is as follows:
- Select the desired photo to send and open it using the photo album of this program.
- In the window that opens, select the “Email” button. A registration form for the mail service will open, in which you will have to fill in all the required fields.
- Once the Windows Live Mail setup is complete, you can send images.
Many beginners who are just mastering computers and Internet services are very happy to learn that by email It turns out that you can send not only simple text messages, but also photos, documentation created in MS Word, spreadsheets, presentations etc. In a word, you can put one or even several files into an email like an envelope and send them to your recipient.
Today, the Internet and e-mail make it possible to send even quite large files. For example, the Yandex mail system, with which we work, allows you to send files with a total volume of 30 megabytes in one email.
These are very large volumes compared to about 10 years ago. At that time, the volume of a mailbox was 1-2 megabytes, and sending large files took quite a long time and was very expensive, since the transfer was done through a regular modem and payment was made for the time it was connected to the Internet.
Now, fortunately, we don't pay for time and don't have to worry or watch the clock when sending large amounts of information via email. Therefore, we can not be shy and send large full-length photographs, rather voluminous presentations and even small videos by e-mail.
Let's see how this is done using the example of sending photos by e-mail in a free video tutorial.
Video tutorial: How to send photos by email
Distance courses by Kashkanov. This email address is being protected from spambots. You must have JavaScript enabled to view it. This email address is being protected from spambots. You must have JavaScript enabled to view it.
Internet users, regardless of their level of activity, are often faced with the need to send any media files, including photos. As a rule, any most popular email service, which often has minimal differences from other similar resources, is perfect for these purposes.
First of all, it deserves attention that every modern email service has standard functionality for downloading and then sending any documents. In this case, the photos themselves are regarded by the services as regular files and sent accordingly.
In addition to the above, it is important to pay attention to such a factor as the weight of photographs during the loading and forwarding process. Any document, when added to a message, is automatically uploaded to your account and requires the appropriate amount of space. Since any sent mail is moved to a special folder, you can delete all forwarded mail, thereby freeing up some free space. The most pressing problem of free space is when using a box from Google. We will touch on this feature further below.
Unlike the vast majority of different sites, mail allows you to download, send and view photos in almost any existing format.
Before proceeding further, be sure to familiarize yourself with the process of sending letters using various email services.
Yandex Mail
Services from Yandex, as you know, provide users with the functionality of not only sending and receiving letters, but also the ability to download images. In particular, this applies to the Yandex Disk service, which serves as the main storage location for data.
In the case of this email box, files added to sent messages do not take up extra space on the Yandex disk.
- Open the Yandex Mail main page and use the main navigation menu to go to the tab "Inbox".
- Now in the top center area of the screen, find and use the button "Write".
- In the lower left corner of the message editor workspace, click on the icon with the image of a paperclip and a tooltip “Attach files from your computer”.
- Using the standard Windows operating system explorer, navigate to the graphic documents that need to be attached to the message you are preparing.
- Wait for the picture to finish loading, the time of which directly depends on the size of the photo and the speed of your Internet connection.
- If necessary, you can download or delete the uploaded photo from the letter.
- Please note that once deleted, the image may still be recoverable.


In addition to the described instructions for adding graphic documents to a message, it is important to make a reservation that the Yandex email box allows you to use the embedding of photographs directly into the mail content. However, to do this, you will need to prepare the file in advance by uploading it to any convenient cloud storage and receiving a direct link.
- After filling out the main field and the lines with the sender's address, on the toolbar for working with the letter, click on the icon with a pop-up hint "Add Image".
- In the window that opens, insert the previously prepared direct link to the image into the text field and click on the button "Add".
- Please note that the uploaded image will not display correctly if you use a high resolution image.
- If the added image should be harmoniously combined with the rest of the content, you can apply the same parameters to it as to the text without restrictions.
- Having done everything according to the instructions, use the button "Send" to forward the letter.
- The recipient will see the image differently depending on the method you choose to upload the photo.


If you are not satisfied with the options discussed, you can try inserting a link in text. The user, of course, will not see the photo, but will be able to open it independently.
This is where you can finish with the functionality of attaching graphic files to messages on the Yandex mail service website.
Mail.ru
The service for working with letters from Mail.ru, just like Yandex, does not require the user to waste excessive free space on the offered disk. At the same time, the linking of images itself can be done directly using several methods that are independent of each other.
- Having opened the main page of the mail service from Mail.ru, go to the tab "Letters" using the top navigation menu.
- On the left side of the main contents of the window, find and use the button "Write a letter".
- Fill in the basic fields based on known information about the recipient.
- On the tab located below the previously mentioned fields, click on the link "Attach file".
- Using standard Windows Explorer, specify the path to the attached image.
- Wait for the image to finish loading.
- After the photo is uploaded, it will automatically be attached to the letter and act as an attachment.
- If necessary, you can get rid of the picture using the button "Delete" or "Delete everything".


The Mail.ru service allows you not only to add graphic files, but also to edit them.

As a result of making adjustments to the graphic document, its copy will be automatically placed on cloud storage. To attach any photo from cloud storage you will need to follow a predefined procedure.

In addition to what has already been said, please note that you can also use photos from other previously saved letters.

In addition to the methods described above, you can use the toolbar in the message editor.

This is where the main possibilities for sending pictures provided by the mail service from Mail.ru end.
Gmail
Google's email service works somewhat differently from other similar resources. Moreover, in the case of this mail, you will one way or another have to use free space on Google Drive, since any third-party files attached to messages are uploaded directly to this cloud storage.
- Open the home page of the Gmail mail service and in the right menu click on the button "Write".
- Each stage of work in any case occurs through the internal message editor. To achieve maximum ease of use, we recommend using its full-screen version.
- After filling out the main fields with the subject and recipient's address, on the bottom toolbar, click on the icon with the image of a paperclip and a tooltip "Attach files".
- Using the basic operating system explorer, specify the path to the image to be added and click on the button "Open".
- Once the photo upload starts, you need to wait for the process to complete.
- Subsequently, the picture can be removed from attachments to the letter.


Of course, as with any other similar resource, the Gmail email service provides the ability to embed images into text content.
In our electronic age, few people use a conventional film camera anymore. Mostly, people use their digital counterparts. Every day or week, each of us takes from two to a hundred different photographs with such a device. They reflect all the author’s impressions of this world. And it is customary to share impressions, including with those who live in another city. But here many people have problems. Using regular mail is no longer prestigious, and it takes a long time. But not everyone knows how to send photos by email.
You will need
- - computer,
- - access to the Internet,
- - electronic mailbox,
- - photo compression program,
- - the photographs themselves.
Instructions
In the meantime, this is not so difficult to do. The main thing is to carefully study and remember all the fields that will have to be filled out. First you need to compress all photos to a smaller size. Doing this, of course, is not necessary, but it is advisable. Because the person you're sending the photos to may not have a , and then he'll just wait for the images to load. There are special programs for reducing photos in volume. For example, FastStone Image Viewer. This is a free graphics editor with a simple interface. The program itself can be downloaded and used.
Once the images are optimized, you can start sending. Here we will look at how to do this from the Yandex website mailbox. To do this you need to go to the website. Click on the “Mail” section and enter your username and password. If your email has not yet been registered, then you just need to do it.
Let's fill them out. In the “To” field we write the email address of the person to whom the letter is sent. In the “Subject” column we indicate a brief content of the letter. For example, photos from Vasya’s party. In the next, largest section, you should write the actual letter or accompanying words to the photographs. This is done at the request of the person sending.
Then, below, select the “Attach file” tab. A window should open in which you need to select the folder where the photos are stored on the left. When they are opened, we make “page thumbnails” and select an image. We wait for it to load into the letter and click on the “send” button. After all the steps, the message “Your letter has been sent successfully” should appear. It means that you did everything right.