How to properly configure windows 10 updates. Additional such points for settings
As in previous versions Windows, you can manage the settings for the Update Center using Group Policies, which are also regulated by editing the registry settings.
Using the Group Policy Editor
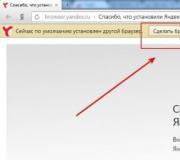
When updates are available for your system, you will receive a banner notification that will be saved in the Notification Center.


This configuration method is not available in Windows editions 10 Home due to the lack of an editor in it group policy... However, you can customize how Windows 10 Home gets updates by editing registry settings.
Using registry settings
- Open Registry Editor (Win + R - regedit)
- Go to HKEY_LOCAL_MACHINE \ SOFTWARE \ Policies \ Microsoft \ Windows
- Right-click on Windows partition and select Create - Section
- Enter the name of the WindowsUpdate section
- In the new section, create a subsection named AU in the same way.
- Move the mouse cursor over the subsection AU. On the right side of Registry Editor, right-click and select New - DWORD (32-bit) Value.
- Name the new parameter AUOptions
- Similarly, create three more parameters with the following names: NoAutoUpdate, ScheduledInstallDay, ScheduledInstallTime (optional NoAutoRebootWithLoggedOnUsers).
Now set the values of these parameters depending on your choice:
Parameter
Description
Available Values
AUOptions
The parameter regulates the way of receiving and installing updates
2 - Notify before downloading and installing any updates
3 - Automatically download updates and notify them when they are ready for installation (default value)
4 - Automatically download updates and install them on a specified schedule
5 - Allow local administrators to select notification and install configuration mode for automatic updates
NoAutoUpdate
The parameter allows you to disable the search and installation of updates
0 - Automatic installation of updates is enabled. Updates will be downloaded and installed depending on the settings of the AUOptions parameter
1 - Automatic installation of updates is disabled (not recommended)
ScheduledInstallDay
This parameter allows you to schedule the installation of updates on a specific day of the week.
4
0 - daily
1 - every Monday
2 - every Tuesday
3 - every Wednesday
4 - every Thursday
5 - Every Friday
6 - Every Saturday
7 - every Sunday
ScheduledInstallTime
This parameter allows you to schedule the installation of updates on certain time.
Works only if the value of the parameter AUOptions = 4
Values from 0 before 23 , which corresponds to hours in a day.
NoAutoRebootWithLoggedOnUsers This parameter specifies that to complete the scheduled installation, the Automatic Updates service will wait for any logged on user to restart the computer instead of automatically restarting the computer.
Works only if the value of the parameter AUOptions = 4
1 - disable automatic reboot
0 - enable automatic reboot
Windows 10 Update settings don't even include the ability to even notify the user about a restart. The developers found it most convenient to reboot when the system is idle. Can run in the background when idle various applications, and for some users it is necessary to keep the PC on at all times.
Unlike Windows 8, the top ten cannot be disabled system updates, you can only postpone them. Unfortunately, this feature is only available for Windows 10 Pro.
How to open Update Center in Windows 10 Pro
To launch the update center, click on "Start" - "Options" - "Update and Security".
In the window that opens, click " Extra options».

Update settings in Windows 10 Pro
"Choose how to install updates"
Here you can deselect the default when the system should reboot and ask it to notify about it.

"Provide updates for other Microsoft products"
Here you can choose to update only the OS.

"Postpone Updates"
Exactly at this section you can opt out of auto-update, as we said above.

"Choose how and when to get updates"
This section can be disabled.

Instead of an afterword
By disabling automatic update system, do not forget to periodically perform this action manually. This is especially true for the installation of critical Windows security updates.
New and more detailed article on disabling automatic updates in Windows 10 -
1. Open the group policy editing window. To do this, use the simultaneous pressing of the Win + R keys and in the window that opens, enter gpedit, then press "Enter".
2. Open the first directory with Computer Configuration, then go to Administrative Templates, expand Windows components and then open the Update Center catalog.
3. On the right, we are looking for a policy named "Configure Automatic Updates". Double click on it.
4. In the window that opens, move the switch to the line "Enabled". Below there will be a section of parameters, here we set required mode work with updates. In this case, the characteristic for the selected parameter is displayed to the right.
We recommend installing the second download option - Notifications for fresh updates. When this option is selected, the system will notify about available updates, but any operations with them can only occur with the permission of the user himself.
5. Now you need to activate the changes made in the settings. To do this, you need to start checking for fresh updates through the Settings window:

After appear fresh updates on your PC, a notification will pop up prompting you to install the update.  The notification itself is saved in the Notification Center.

Unfortunately, Windows users 10 Home will not be able to configure the updates in this way. This is due to the fact that in this version of the operating system, the Group Policy editor is simply absent. But do not be upset, you can still configure the receipt of updates and this is done through the registry editor.
1. Open the registry editor window. To do this, simultaneously press two keys Win + R then, in the next window, you must enter regedit and press "Enter".
2. Then, in the editor window, we go through the directories along the following path:
3. Right-click on Windows directory and select Create → Section.
4. For this section, enter the following name: WindowsUpdate.
5. In the section that we have created, in the same way, you need to create another one, but with the name AU.
6. In the AU directory, in the right half of the editor window, click right click mouse anyway empty space and in the drop-down menu click New -> Option DWORD(32-bit).
7. This parameter must be given a name AUOptions.
8. In the same way, create a few more parameters with the following names: NoAutoUpdate, ScheduledInstallDay, ScheduledInstallTime... Optionally, you can create a parameter.
9. For all created parameters, specify the values that depend on the desired result.
|
Parameter |
Description |
Value options |
|
AUOptions |
This parameter determines how updates are downloaded and installed. | 2- notification when updates are available. 4 - everything happens automatically, but according to a specific schedule. 5 - Allows local administrators to configure notifications and boot methods. |
|
NoAutoUpdate |
This option can be used to disable updates. | 0 - this value disables this parameter.
1 - this value of the parameter disables automatic updates. |
|
ScheduledInstallDay |
With this parameter, you can specify the tribute of the week for installing updates. This option will only work if the AUOptions value is 4. |
0 - any day. 1 - on Monday. 2 - on Tuesdays. 3 - every Wednesday. 4 - Thursdays. 5 - every Friday. 6 - Saturdays. 7 - on Sundays. |
|
ScheduledInstallTime |
With this parameter, you can specify a specific time to install updates. As in the previous case, this option works when the AUOptions value is 4. |
Here you can specify values from 0 to 23. According to the clock. |
|
NoAutoRebootWithLoggedOnUsers |
Disables automatic restart after installing updates. The reboot is carried out only by the user, manually. Works only if the AUOptions value is 4. |
1 - disables automatic reboot. 0 - this parameter is inactive. That is, reboot is enabled. |
Files for automatic creation and configuration of registry settings
Download with files automatic tuning registry and unpack it. The archive contains the following files:
1. WU_Notifu_Updates.reg- indicates the second value: notification before update operations.
2. WU_Never_Notifu_Updates.reg- this file will disable updates altogether (not recommended).
How do I disable automatic installation for drivers?
This instruction can help if, after automatic installation drivers, various failures and malfunctions of the system begin to occur. In such cases, this type of installation is disabled in order to avoid installing problematic drivers.
1. Open the Control Panel window. To do this, use the simultaneous pressing of two keys: Win + X, and then from the menu select "Control Panel".
2. Open the Systems and Security section and then expand the "System" category.
4. Now, in the properties window, open "Hardware" and here click on "Device installation options".
Hello admin! I installed Windows 10 a few days ago, and today I went into the update log, and there is a message -"No updates have been installed yet"
Returned to Windows Update and clicked on the "Check for Updates" button

There is a short search for updates.

Then the search stops and the message “Device updated. Time last check: today..." although there is no mention of installed updates in the log.

On this moment version of my Windows assemblies 10 - 1607 (14393.0) and my friend has a system build version 1607 (OS Build 14393.351), although we installed Windows on the same day.
Tell me, what other ways can you install updates on Windows 10?
How to install updates on Windows 10 and upgrade an assembly to the most current version
Hello friends! If installed on your Windows computer 10 does not want to download and install updates in any way, then you can start the update search manually. You can also download ready-made update packages in the form of a regular installer on the official Microsoft website and install them. If none of the suggested solutions solve the problem, you can use the Troubleshoot Center windows updates". Let's consider all the options.
Open Windows 10 Settings and select "Updates and Security"

Select "Windows Update" and click on the "Check for Updates" button
Updates should download and install.

If this check will not lead to anything, it meansdownload ready-made update packages in the form of a regular installer from the official Microsoft website and install them. For this, here, in the window Windows Update click on the button“Look for information about latest updates... More details. " Or just follow the link:
https://support.microsoft.com/ru-ru/help/12387/windows-10-update-history

The "Windows 10 Update History" page of the official Microsoft website will open.
On this page you can find out all the information you are interested in about the latest updates to the operating Win systems 10.
For example, let's find out all the information about the most recent released update from October 11, 2016 - KB3194798 (OS Build 14393.321).

Current Package updates "KB3194798" is cumulative and contains all necessary updates per recent times... If you download and install it, then your system will receive all the latest actual updates at once and will increase until the very last one at the moment.

Let's download the cumulative update KB3194798 from the Microsoft Update Catalog ”And then install it. AND Use your browser to download the update Internet Explorer, follow the link:
http://www.catalog.update.microsoft.com/home.aspx
enter KB3194798 in the search bar and click on "Search"

My computer is running Windows 10 64-bit, I select the appropriate update rollup for Windows 10 Version 1607 for x64-based systems (KB3194798) and click Download


I will select the "Downloads" folder to save and press "Save"

The update is being downloaded.

View downloads.
Open folder.

We start the installation of the update.

Preparing the installation.

You want to install the following software Windows?


Updates are being installed.


Installation completed. We reboot the computer.


After rebooting, we look at the update log, as you can see, our update installed,

and the build is upgraded to Windows 10 1607 (OS Build 14393.321)

Moreover, after installing the cumulative update, Windows Update began to work normally for us.
We press Install now and install other updates.

After installing the updates, restart the computer again.

Updates are being installed.


System assembly has been upgraded to version Windows 10 1607 (14393.351)
Windows 10 Update allows you to timely download the operating system update from the official Microsoft servers... After installing the OS this service enabled by default and works in background... However, you can disable it yourself and not receive new versions. If you do not care about the computer load with processes related to tracking and installation system files then you can enable Windows 10 Update in several ways.
This procedure can only be performed using the built-in functionality of the operating system. Third party software you don't need it. First, check if the update center works by default on your computer. You can do it like this:
- Start Task Manager with Ctrl combinations+ Shift + Esc.

- Click the Services tab. Here find a service named "wuauserv".

Thanks to it, auto-update works in the background in the operating system. If you do not have "wuauserv", then go to one of the inclusion methods:
- through group policy;
- through "Windows Settings";
- using the command line;
- through registry settings;
- through the "Services".
Let's consider each method in detail.
Enabling in local group policy
Restore work of this service in the top ten it is possible as follows:
- Open the Run program with the Win + R key combination. Enter the command "services.msc" and start the execution with the OK button.

- You will see the "Services" window. In the list on the right, find the line "Windows Update" and using the RMB in the menu select "Properties".

- In the "General" tab, find the "Startup type" line and set the "Automatic" option in the menu, and then apply the changes with the "OK" button.

- Reboot your PC.
In this way, you can start the central center in the operating room. Windows system 10. This method can help you get rid of error code 0x80070422.
Now let's figure out how to check for available updates manually and start downloading / installing them. To do this, you need the functionality of the "Parameters" section:
- Right-click on the "Start" icon on the bottom panel and select "Settings" from the menu.

- Open the Update & Security section.

- Go to the subsection "Windows Update" in the left column.

- In this window, you can navigate all required settings CH and check for the presence of files to download. To check, you need to click on the button marked in the screenshot.

- The tool will now scan for new Windows patches 10 and will notify you about it. In the "Advanced Options" section, move the option to the "Off" position, as shown in the screenshot. By clicking on "Choose how and when to receive updates", you can configure delivery methods (from PC to local network, internet, etc.).

If you have a problem with the operation of the CH, then you need to check the settings in the Group Policy Editor.
Local Group Policy Editor
Follow these steps to run the program:
- Go to Run with Win + R. Write the command "gpedit.msc".

- Open the "Windows Update" branch, which is located under the path "Computer Configuration" - "Administrative Templates" - "Windows Components".

- In the right part of the window, find the line "Configure automatic updates" and click on it with RMB. In the menu, go to the "Change" item.

- Set the setting to Enabled (1). In the "Options" section, select the settings according to which automatic updates will work (schedule, installation, notifications about available downloads, etc.). Apply the changes with the "OK" button.

Using the command Windows strings 10, you can disable or enable the "Update Center". Through it you will be able to force the "wuauserv" service to start.
- Open up command line with administrator rights. Type in the command "net start wuauserv" and press Enter.

- The program will start the service, after which you will see a corresponding message. The process will start every time you turn on the PC, so you do not have to repeat this procedure. To turn off the CH Windows 10, you must enter the command "net stop wuauserv".

- Now it remains to check whether the system will be updated.
Registry
Also, the central center will not work if the value of the parameter in the registry is not corrected. You need to do the following:
- In the "Run" window (Win + R) enter the "regedit" command.

- In the registry editor, find the HKLM \ System \ CurrentControlSet \ Services \ wuauserv branch. It is enough to copy the path from this instruction and paste it into the search bar at the top of the window.

- On the right side of the window there will be the "Start" parameter. Right-click to select the "Change" item in the menu.

- In the disabled state, the parameter will have the value 4. For the CH to start downloading updates, set the value to 1.

The start of this service is not affected by any others, so there should be no problems or problems with performance. You can also check the HKEY_LOCAL_MACHINE \ SOFTWARE \ Microsoft \ Windows NT \ CurrentVersion \ Hotfix branch, which contains information about all update files.
Third Party Programs
What to do if customize automatic download It does not work? Starting the service doesn't help, and you don't have the time or knowledge to find workarounds? Then try updating operating system using the WSUS Offline Update utility. Download it from the official website of the developers at the link. On home page click on the button marked in the screenshot. The creators guarantee complete safety for users and their personal data on a PC. After downloading, do the following procedure:
- Open the UpdateGenerator.exe file in the program folder.

- Select your OS version: Windows 10 x32 or x64. To start downloading the files, click "Start".

- When the download is complete, you will see a log on the screen with a list of all downloaded files. The download and installation time depends on how long you have not updated Windows. Now you need to go to the "client" folder and open the UpdateInstaller.exe file.

- In the program window, click "Start" to start installation.

If WSUS Offline Update starts to freeze or stops looking for files, try using the earlier and stable version programs.
You need to update the operating system in this way only once, because after installing the patch, troubleshooting will be carried out and the CH will be launched by default.
Outcome
If you have a desire to set an extreme Windows version 10, then all the described methods will help you with this. Be sure to tweak the settings so that a download or reboot with a scheduled installation doesn't catch you off guard.
Video
So, to consolidate the material received, let's watch a video on this topic.